Blog

  • DIY vs Professional Water Filter Installation: What Should You Choose?

    DIY vs Professional Water Filter Installation: What Should You Choose?

    Last updated: September 10, 2026

    Key Takeaways

    • A simple under-sink DIY water filter installation may take 1 to 3 hours if the parts match the plumbing and the shutoff behaves.
    • A basic under-sink or faucet filter often takes about 1 to 3 hours for DIY and roughly similar on-site time for a professional once they arrive.
    • You also learn how the system works, which helps when it is time to change cartridges every 6 months or sanitize a housing.
    • DIY wins when the job is physically simple and the risk is low.

    Table of Contents
    DIY vs Professional Water Filter Installation: What Should You Choose?

    A simple under-sink filter is usually a fair DIY job. A faucet mount is, too. So is a basic fridge line. But once you move into whole-house systems, hard-pipe changes, permit-heavy work, or anything where a leak could wreck flooring, I’d hand it to a professional without much debate. The real issue is not “Can I install a filter?” It is sharper than that: “What happens if one joint leaks, and who takes the hit?” The EPA says even small leaks can waste water and cause damage when they go unnoticed, so caution makes sense once the install gets complicated. EPA WaterSense

    I write about water treatment as a local service decision, not a hobby purchase. Pipe material. Shutoff valves. Drain lines. Pressure. Code. The cost of a mistake. Those matter as much as the filter itself. And if you are comparing an under-sink cartridge with a whole-home system, the plumbing details can matter just as much as the brand on the box.

    The real difference between doing it yourself and hiring it out

    When the task is simple and the risk stays low, DIY usually wins. Once the work touches several fixtures, needs plumbing changes, or has to be clean enough to avoid a callback, professional installation is the stronger play. That is the split I’d use, and it holds whether you are looking at a faucet filter or a whole-house setup.

    Labor is only part of it. Responsibility is the bigger piece. With DIY, you are the one who has to shut the water off cleanly, seal every fitting, flush the system, and catch a slow leak before it soaks a cabinet. A pro brings the labor, the tools, and the kind of scar tissue that comes from seeing enough compression fittings, push-to-connect joints, and saddle-valve mistakes to know where things usually fail. The Plumbing-Heating-Cooling Contractors Association also says licensed plumbing work is meant to protect health and property, which is a big reason complex filter installs are often better left to a pro. PHCC

    Cost follows the same pattern. A point-of-use filter with a straightforward connection often makes sense as a DIY project because you are paying mostly for the unit and a handful of fittings. A whole-house system can become a half-day or full-day plumbing job, especially if the plumber has to add a bypass, move copper, adapt PEX, or fix old shutoffs. Honestly, I’d expect the bill to move more with access and pipe condition than with the filter brand itself. An easy under-sink setup may stay close to the purchase price; a whole-house install can climb fast once labor and materials enter the picture.

    Here’s the cleanest frame: if the filter comes with a standard hose connection, quick-connect fittings, or a clear template, DIY is often reasonable. If the job means cutting copper, opening a wall, or altering a main line, I would not treat it like a weekend project unless you already know how to pressure-test and redo plumbing joints. Even then, it is smart to talk with a professional first if the shutoff, pipe condition, or wall access looks questionable. That math stops working fast.

    Criteria DIY Professional installation Winner for this condition
    Up-front labor cost Lower, because you supply the labor Higher, because you pay labor DIY if budget is tight and the job is simple
    Leak risk Higher if fittings are new to you Lower when done by an experienced plumber Professional for cabinets, basements, and finished spaces
    Time to finish Often 1–3 hours for a basic under-sink unit Often faster on complex jobs, slower to schedule DIY if the kit is simple; professional for complex systems
    Code and permit issues Easy to miss More likely handled correctly Professional where local rules matter
    Pipe changes Limited unless you already know plumbing Better for copper, PEX, CPVC, and bypasses Professional when cutting pipe is required
    Maintenance access Depends on where you mount it Usually better planned Professional for whole-house and serviceable layouts
    Risk of wrong filter choice Higher if you misread flow or capacity Lower if installer confirms fit Professional if water quality is confusing
    Cleanup and wall damage Your responsibility Usually part of the job Professional if the work area is finished
    Best fit Faucet, pitcher, simple under-sink, some fridge lines Whole-house, reverse osmosis, hard-pipe retrofits Depends on complexity

    When DIY water filter installation makes sense
    DIY vs Professional Water Filter Installation: What Should You Choose?

    DIY works best for someone who can turn off a shutoff valve, follow a template, and check for drips over 24 hours. That is the right lane for under-sink cartridges, countertop systems, faucet mounts, and many refrigerator water lines. In those jobs, patience matters more than theory. The water filter installation itself stays manageable.

    The upside is control. You choose the schedule, pick the mounting spot, and skip labor charges for a straightforward install. You also learn how the system works, which helps when it is time to change cartridges every 6 months or sanitize a housing. If the maker supplies a bracket, a few braided lines, and standard 1/4-inch tubing, the job is often manageable for a careful homeowner. For a related step-by-step overview, see our under-sink water filter guide and how to replace a water filter cartridge.

    The trade-off is that DIY mistakes usually start small and get expensive later. A fitting that is “almost tight enough” can seep into a cabinet toe-kick. On a reverse osmosis system, a drain connection can back up if you miss the correct orientation or air gap requirement. And a badly placed filter can make cartridge changes annoying enough that the system gets ignored. Neglect is a real failure mode in water filtration, and it is one reason the EPA recommends checking plumbing connections carefully after any install. EPA WaterSense

    DIY is not the right answer for someone who has never shut off a water supply, does not know the difference between compression and push-fit connections, or cannot reach the plumbing without moving stored items and tools. It is also a poor choice if your home has brittle old valves, corroded copper, or any sign that the shutoff has not been touched in years. Cheap on paper. Costly in damage. That’s the trap.

    I’d call DIY a good option when the following are true: the filter is point-of-use, the installation uses standard fittings, the space is dry and visible, and you are willing to leave the water off long enough to confirm there is no seepage.

    Which jobs really belong to a professional?

    Professional installation wins when the system is tied to the home’s plumbing in a way that raises the stakes. Whole-house filtration, reverse osmosis with a drain line, softener-plus-filter combinations, and any install that needs a bypass valve are the classic examples. Those jobs are less about hanging a device and more about changing how water moves through the house.

    The value of hiring a professional is not some mysterious skill set. It is fewer avoidable mistakes. A good installer knows when a main shutoff is marginal, when a pressure-reducing valve might be part of the problem, and when the install should stop until the plumbing is repaired. That judgment matters because a filter only works as designed if pressure, flow direction, and clearances are right. If the job touches the main line or a branch serving multiple fixtures, it is wise to consult a professional rather than guess.

    A professional also helps when the water-quality question is broader than the filter. If a homeowner is trying to fix chlorine taste, sediment, iron staining, hardness, or lead concern with one generic cartridge, the wrong product can waste money and leave the problem untouched. A service company that asks for a water test or reviews the symptom pattern is often worth the labor charge. NSF International also publishes certification standards for drinking-water treatment products, so the label and intended use should be checked before you buy. NSF

    The weak spot with professional installation is obvious: you pay for it, and you may wait for an appointment. A complex job can also surface extra work that was not obvious from the quote. Old valves, inaccessible crawlspaces, and awkward pipe routing can all add time. That is not necessarily bad news; it often just means the house is older or less cooperative than the brochure suggested.

    I would not hire a pro for a simple faucet filter that screws on in minutes. I would absolutely hire one if the install involves a basement loop, a manifold, or any filtration system meant to protect the whole plumbing network, not just the kitchen sink.

    The honest side-by-side on cost, time, and what can go wrong

    Professional installation usually costs more because labor is the product, but the better question is what you are paying to avoid. With DIY, the “saved” money disappears quickly if you buy the wrong adapters, crack a fitting, or end up paying to dry out a cabinet. With professional work, the value is in reducing the odds of that 10 p.m. call when a slow leak is suddenly not slow anymore.

    A simple under-sink DIY job may take 1 to 3 hours if the parts match the plumbing and the shutoff behaves. A professional can often finish the same basic job faster because the steps are routine, but you may spend days waiting for the appointment. For a whole-house install, the time math shifts. One visit from a pro can replace a multi-day chain of hardware-store runs for a homeowner. For a local example of how whole-home water treatment can be planned as a service visit, see our whole-house water filter page.

    The biggest hidden cost in DIY is not the tool kit. It is uncertainty. If you do not know whether your supply line is 3/8-inch compression, 1/2-inch NPT, or something adapted years ago, the wrong fitting can stall the project. If the install includes a drain saddle or a tank, a tiny routing error can create a problem that only shows up after the cabinet door is closed. Nasty little gremlin, that one.

    Professional work has its own weak spot: not every installer thinks like a filtration specialist. I would ask direct questions about the brand, the model, the bypass, and the cleanup because a general plumber may be excellent at pipe work yet less careful about filter orientation, cartridge seating, or flushing instructions. That matters on carbon blocks, reverse osmosis membranes, and systems that need a final purge before use.

    What a bad job looks like is easy to spot: water beads under fittings, tubing kinked at the bend, a filter housing mounted where cartridge changes require moving the sink trap, unprimed or unflushed water with air spurts, and a system that rattles or cuts pressure far more than expected. If you see those signs, stop using the system until it is corrected.

    How to choose based on your house, not just the filter box

    DIY is the better choice for newer homes with accessible shutoffs, visible plumbing, and a basic point-of-use filter that uses standard connections. Professional installation is the better choice for older homes, complicated pipe runs, and any system whose failure could affect multiple rooms. That is the first rule I’d use, and it usually beats choosing by price alone.

    Your water source matters too. A city-water home that mainly wants better taste or less sediment usually has an easier decision tree than a well-water home with iron, sulfur odor, hardness, or pressure swings. Well systems often need more than a single filter. They may need pretreatment, pressure management, or a combination of filtration and softening. That is no place for guesswork, so a water test or a professional review is a safer starting point. If you are comparing treatment options, our well water treatment guide can help frame the decision.

    Climate matters in a real way. In colder regions, any filter, line, or drain that sits near an exterior wall or unconditioned garage needs freeze protection. In a warm climate, heat is less of a burst-risk issue, but sediment and algae in storage tanks or exposed components can become more of a concern. Local plumbing codes also vary on backflow prevention, air gaps, and permitted connections, so a job that is fine in one town can be rejected in another. The International Code Council keeps the model plumbing code updated, and local rules can differ from it, so it is worth checking before any permanent install. ICC

    When should I stop treating this like a DIY project?

    Once the job needs cutting, bypassing, or code judgment, stop treating it like DIY and consult a professional. That is the cleanest answer I can give, and it is especially true when the install moves from a filter swap to actual plumbing work.

    The verdict flips in four situations. First, if the system is whole-house and the install touches the main line, hire a professional. Second, if the house has old valves, brittle fittings, or corrosion, hire a professional before you start turning things off and on. Third, if the filter includes a drain line, tank, or permeate pump, professional help is the safer choice. Fourth, if the basement, utility room, or under-sink cabinet is finished and water damage would be expensive, I would pay for the install rather than gamble on a first attempt. For the specific case of reverse osmosis and drain connections, our reverse osmosis installation page explains why the details matter.

    The flip side is just as clear. If the job is a countertop unit, a faucet mount, a refrigerator line with a standard connector, or a basic under-sink cartridge system with clear instructions, I would not pay a plumber just to screw parts together. That is money spent on convenience, not necessity.

    One more reason to pause before buying: if you do not know what problem you are solving, do not buy a filter yet. “Better water” is not a spec. Chlorine taste, sediment, lead concern, hard water, and sulfur odor are different problems. The right answer may be a sediment prefilter, activated carbon, reverse osmosis, softening, or a service visit to inspect the plumbing itself.

    Choose DIY if the filter is point-of-use, the fittings are standard, and you can leave the water off long enough to check for leaks. Choose professional installation if the job changes the plumbing, affects the whole house, or sits near expensive finishes. Neither if you have old shutoffs, corrosion, or a water-quality problem you have not identified yet.

    What should I ask before I hire someone?

    Ask whether the quote includes the bypass, fittings, cleanup, and leak check. Ask how long the install should take for your exact model, whether the installer has worked with the same connection type, and what happens if old valves fail during shutdown. Those questions matter more than a polished sales pitch, and they help you compare bids on the same terms.

    Also ask whether the system needs a water test, a drain connection, or a pressure check before installation. If a contractor cannot answer those questions plainly, that is a warning sign. If you want a quick reference before the first call, our water filter cost guide breaks down common price ranges and what usually changes the bill.

    How long should a normal installation take?

    A basic under-sink or faucet filter often takes about 1 to 3 hours for DIY and roughly similar on-site time for a professional once they arrive. A whole-house system can take longer, especially if the plumber needs to add a bypass or replace fittings. The schedule delay is usually more about booking the visit than about the install itself, so the calendar matters as much as the wrench time.

    What does a bad installation look like after the fact?

    Look for drips, a damp cabinet base, a sudden pressure drop, noisy tubing, and water that tastes or smells wrong after the initial flush period. A reverse osmosis system that drains too slowly or never seems to fill normally is another warning sign. If any of that happens, shut it down and get the connection checked.

    Is the most expensive option always the safer one?

    No. A higher labor bill does not guarantee a better install, and a DIY job is not automatically risky. The safer option is the one that matches the complexity of the plumbing. A simple filter can be perfectly fine as DIY, while a poorly explained whole-house job can be a bad use of money even if it looks “professional.”
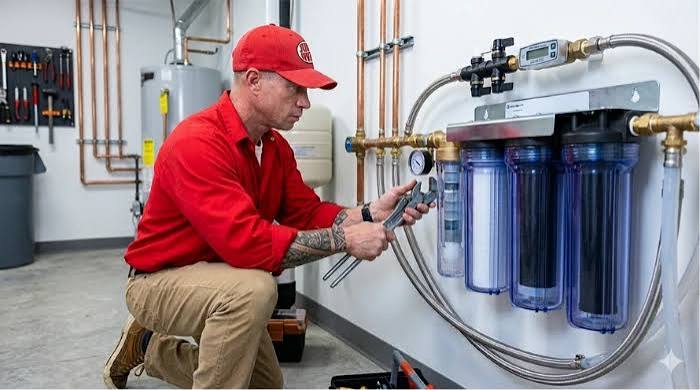
  • What Happens During a Professional Water Filter Installation?

    What Happens During a Professional Water Filter Installation?

    Last updated: September 10, 2026

    Key Takeaways

    • A good installer should be able to explain why NSF/ANSI 42, 53, or 58 matters for the model they are quoting, and what the filter
    • A competent installer should explain what normal startup noise sounds like and what is not normal.
    • Ask what happens if your plumbing is copper, PEX, CPVC, or galvanized, because the connection method changes.
    • The wrong system can be perfectly installed and still be the wrong answer.

    A professional water filter installation is mostly a plumbing job, with a water-quality call wrapped around it. First the installer checks your water line. Then they choose the connection point, mount the system, flush it, and make sure it neither leaks nor robs your faucets of pressure. Choosing who to call for what happens during professional water filter installation raises the real question: not “Can they put a filter in?” but “Will they install the right type of filter for my water, my plumbing, and my budget?” Under-sink jobs usually take 1 to 3 hours. Whole-house work often runs longer because of pipe size, space, and code checks.

    I write about home water treatment and plumbing decisions, and people often miss the same thing: a good installation is about fit, not just hardware. The wrong system can be perfectly installed and still be the wrong answer. NSF says certification applies to the specific claim, not to the word “filtered” by itself. Simple, but easy to miss.

    What the installer actually does, start to finish

    What Happens During a Professional Water Filter Installation?

    A good install starts with a water check, not a drill.

    First comes the source, the pipe material, the shutoff valve, and the spot where the filter belongs. For a point-of-use under-sink system, that is usually the cold-water line plus a dedicated faucet or an appliance connection. For a whole-house system, the installer looks for the main line entry point, enough wall clearance, drain access if the unit needs regeneration or backwashing, and a dry place for the tank or housing.

    Then the practical work begins: shutting off water, relieving pressure, cutting or teeing into the line, installing the housing or manifold, and sealing the fittings with the right method for the pipe type. Compression fittings, push-to-connect fittings, threaded adapters, and soldered copper connections all behave differently. That matters because a neat-looking job can still fail if the fitter picks the wrong sealant or cranks down a plastic fitting too hard. Ugly is not the enemy. Wrong is.

    After the plumbing is tied in, the installer flushes the cartridges or media according to the manufacturer’s instructions. Carbon filters often need flushing to clear fines. Reverse osmosis systems need a longer initial flush plus a check of the storage tank, drain line, and permeate faucet. Whole-house systems may need media settling, a programming step, or a regeneration cycle.

    Finally comes inspection and handoff: check for leaks, confirm pressure, explain cartridge changes, and show you what alarms or bypass valves do. Skip that last part, and the job is only half done.

    What kind of filter are you actually buying into?

    An under-sink carbon filter is the easy pick for someone who wants better-tasting water without much fuss. It is usually the least disruptive option, and it fits apartments and kitchens where space is tight. The trade-off is narrow scope: carbon improves taste and odor and may reduce some contaminants depending on the certified model, but it does not solve everything. Hardness, heavy sediment, nitrates, bacteria — carbon alone is often the wrong tool.

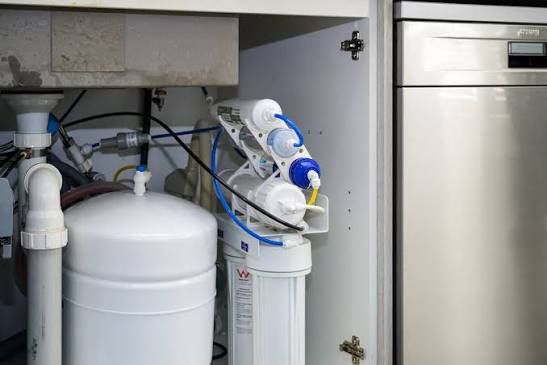
    Reverse osmosis is the stronger choice when the goal is broader contaminant reduction at one tap. It usually includes a prefilter, membrane, storage tank, and dedicated faucet. That extra hardware is why the install takes longer and costs more to service later. It also creates reject water, which is a real drawback in places with water-use restrictions or in homes that dislike the drain connection. The Water Quality Association and EPA both note that RO performance depends on pressure and the system design.

    A whole-house system makes sense when the problem starts at the source or affects every fixture. That is the right call for sediment-heavy well water, noticeable chlorine at every tap, or homes that want filtered water in showers, laundry, and the kitchen. It is not the right answer if you only care about drinking water at the sink. These systems take up space, can cut pressure if they are undersized, and often need pricier media changes.

    For decision-making, model names matter less than the standard. I would want to see NSF/ANSI certification for the specific claim the seller makes. NSF/ANSI 42 covers taste and chlorine reduction; NSF/ANSI 53 addresses certain health-related contaminants; NSF/ANSI 58 is common for reverse osmosis systems. If the product page is fuzzy about certification, that is a warning sign.

    How much does professional installation usually cost?

    What Happens During a Professional Water Filter Installation?

    The honest answer is that the cost depends on the system type, the plumbing layout, and whether the installer has to add valves, a drain line, an electrical outlet, or a new shutoff. A simple under-sink install is usually the least expensive because it uses less labor and fewer parts. Reverse osmosis costs more because of the extra faucet, drain connection, and tank. Whole-house work costs more again because it can involve larger pipe, mounting hardware, and system programming.

    Three things move the labor price: access, complexity, and code-related work. Tight cabinets, old corroded valves, and galvanized plumbing all slow the job down. If the installer also needs to bring the work up to local plumbing code, that can add time and material. In some areas, especially older homes or places with hard-water scale and sediment, an installer may recommend a prefilter or pressure-regulating component before the main filter. That is not upselling by default; sometimes it is the difference between a system that lasts and one that clogs early. That math stops working fast.

    A useful quote should separate labor from equipment and list what is included: shutoff, mounting, filter cartridges, new faucet if needed, flush, and leak check. If a bid is just one lump sum with no parts list, I would ask for a breakdown.

    What should a good installer inspect before touching the pipes?

    Before a single pipe gets touched, a good installer should inspect the water source, pipe condition, pressure, space, drainage, and the specific contaminant concern. Sounds basic. It is where bad installs start.

    City water or well water? That is the first fork in the road. City water often pushes the choice toward chlorine or chloramine reduction, which makes carbon filtration or RO more likely. Well water changes the conversation because sediment, iron, hardness, sulfur odor, and bacteria risk can all enter the picture. In well-water homes, a “standard” filter may be the wrong system if the water needs treatment beyond taste, so it is wise to consult a water-treatment professional and review a recent water test. The EPA recommends testing private wells at least once a year for bacteria, nitrates, and anything else of local concern.

    Pressure matters too. A reverse osmosis system usually works best in a pressure range that supports membrane performance; if pressure is low, the installer may need a booster pump. Whole-house systems can also become annoying if they are undersized for the home’s flow rate. A family with two bathrooms and irrigation demand does not need the same setup as a condo.

    Code issues and maintenance access deserve a look as well. Can you reach the bypass valve? Can you replace the cartridge without pulling out the garbage disposal? Is there a drain available for RO wastewater or backwash discharge? Is the floor protected if a housing leaks? These details separate a thoughtful installation from one that only looks neat on day one.

    If the technician never asks about your water test, your pressure, or your maintenance tolerance, I would keep shopping.

    The honest difference between under-sink, reverse osmosis, and whole-house installs

    Under-sink systems win for simplicity, reverse osmosis wins for broader single-tap filtration, and whole-house systems win for whole-home treatment. That is the cleanest way to think about it, and it is also where a professional should tailor the recommendation to the water test and the home.

    Criteria Under-sink carbon Reverse osmosis Winner for [condition]
    Install complexity Usually simplest; fewer parts and no storage tank More involved; tank, faucet, and drain line are typical Under-sink carbon for quick, low-disruption jobs
    Space needed Small footprint under the cabinet More cabinet space because of the tank and membranes Under-sink carbon for cramped kitchens
    Contaminant scope Good for taste and odor; depends on certification Broader reduction at a single tap, especially NSF/ANSI 58 systems RO for wider drinking-water concerns
    Effect on flow/pressure Usually minimal at the main faucet Can have slower dispense rates from the RO faucet Carbon for users who dislike slow fill times
    Maintenance Cartridge swaps are usually straightforward More parts to service: prefilters, membrane, tank checks Carbon for low-maintenance preference
    Wastewater No drain waste in most setups Produces reject water by design Carbon where water conservation matters
    Best use Taste, odor, and point-of-use convenience Drinking water with stricter contaminant goals Depends on water test and goal
    Typical service burden Lower for both install and routine changes Higher because of the tank and drain components Carbon for simpler ownership

    My take is plain: choose under-sink carbon if you want the least invasive install and your issue is mostly taste or smell. Choose RO if you want a stronger drinking-water system and can accept the space, drain, and maintenance trade-offs. For whole-house treatment, talk to a professional first; use it only if the issue affects every fixture or the source water needs front-end treatment.

    What makes a bad installation obvious?

    A bad install usually announces itself in the first week, not the first year.

    Leakage is the easiest clue. Fittings, shutoff, or drain connection — any one of them can drip. Even a slow drip matters because it can swell cabinet bottoms or stain floors before you notice.

    Pressure problems show up next. If the installer undersized the system or added a filter with too much restriction, you may see weak flow at the tap or sluggish refill times. In a reverse osmosis setup, very slow output can mean low inlet pressure, poor membrane performance, or a tank problem. In a whole-house job, pressure loss at showers and fixtures means the system may not match the home’s demand.

    Noise gives away plenty too. Air in the lines, hammering, continuous drain flow, or a system that regenerates too often suggests the configuration is off. A competent installer should explain what normal startup noise sounds like and what is not normal. No explanation? That leaves you guessing later.

    The worst installs ignore maintenance access. If you cannot reach the bypass, cannot replace the cartridge without removing half the cabinet, or cannot tell which way the flow goes, the install may have been built for the installer’s convenience, not yours.

    When should you not hire for a filter install at all?

    Pause the hire if you have active leaks, severely corroded plumbing, unknown well water, or a water-quality problem that has not been identified. A filter is not a substitute for diagnosis.

    If the water is discolored after plumbing work, smells like rotten eggs, or comes from a private well that has not been tested recently, I would start with water testing and plumbing inspection, not product selection. A filter installed on top of a bigger issue can hide symptoms without solving the cause. In health-related situations, a licensed plumber and a qualified water-quality professional are the right people to ask first.

    You should also hesitate if the installer will not say whether the system is certified for the specific claim being made. NSF/ANSI certification matters because “filtered” is not the same as “certified to reduce a contaminant.” That difference is not marketing trivia; it is the buying decision. The EPA and NSF both stress that certification should match the exact contaminant reduction claim.

    And if the quote leaves out permits, drain work, replacement valves, or ongoing maintenance costs, the price is not complete. Ask for the missing pieces before you sign.

    Which filter should I choose if I want the installation to go smoothly?

    Choose the simplest system that solves the actual water problem. That is usually the one that goes in cleanly, costs less to maintain, and causes fewer surprises later.

    If your main concern is taste, odor, or chlorine at one sink, an under-sink carbon system is the easiest professional install. If you want stronger contaminant reduction at the kitchen tap and can live with a tank, a drain line, and more maintenance, reverse osmosis is the better fit. If the entire house has sediment, odor, or a source-water issue, a whole-house system is worth the bigger install.

    My recommendation is blunt: do not pay for whole-house treatment if only one drinking tap needs help, and do not buy the cheapest under-sink filter if your actual concern is beyond taste. The right installation starts with the right category. No shortcut there.

    Choose under-sink carbon if you want the least disruptive install and only need better-tasting water at one tap. Choose reverse osmosis if you want broader drinking-water treatment and can accept the tank, drain, and slower faucet flow. Neither if your water has an unresolved safety issue, active plumbing damage, or no recent water test.

    What should I ask before I book the installer?

    Before you book, ask three things: what system they recommend for your water, what the price includes, and what maintenance you will owe afterward. That is the fastest way to separate a real installer from a parts-swapper.

    I would also ask whether the quote includes a bypass valve, new shutoff, dedicated faucet, drain connection, cartridge flush, and leak check. Ask what happens if your plumbing is copper, PEX, CPVC, or galvanized, because the connection method changes. If you have well water, ask whether they are comfortable working from an actual water test rather than guesswork. According to the CDC and EPA, private well owners should test regularly, not assume the water is safe.

    A good installer should be able to explain why NSF/ANSI 42, 53, or 58 matters for the model they are quoting, and what the filter certification covers. In practice, that should come with one or two numbers: what contaminant is reduced, by how much, and under which standard. Ask for the exact model number, too, because certification is model-specific.

  • How Much Does Water Filter Installation Cost?

    How Much Does Water Filter Installation Cost?

    Last updated: September 10, 2026

    Key Takeaways

    • A simple under-sink install can take about 1 hour.
    • A $250 countertop unit may cost little to put in, while a modest whole-house system can cost much more to install than the filter itself.
    • How long do you expect the job to take?
    • A point-of-use unit will not solve a shower problem or protect your water heater.

    Water filter installation usually costs less than the system itself, but the bill can swing from a simple under-sink hookup to a full house main-line job. In plain terms: most straightforward installs are charged like a service call plus labor, while whole-house or plumbing-adjacent work runs higher because it eats more time, fittings, and skill.

    I write about plumbing and home-service pricing, so I judge this the way a decent installer does: by the filter type, the plumbing already in place, and the hidden work behind the wall. Not glamorous. Just where the money goes.

    Water filter installation costs by location

    How Much Does Water Filter Installation Cost?

    Installation cost follows the location, not just the brand. A point-of-use filter under one sink is usually the least expensive install because the plumber ties into one cold-water line and one drain. A whole-house filter is a different animal because it sits on the main line and may need shutoff valve work, bypass piping, or pressure checks. The EPA notes that filter selection should match the specific water problem, so checking local water conditions before you pay for plumbing work makes sense. EPA: Choosing Home Water Filters

    For a simple under-sink reverse osmosis or cartridge filter, the labor is often closer to a basic service visit than a major plumbing project. By contrast, a whole-house sediment or carbon system usually brings a bigger bill because the installer may need 2 to 4 hours, not 30 to 60 minutes, especially when the piping is tight or old. The U.S. Department of Energy also notes that point-of-use systems generally treat water at one tap, while whole-house systems treat all water entering the home. DOE: Water Filtration

    Here’s the rule I use: one faucet means mostly labor; the whole home means labor plus plumbing modification. If your house has PEX with reachable shutoffs, installation is easier. If the line is copper, cramped, or corroded, the price climbs because the risk climbs. That part is a bear.

    What generic articles often miss is simple: the system price and install price are not the same thing. A $250 countertop unit may cost little to put in, while a modest whole-house system can cost much more to install than the filter itself. Budgeting only for the device catches homeowners off guard fast.

    How much does the plumber charge?

    The labor charge is usually what you are really buying. The installer may charge a flat trip fee, hourly labor, or a flat install rate tied to the filter type. Flat rates are easier to compare. Hourly rates are fair when the job is unpredictable, but they can get expensive if the piping is old or the shutoff fails.

    What tends to move the number more than the brand name?

    • Under-sink install with existing shutoffs: lower labor
    • Add a new dedicated shutoff: higher labor
    • Whole-house install on accessible main line: moderate labor
    • Whole-house install with bypass, pressure regulator, or drain tie-in: higher labor
    • Warranty-safe installation required by the manufacturer: may limit DIY

    A clean install also depends on what is already there. Some systems need a 1/4-inch line to a faucet, an air gap at the drain, or a specific clearance under the sink. If the cabinet is packed with garbage disposal wiring, a water heater line, or a trash pull-out, the job takes longer. Crowded cabinets are where tidy plans go sideways.

    My view is plain: if the install quote looks unusually low, ask what is excluded. A low quote can leave out valve replacement, extra tubing, filter flushing, or disposal of the old unit. Then the “simple” job becomes change orders. Sneaky, really.

    Which type of filter costs more to install?

    How Much Does Water Filter Installation Cost?

    Whole-house systems usually cost more to install than under-sink or faucet-mount filters. That is the better choice only if you want filtered water at every tap, need sediment control for appliances, or have water quality concerns that affect the entire house.

    A faucet-mounted filter is the easiest and cheapest to put on, but it is also the least elegant. It can get in the way of sink clearance and often has lower capacity than a plumbed system. An under-sink filter is my preferred middle ground for most kitchens because it keeps the counter clear and serves drinking water and cooking water without changing the whole house.

    Whole-house filtration can be the better fit when the goal is broader protection, but checking with a plumber or water-treatment pro first is smart. It makes sense for well water with sediment, homes with chlorine taste throughout the plumbing, or buyers who want filtration before water reaches the water heater and fixtures. The trade-off is obvious: more fittings, more shutoff work, and more chance of a pressure drop if the system is undersized.

    The weak point of a whole-house system is that it can be overkill for a condo, rental, or single occupant who only wants better-tasting drinking water. In those cases, I would skip main-line filtration unless the water report justifies it.

    What should be in the quote before you say yes?

    The quote should spell out parts, labor, and any plumbing changes. If it does not, I would keep shopping. A good quote usually names the filter model, the install location, whether new valves are included, and whether disposal of the old unit is included.

    Ask these questions before you approve the job:

    1. Does the price include the shutoff valve, fittings, and tubing?
    2. Does it include drilling the sink deck or countertop if needed?
    3. Is a drain connection included for reverse osmosis?
    4. Will you test for leaks after install?
    5. Does the price change if the old valve will not close?
    6. How long do you expect the job to take?
    7. Is flushing or startup included?

    That time question matters. A straightforward under-sink install may be done in about an hour. A whole-house system can take several hours. If the installer says the job is “quick” but refuses to name the steps, that is a warning sign.

    A good quote also tells you what the installer will not do. For example, a filter swap is not the same as correcting bad house pressure, replacing old copper, or fixing a code issue with drain connections. If those problems show up on site, the job changes.

    How do I know if the installer did a bad job?

    A bad install leaks, rattles, drops pressure, or leaves the system hard to service later. Four warning signs matter most: wet fittings, a cloudy startup that never clears, a filter head mounted where the canister cannot be removed easily, and a noticeable drop in pressure after the unit is installed.

    Leaks are the obvious failure. Less obvious is a system that works but is set up badly. If the shutoff valve is hard to reach, if tubing is kinked, or if the drain line on an RO system lacks proper routing, the job was not finished well. A neat install should still let you replace the cartridge later without tearing apart the cabinet.

    Pressure loss is another clue. Every filter creates some resistance, but a poor choice or poor install can make the sink feel weak. That is especially true with whole-house systems that are too small for the home’s flow rate. If your shower pressure drops right after install, the system may be undersized or the bypass may not have been set correctly.

    I’d also question any job that skips a leak check or startup flush. Many manufacturers call for flushing before use, and that step is not optional if you want clean-tasting water and fewer cartridge problems.

    Honest side-by-side: under-sink vs whole-house

    Under-sink filtration wins for most kitchen-only buyers because it is cheaper to install, easier to service, and less disruptive. Whole-house filtration can win when the entire property needs treatment, not just drinking water, but it is worth consulting a plumber or water-treatment specialist first. That is the real split. The EPA’s home-filter guidance is a good starting point for matching the system to the water issue. EPA: Choosing Home Water Filters

    Criteria Under-sink filter Whole-house filter Winner for [condition]
    Install complexity Usually one faucet, one line, maybe a drain connection Main-line work, bypasses, and more fittings Under-sink for a quick kitchen job, though a plumber should confirm access and valve condition
    Typical labor time Often about 1 hour for a straightforward install Often several hours, especially on older piping Under-sink for speed
    Housewide coverage Only one tap or one sink Every faucet, shower, and appliance Whole-house for full-home treatment
    Pressure impact Usually limited to one sink Can affect the whole house if undersized Under-sink for low risk of pressure complaints
    Serviceability Easy cartridge access under one cabinet Must be mounted where the main line is accessible Under-sink for simple maintenance
    Up-front install cost Usually lower because the job is smaller Usually higher because piping changes are larger Under-sink for tighter budgets
    Best use case Drinking and cooking water Sediment, chlorine, or treatment for the whole home Depends on water problem
    Bad-fit scenario Not enough if every tap has the same water issue Overkill for a condo or a single-point taste issue Neither if the problem is only portable water jugs

    My judgment is clear: choose under-sink unless you have a whole-home water problem. That is the more cost-efficient install for most households. Whole-house is the better buy only when the reason is broad and specific, not just “I want better water.”

    When does the recommendation flip?

    The recommendation flips in a few cases, and ignoring them is how homeowners overspend.

    On well water, if the water report shows sediment, staining, or sulfur at multiple fixtures, whole-house treatment deserves a hard look, but you should consult a professional before you buy. A point-of-use unit will not solve a shower problem or protect your water heater.

    Second, if you are in a rental, condo, or temporary home, I would avoid major plumbing work. A removable under-sink or faucet system is easier to take with you and cheaper to remove later.

    Third, if the sink cabinet is tiny or the plumbing is badly aged, the under-sink option can still become expensive because access is poor. At that point, a plumber may spend almost as long installing one point-of-use unit as a simple whole-house bypass, and the math stops working fast.

    Fourth, if the home’s water pressure is already marginal, I would be careful with any whole-house filter that has a fine micron rating. A tighter filter media can create a pressure drop. That is not a reason to avoid filtration; it is a reason to size it correctly.

    So what should you budget?

    Budget more for the install than you think if the job involves main-line plumbing, drain work, or old shutoffs. Budget less if the system is under one sink and the cabinet is open. A practical homeowner should ask for a line-item quote and compare the cost of the device, valves, tubing, and labor separately.

    If I were choosing without overthinking it, I would pay for under-sink installation for drinking water in most homes, and for whole-house installation only when the water issue is truly everywhere. That is the cleaner use of money, and it avoids paying for filtration you do not need.

    Choose under-sink installation if you want filtered drinking water at the kitchen tap, have limited budget, or live in a condo or rental. Choose whole-house installation if sediment, chlorine, or another water issue affects every fixture in the home. Neither if you have not checked the water source or the home’s plumbing access; in that case, start with a water test and a look under the sink and at the main shutoff.

    FAQ

    How long does water filter installation take?
    A simple under-sink install can take about 1 hour. A whole-house install often takes several hours, especially if valves or bypass piping must be added.

    Do I need a plumber for every filter?
    No. Basic faucet-mounted and some countertop systems are DIY-friendly. I would hire a plumber for under-sink reverse osmosis, whole-house systems, or any job that touches the main line.

    Why did my install quote change once the plumber arrived?
    Usually because of old valves, tight access, missing shutoffs, or the need for extra fittings. A good quote should say what is included and what is billed only if needed.

    Is a whole-house filter worth it?
    Yes if the whole home has a water problem that you want to address at every fixture. No if your only goal is better-tasting drinking water at one sink.

    What is the biggest mistake people make?
    They buy the filter first and the install plan second. That is backwards. The plumbing layout, not just the filter model, drives the real cost.

  • Best Water Filter Types for Older Homes With Aging Pipes

    Best Water Filter Types for Older Homes With Aging Pipes

    Last updated: September 10, 2026

    Key Takeaways

    • Homes built before the 1980s may also have lead solder, and some neighborhoods still have lead service lines outside the house.
    • Many city-water houses get the best mix of protection, convenience, and long-term cost from that setup.
    • Galvanized steel can shed rust and scale.
    • Copper systems can carry corrosion byproducts.
    • A certified under-sink filter is usually the safest default when lead is a concern for water filter types older homes with aging pipes.

    Old galvanized, copper, or lead-soldered plumbing changes the answer fast. In that situation, the safest starting point is usually a certified under-sink filter with a carbon block and a lead-reduction claim — or a reverse osmosis system when you want the broadest contaminant removal and can accept slower flow and wastewater. I write about household water treatment, plumbing contamination risks, and certification labels like NSF/ANSI 53, 58, and 42, and qualified plumbers or water-treatment professionals should still be consulted for site-specific advice, because the right filter depends less on taste than on what your pipes may be adding to the water; see the EPA Lead and Copper Rule and the CDC lead guidance.

    Older houses are not all the same. Still, the pattern is familiar: water can pick up lead from solder or service lines, rust from corroding steel, sediment from mineral scale, and chlorine taste from the city supply. So the filter should match the risk, not the marketing. Fancy label? Not enough. When comparing water filter types older homes with aging pipes, the best choice is usually the one that fits the specific contaminant, not the flashiest box.

    What aging pipes usually put into the water

    Best Water Filter Types for Older Homes With Aging Pipes

    Lead is the first thing I would check. It changes the buying decision. In older homes, the issue is not only what comes from the municipal supply; it is what happens after water sits in the building’s plumbing. Galvanized steel can shed rust and scale. Copper systems can carry corrosion byproducts. Homes built before the 1980s may also have lead solder, and some neighborhoods still have lead service lines outside the house. Want a clean outside reference? The U.S. Environmental Protection Agency’s Lead and Copper Rule explains why plumbing materials matter, and the CDC’s lead guidance covers the health concern in plain terms.

    I would not begin with a basic pitcher unless your main issue is taste and odor. Pitchers that only carry NSF/ANSI 42 improve chlorine taste and smell, but that is not the same as lead reduction. In an older home, that gap matters. NSF/ANSI 42 is about taste and odor, not a full lead solution. Apples and oranges.

    Sediment is the other piece generic articles tend to gloss over. Should your taps spit brown particles after a plumbing repair or after water has sat overnight, a filter with a sediment prefilter or a cartridge designed to catch particulate load is more useful than a pure taste filter. A filter can be “good” and still clog fast if your pipes are shedding debris. That is a maintenance issue, not a product flaw, but you need to plan for it. A cartridge that lasts 6 months in a newer home, for example, may need replacement sooner in an older one.

    The real difference between carbon block and reverse osmosis

    Carbon block works for most older homes because it handles the common problem without making the kitchen annoying to use. Reverse osmosis is the pick when you want the widest reduction list and can live with a tank, slower fill, and wastewater.

    Here is the practical difference:

    Criteria Carbon block under-sink Reverse osmosis under-sink Winner for [condition]
    Lead reduction Many models are certified to NSF/ANSI 53 for lead Many RO systems are certified to NSF/ANSI 58 for lead RO if lead is the main concern
    Taste and odor Strong on chlorine taste, usually NSF/ANSI 42 Also strong, but often more than you need Carbon block for city-water taste issues
    Flow rate Typically better flow at the tap Slower at the faucet because of the membrane and tank Carbon block for daily convenience
    Maintenance Cartridge changes are usually simpler More parts: membrane, prefilters, postfilter Carbon block for low-fuss upkeep
    Wastewater No wastewater Produces reject water Carbon block for water-conscious households
    Space Usually compact Needs more space under the sink Carbon block for tight cabinets
    Broad contaminant reduction Good for targeted issues Broader reduction of dissolved solids RO for mixed water-quality concerns
    Cost of ownership Usually simpler Usually higher ongoing maintenance Carbon block for budget discipline

    That table is why I rarely call reverse osmosis the automatic answer for aging pipes. It is excellent when the water problem is uncertain or layered, but it is overkill if your actual pain is lead plus chlorine plus occasional rust. A certified carbon block with a lead reduction rating often handles that more cleanly.

    Who should skip carbon block alone? Anyone with known high total dissolved solids, a private well with multiple dissolved contaminants, or a home where you want the most comprehensive reduction rather than targeted treatment. Carbon is not a universal cleaner. It is a focused tool. When in doubt, consult a water professional and check a lab report before buying, since NSF/ANSI 53 and NSF/ANSI 58 cover different claims.

    Who should skip reverse osmosis? People with very limited under-sink space, anyone who hates slower draw at the faucet, and households that would rather avoid wastewater and membrane maintenance. RO can be the right answer, but it is not the least annoying answer.

    Which filter type I would choose for most older homes

    Best Water Filter Types for Older Homes With Aging Pipes

    For most older homes, I would choose a certified under-sink carbon block system with a lead-reduction claim, and I would only move to reverse osmosis if the water report, plumbing history, or local risk pushes me there. Honestly, that is usually the best balance of protection, convenience, and cost of ownership for many city-water houses.

    Why carbon block first? Older-home problems are often specific: lead from solder, chlorine taste from the utility, and sediment from pipe corrosion. A good carbon block can handle that trio without turning the sink into a mini-treatment plant. Look for a system that lists NSF/ANSI 53 for lead and NSF/ANSI 42 for taste and odor. If the listing also mentions cyst reduction or VOC reduction under the same standards, that is useful, but it is secondary to the lead claim in an old house. Should you need a place to start, the NSF certified products database can help verify the label.

    What kind of carbon block? I would favor an under-sink model over a faucet filter if your plumbing is aging. Faucet-mounted units can be handy, but they add bulk to the spout and are easier to knock loose. Pitchers are even less suitable when the concern is plumbing contamination, because they treat only what you pour and do nothing at the tap you cook with. In a house with old pipes, I want the filter on the line that serves the sink. A compact under-sink unit is usually the most practical water filter type for older homes with aging pipes.

    The drawback is real: carbon block does not reduce total dissolved solids the way RO can, and it does not strip everything people sometimes worry about. With a well, a boil-water notice history, or lab results that show several dissolved contaminants, I would not stop at carbon. But for a lot of aging municipal systems, carbon is the practical choice.

    When I say “choose this,” I mean the home where the owner wants one good system, not a project. That is the house I have in mind. Should that be you, this is the option I would narrow to first.

    Why reverse osmosis is the safer pick in some older houses

    Reverse osmosis wins when the plumbing story is messy or the water report is not reassuring. Should your home have lead service lines, repeated sediment problems, or a private well with iron, manganese, nitrate, or other dissolved contaminants, RO gives you a broader margin of safety than carbon alone. Systems certified to NSF/ANSI 58 are built for that role.

    The strongest argument for RO is coverage, not taste. Carbon block is selective. RO is more sweeping. That matters if you do not know what the old pipes have been adding over time. In older homes where the renovation history is partial or the utility has not fully replaced legacy service lines, RO can feel like the more cautious choice.

    The trade-off is not subtle. RO systems usually need more room under the sink, have more parts to service, and waste some water in the process. Many also need periodic membrane replacement, which is part of the operating cost whether or not the marketing page says it out loud. Want a simple “install once and forget it” setup? RO is the wrong answer. A typical membrane can last about 2 to 5 years, but that depends on water quality and household use.

    I would also skip RO if your problem is mostly chlorine taste and a little visible sediment. That is too much system for too little problem. A good carbon block will be easier to live with.

    One more thing generic advice often misses: RO water can taste “flat” to some people. That is not a defect, but it is a preference issue. Should you dislike very soft-tasting water, I would think twice before making RO your default.

    The options that sound convenient but usually are not enough

    A pitcher filter is convenient, but it is the wrong first choice for many older homes. Its main value is better-tasting water, usually through NSF/ANSI 42 style chlorine reduction. That helps if the water smells like a pool. It does not solve the core problem if your pipes are the issue. I would not use a pitcher as my main defense against aging plumbing.

    A faucet-mounted filter is better than a pitcher because it treats water at the tap and is easier to use for cooking. Still, it is physically exposed, can reduce clearance under the spout, and usually offers less capacity than a dedicated under-sink system. With a cramped sink area, the added bulk gets annoying fast.

    Whole-house filtration sounds appealing, and in some homes it is the right move, but it is not the best single answer for aging pipes unless your entire house needs sediment control or you are pairing it with a point-of-use lead solution. Whole-house systems can improve the water entering the building, but they do not always solve the final leg of contamination at the kitchen tap. That kitchen tap is where drinking and cooking happen, so that is where I would spend the serious filtration budget first. According to the EPA, point-of-use filters are often the most direct way to address lead at a single tap.

    If the shortest honest summary is what you want: pitchers are for taste, faucet filters are for convenience, under-sink carbon is for the common old-house drinking-water problem, and reverse osmosis is for the widest protection.

    How to read the label before you buy

    Choose the certification first, not the brand name. That sounds boring, but it is the difference between a useful filter and a decorative one. For aging pipes, I would look for NSF/ANSI 53 if lead reduction is the priority, NSF/ANSI 42 for chlorine taste and odor, and NSF/ANSI 58 if you are buying reverse osmosis. Those are the labels that matter more than glossy claims.

    I would also read the fine print on what the listing does not say. If a filter mentions taste improvement but never mentions lead, I treat that as a no for an older home. If it says “reduces contaminants” without naming the standard, I keep scrolling. Should it be a faucet filter or pitcher and the packaging does not clearly state the certification scope, I assume the claim is narrower than the marketing suggests.

    For older homes, installation style matters almost as much as the media type. Under-sink systems keep the treatment at the point of use and away from daily handling. Pitchers are easiest, but they treat the smallest volume and require the most user discipline. Faucet filters split the difference but can be awkward in small kitchens. RO demands the most space, but it gives the broadest coverage.

    If you want an authoritative place to sanity-check lead risk, the EPA and CDC links above are the right starting points. For certification language, the NSF standards themselves are the gold standard for what a claim means. A filter without a clear standard is not a filter I would trust in an old house. On labels, a number like 53, 42, or 58 is more useful than a slogan.

    What I would choose in three common old-house scenarios

    Choose a certified under-sink carbon block if your house has city water, you want better-tasting water, and your main worry is lead from old plumbing plus chlorine from the utility. This is the cleanest fit for most people because it targets the likely problem without making daily use harder.

    Choose reverse osmosis if your water report shows multiple dissolved contaminants, if you have a private well with uncertain chemistry, or if your plumbing history is so murky that you want the broader reduction profile of NSF/ANSI 58. This is the safer technical choice, but it is not the easiest one to live with.

    Choose a pitcher or faucet filter only if the issue is mostly taste, odor, or temporary convenience, and you are not relying on it as the main answer to old pipes. Those products can be fine, but they are not my first pick for a house with real plumbing-age concerns.

    Exception scenarios

    If your home has confirmed lead service lines and you cannot verify what is in the plumbing after the meter, I would move toward reverse osmosis rather than carbon alone. The broader reduction profile matters there.

    When the only issue is a chlorine smell from municipal water and your plumbing is relatively recent, a good carbon block can be more than enough. I would not pay for RO just to fix taste.

    If you live with very limited cabinet space, a compact pitcher or faucet filter may be the only practical option for now, even though it is not the ideal long-term answer.

    Should your taps release visible sediment after repairs or seasonal changes, I would favor a system with a prefilter or a sediment-tolerant design over a minimalist pitcher. Clogged cartridges get expensive and frustrating.

    What is the best water filter type for an older home with aging pipes?

    Choose a certified under-sink carbon block if your water concern is lead, chlorine taste, and ordinary old-pipe sediment. Choose reverse osmosis if you want the broadest protection or your water quality is uncertain. Neither if you are relying on a pitcher alone to solve a real plumbing-contamination problem.

    FAQ

    Do I need a filter if my water already meets city standards?

    Yes, if the pipes inside your home are old enough to add lead, rust, or sediment after the water leaves the utility. City compliance does not guarantee what happens in your plumbing. For many homes built before 1986, the concern is the plumbing, not the treatment plant.

    Is reverse osmosis always better than carbon block?

    No. RO is broader, but it is also slower, more complex, and more wasteful of water. Carbon block is the better practical choice for many older homes with normal city water. In a typical under-sink setup, the better choice is the one you can maintain for 12 months or longer.

    Can a pitcher filter remove lead?

    Only if it is specifically certified for lead reduction. If it only advertises better taste or chlorine removal, I would not count on it for an older home. Check the label for a real standard, not just a claim.

    Should I filter every faucet?

    Not usually. For an older home, I would prioritize the kitchen tap used for drinking and cooking. That is where the risk and the payoff are highest.

    What should I check before buying anything?

    Check the plumbing age, whether your home has lead service lines or lead solder history, and whether the filter lists NSF/ANSI 53, 42, or 58 for the job you actually need. If possible, test the water first and ask a plumber or water-treatment specialist to interpret the results.

  • Whole House Water Filter vs Under Sink Filter: Which Is Better for Your Home?

    Whole House Water Filter vs Under Sink Filter: Which Is Better for Your Home?

    Last updated: September 10, 2026

    Key Takeaways

    • Quick answer: for most homes, the right choice in the whole house water filter vs under sink filter decision depends on scope, with whole-house systems treating every tap and under-sink systems focusing on one sink.
    • Need cleaner water at every tap? A whole-house filter is often the better fit.
    • A whole-house system is often the better fit when the problem starts before water reaches any faucet.
    • A whole-house unit does not usually create “bottled-water quality” at every tap.
    • For a family that wants one install to affect only the kitchen, an under-sink filter is often the better fit.

    Need cleaner water at every tap? Then a whole-house filter usually wins. But if your only concern is the kitchen sink, an under-sink filter tends to deliver more targeted treatment for less money and less plumbing. Still, a professional should confirm the right setup for your water report.

    I write about home water treatment as a contractor-facing decision, not as a lifestyle upgrade, so I look at what gets fixed, what gets skipped, and what a bad install usually creates: pressure loss, leaks, and the wrong filter stage for the actual water problem. Consult a qualified water-treatment professional, and check NSF guidance on certified products and standards before you buy. NSF water filter certification

    The real difference is where the water gets treated in the whole house water filter vs under sink filter choice

    Whole House Water Filter vs Under Sink Filter: Which Is Better for Your Home?

    A whole-house system often makes sense when the problem starts before water reaches any faucet — but a professional should confirm that the main-line setup fits your home. It treats all incoming water at the point of entry, so showers, laundry, toilet fill, hose bibs, and appliances all see the same water quality change. That matters if your city water has sediment, chlorine taste, or you’re trying to protect a water heater, dishwasher, or ice maker from grit. CDC home water treatment

    An under-sink filter often makes sense when the trouble is local and specific — and again, a professional should confirm that one fixture is enough. It treats only one outlet, usually the kitchen faucet, and often gives a better result for drinking and cooking than you can justify filtering the whole house for. A good under-sink reverse osmosis system may include a carbon block and membrane stages that are hard to justify on a whole-house line because the flow demand would be too high. That math stops working fast. EPA WaterSense

    Scope is the catch. A whole-house unit does not usually create “bottled-water quality” at every tap. It is often a sediment filter, carbon tank, or scale-control system, not a full reverse osmosis setup. An under-sink filter does not solve shower water, laundry issues, or plumbing scale elsewhere in the home.

    For a homeowner in a hard-water area, a common split is this: whole-house softening or sediment treatment at the entry point, then an under-sink carbon or reverse osmosis unit for drinking water. A licensed plumber or water specialist should match that layout to the water test. Not overkill, if the report supports it; just two jobs, handled in two places. EPA private wells

    Whole-house water filters: who they fit and who should skip them

    A whole-house filter wins for a family that wants one install to affect the entire home. It is the right call when you have visible sediment, frequent cartridge loading, chlorinated city water, or a specific need to protect appliances and plumbing. It also makes sense if you rent one unit of effort and want the benefit at every fixture, not just the kitchen.

    Coverage is the strength. A properly sized system can reduce sediment before it reaches a tankless heater or washing machine, and a carbon-based system can improve taste and odor across the house. That broad effect is why these systems are often paired with a pressure tank, bypass valves, and service clearance around the main line.

    But the weakness is size and plumbing impact. Whole-house units are not invisible. They take space near the main shutoff, and the wrong cartridge or tank size can create a pressure drop you will notice at showers. Installation can also require cutting into the main line, adding fittings, and in some homes dealing with cramped basements, crawlspaces, or exterior meter locations.

    Who should skip it? Households that only want better drinking water, people in apartments or condos where main-line plumbing changes are not practical, and homeowners on a tight budget who do not need whole-house coverage. If your water problem is only taste at the kitchen sink, a whole-house filter is a lot of plumbing for one glass of water.

    Cost also tends to scale with scope. A basic whole-house sediment or carbon setup is usually a bigger job than an under-sink filter because it involves more fittings, more space, and more labor. The exact price depends on pipe material, access, and whether the system needs a bypass, a prefilter, or a drain connection. For anything involving the main line, I would ask the installer to spell out what happens if the pressure drop is unacceptable after startup.

    Under-sink filters: the better choice for drinking water

    Whole House Water Filter vs Under Sink Filter: Which Is Better for Your Home?

    An under-sink filter wins if your real goal is better water for drinking, cooking, coffee, and ice. It gives you treatment where you actually use the water most carefully, and it avoids changing the rest of the house. That is why it is the smarter choice for many homes with decent municipal water and one complaint: taste, odor, or specific contaminants at the tap.

    The best-known format here is a multi-stage cartridge system or reverse osmosis unit mounted in the cabinet. That package is compact, typically tucked under the sink with a small dedicated faucet or a connection to the main faucet if the design supports it. The performance is more localized, but the treatment can be more aggressive than a whole-house carbon tank.

    The drawback is obvious: it does nothing for showers, laundry, or the water heater. If your issue is rust stains in the tub or grit in the dishwasher, an under-sink filter does not touch that. It also needs more regular attention at one point of use, and some reverse osmosis systems waste water during treatment, which matters in areas where water rates are high or where conservation is a concern. EPA WaterSense reports that conventional under-sink reverse osmosis systems can waste several gallons for every gallon produced, so check the model before you buy. EPA WaterSense product search

    Honestly, I would choose under-sink first for a homeowner who drinks tap water but is otherwise satisfied with the rest of the home. It is also the more realistic option for people who want a meaningful improvement without reworking the main plumbing line. The cabinet space requirement is a real constraint, though. If the sink base is packed with disposals, pull-out trash bins, or a water heater, the install can get awkward fast.

    Ask the installer about NSF/ANSI certification for the contaminant claims you care about, not just “filtered water” as a vague promise. NSF/ANSI 42, 53, and 58 are common standards for taste, health-related claims, and reverse osmosis performance. The standard matters because the wrong filter stage can look good on a sales sheet and still miss the substance you wanted removed. NSF water filtration guide

    The honest side-by-side

    A clean comparison comes down to where the problem lives and how much of the house needs fixing.

    Criteria Whole House Filter Under Sink Filter Winner for this condition
    Coverage Treats water to the whole home Treats one sink or one fixture Whole house for showers, laundry, appliances
    Drinking water quality Often good, but varies by system Usually stronger for drinking-focused treatment Under sink for taste and contaminant removal
    Install complexity Higher; main line work and more space Lower; cabinet install at one point Under sink for easy retrofits
    Pressure impact Can be noticeable if undersized Usually localized Under sink for preserving shower pressure
    Maintenance Larger cartridges/tanks, less frequent but more involved Smaller cartridges, easier access Under sink for simple upkeep
    Appliance protection Better for heaters, washers, dishwashers None Whole house for sediment and scale control
    Space needed Mechanical area near main shutoff Cabinet space under sink Under sink for small homes
    Best use case Whole-home water problems Drinking and cooking water only Depends on scope of the problem
    Typical job cost drivers Plumbing access, main-line tie-in, bypass, prefilter Stage count, faucet type, cabinet space Whole house when whole-home benefit is needed
    Downtime on install day More likely to require water shutoff Usually shorter shutoff window Under sink for minimal disruption

    The table only points one way if the reader defines the problem honestly. Whole-house systems are about broad coverage and protection. Under-sink systems are about concentrated treatment where it matters most. A generic comparison often pretends they are interchangeable. They are not.

    What changes the cost and the install time?

    A whole-house filter usually costs more to install because the job is more physical and more unforgiving. The plumber may need to cut the main line, add unions or bypass valves, secure the system to a wall or slab, and confirm that the filtered water still delivers acceptable pressure at the farthest fixture. Access can add more time than the filter itself. A basement with an open main line is one thing; a tight utility closet in a slab home is another.

    An under-sink filter is usually faster because it lives inside one cabinet and ties into a single cold-water line. The install can still get complicated if the sink is crowded, the shutoff valve is old, or the owner wants a dedicated faucet through stone or composite counters. Reverse osmosis systems also need a drain connection, and that detail trips up rushed installs.

    For scheduling, I would expect an under-sink job to be the lighter appointment and a whole-house install to be the half-day that can stretch if the plumbing is old. If the house has galvanized pipe, low clearance, or a poor main shutoff, the quote should reflect that risk. When a contractor gives a price without asking about pipe material, water pressure, or access, that is a warning sign.

    A bad job is easy to spot. Leaks at compression fittings, a bypass valve that does not fully isolate the unit, reduced pressure at two or more fixtures, or a cabinet installation that leaves no room to change cartridges are all real problems. For whole-house systems, I would also watch for a system installed without a sediment prefilter where the water visibly carries grit. For under-sink systems, I would be wary of a reverse osmosis unit without a clean drain path or with tubing routed so tightly that a future filter change becomes a wrestling match.

    When does the answer flip?

    The overall verdict flips in a few specific situations.

    First, if your main concern is scale in a hard-water area and you want to protect the whole plumbing system, a whole-house solution paired with softening is the more sensible route than a kitchen-only filter. That is especially true if your water heater or dishwasher is already showing mineral buildup.

    Second, if you are on a well with sediment, iron, or sulfur odor, the answer is rarely either/or. A whole-house pretreatment setup may be necessary before any under-sink drinking filter can work properly. In that case, the drinking-water filter is the finish line, not the starting point.

    Third, if you live in an apartment, condo, or any place where you cannot alter the main supply line, the whole-house option is off the table. An under-sink unit is the practical answer as long as the cabinet and plumbing allow it.

    Fourth, if your local water report shows a specific contaminant that needs targeted treatment at the kitchen tap, an under-sink reverse osmosis or certified specialty filter may beat a whole-house carbon system by a wide margin. That is the kind of case where one sink gets the higher-end treatment and the rest of the home stays unchanged.

    Which one should you actually choose?

    Choose a whole-house filter if you need better water at every faucet, want appliance protection, and have the plumbing space for a main-line install. Choose an under-sink filter if your real goal is better drinking and cooking water and you do not want to alter the rest of the house. Neither if your water problem is not identified yet; get a water test or a utility report first, because buying the wrong stage is an expensive way to solve the wrong issue.

    That is the clean decision in the whole house water filter vs under sink filter comparison. Whole-house for whole-home problems. Under-sink for kitchen-only concerns. If your situation includes hard water, well water, iron, sulfur, or a known contaminant, the answer can change fast, and it should change based on the water analysis, not on the marketing on the box.

    What should I ask a contractor before I hire them?

    Ask what problem the system is meant to solve, what standard backs that claim, and what happens to pressure after install. If they cannot name the contaminant, the sediment size, or the NSF/ANSI standard they are relying on, they are selling a category, not a solution.

    Also ask whether the quote includes bypass valves, drain routing if needed, cartridge startup, and cleanup. For a whole-house system, I would want to know how much clearance is needed around the filter housing and whether the main shutoff is functional before work starts. For an under-sink system, I would ask how much cabinet space is required and whether a dedicated faucet or drain line is part of the job.

    How do I know if the job was done badly?

    A bad whole-house install leaves clues fast: pressure drops, leaks around fittings, a system mounted where cartridges cannot be changed easily, or water that still carries sediment because no prefilter was used. A bad under-sink install usually shows up as slow leaks, noisy operation, a cramped cabinet that makes filter changes miserable, or a faucet that was added without respecting countertop clearance.

    If the contractor leaves without showing you the bypass, the shutoff points, and the filter change steps, that is a miss. A good install should be serviceable, not mysterious.

    FAQ

    Do I need both a whole-house filter and an under-sink filter?

    Sometimes, yes. A whole-house unit can handle sediment, chlorine, or hardness-related issues, while an under-sink reverse osmosis unit can handle drinking water more aggressively. That combination makes sense when the water has more than one problem.

    Will a whole-house filter lower my water pressure?

    It can if it is undersized, clogged, or matched poorly to the home’s flow demand. That is why sizing and prefiltration matter. A good installer should account for fixture count and pressure before quoting the job.

    Is an under-sink filter enough for well water?

    Not by itself in many cases. Well water often needs sediment treatment, iron control, sulfur treatment, or disinfection before a kitchen-only filter is worth much. The water report should drive the setup.

    Which system is easier to maintain?

    An under-sink filter is usually easier to access, especially if it uses cartridges in a cabinet. A whole-house system may need less frequent service, but the service itself is more involved and is often in a less convenient location.

    What should I ask about before I sign the quote?

    Ask for the filter’s target use, the standards it meets, what is included in labor, how long the install should take, and what the main trade-off is. If the answer is vague, keep looking.

  • Do I Need a Sediment Filter, Carbon Filter, or Both?

    Do I Need a Sediment Filter, Carbon Filter, or Both?

    Last updated: September 10, 2026

    Key Takeaways

    • If it does both, use both.
    • Sediment filtration is the cleanup crew.
    • Clearer water can fool people.
    • A carbon filter wins when the problem is chlorine, odor, and taste .

    Cloudy water, rusty flecks, bad taste, or a faucet that keeps choking on grit — that is the real setup behind do I need a sediment filter, carbon filter, or both? The usual answer is simple: sediment first, carbon second, and both when you want water that is clean and actually pleasant to drink. I write and edit water-treatment copy with one goal: help people choose the right filter train without buying gear they do not need or skipping a stage that solves a real problem; for treatment decisions, consult a qualified water professional and verify claims against NSF’s Certified Drinking Water Treatment Units program and the Water Quality Association’s standards and certification .

    The short answer: which one do you actually need?

    Do I Need a Sediment Filter, Carbon Filter, or Both?

    A sediment filter handles grit, rust, sand, silt, and other visible particles. A carbon filter handles chlorine taste and smell, many organic compounds, and some chemical reduction jobs depending on the media and certification. Both make sense when your water has particles and taste/odor problems, or when you need to keep carbon from clogging too fast.

    Use this rule of thumb: orange marks, grit in a sink, or a toilet tank that looks dirty points to sediment. Clear water that smells like a pool or tastes “chemical” points to carbon. And if it does both, use both.

    That sounds almost too neat. It isn’t. Sequence matters, because carbon cartridges load up faster when sediment reaches them first, and a clogged carbon stage often quits by pressure loss before it quits by taste. That is why a 5-micron sediment stage ahead of carbon is such a common layout in whole-house systems and under-sink prefilters.

    Only chasing better taste at one kitchen tap? If the water is already clear, a carbon filter alone can be enough. Protecting a reverse osmosis system? The prefilter set often includes sediment plus carbon, because the membrane wants low particulate loading and low chlorine. For potable-water treatment, NSF/ANSI standards are the language to look for; NSF International and the Water Quality Association both explain certification categories clearly, and you should consult a qualified professional if you are matching a filter to a specific contaminant or health concern.

    What a sediment filter actually does

    A sediment filter wins when the problem is physical debris. It catches sand, rust flakes from iron pipes, scale, dirt, and silt floating in the water. Micron rating is the number to watch. A 20-micron cartridge catches larger particles and usually loads slower; a 5-micron cartridge catches finer particles and usually loads faster. That trade-off matters more than most product pages admit.

    Sediment filtration is the gatekeeper. Clean faucet screens, fewer clogged aerators, less grit in washing machines, and carbon cartridges that last longer because they are not acting like a dirt net — that is the payoff. If your water comes from a private well, a galvanized line, a water main repair zone, or an older building with pipe scale, sediment is often the first stage I would consider.

    But sediment filters do not fix taste, odor, chlorine, pesticides, VOCs, or dissolved metals in any meaningful general sense. A crystal-clear glass can still smell like a swimming pool. Sneaky little trap. People install a sediment cartridge, see clearer water, and assume the job is done. It is not if the water still tastes wrong.

    Sediment-only fits a reader whose water test or visual check points to particles and nothing else. It is also the right “protective” stage before a carbon block, UV system, water softener, or RO unit. If the water is already particle-free and your complaint is taste, a sediment filter alone is money spent on the wrong problem.

    What a carbon filter actually does

    Do I Need a Sediment Filter, Carbon Filter, or Both?

    A carbon filter wins when the problem is chlorine, odor, and taste. Activated carbon has a huge surface area that adsorbs many compounds from water. Put plainly: it grabs the stuff that makes water smell and taste off. In municipal water, chlorine is the classic target. In some setups, catalytic carbon is used for chloramine reduction, which is a different job and usually requires a different media claim or certification.

    The upside shows up fast. Chlorine taste drops. Smell improves. Coffee and tea often taste less harsh because the disinfectant bite is gone. On an under-sink system, carbon is often the stage that makes filtered water feel worth using every day.

    But carbon is not a dirt filter. It can clog if the water carries sediment, and once it is loaded, flow falls. It also does not solve every contaminant problem. A generic carbon cartridge is not the same as a certified reduction claim for lead, cysts, PFAS, or chloramine. Those claims depend on the exact cartridge and the NSF/ANSI standard it meets. If the listing does not name the certification, I would treat the claim as marketing, not evidence, and I would consult a qualified professional before relying on it for health-related treatment.

    Carbon-only makes sense for city water that is clear but tastes like chlorine. It is also the right choice when your main goal is better drinking water at a single tap and your incoming water is already low in particles. I would not choose carbon-only for a well with visible sediment, nor for any line that regularly spits rust or sand. The cartridge would be doing the wrong job first.

    Sediment filter vs carbon filter: the practical difference

    A sediment filter is a sieve; a carbon filter is a media bed with adsorption chemistry. That is the cleanest distinction, and it decides which one should come first.

    Criteria Sediment filter Carbon filter Winner for [condition]
    Main target Sand, rust, silt, scale Chlorine, odor, many organics Choose by symptom
    Typical rating language Microns, often 1–20 micron Media type and NSF/ANSI claim Sediment if particle size matters
    What it changes first Clarity and grit Taste and smell Choose sediment for cloudy water
    Effect on chlorine taste Usually none Usually the main benefit Carbon for municipal water taste
    Clogging risk Higher in dirty water Higher if sediment is not removed first Sediment as prefilter
    Best first stage Yes, when particles are present No, unless water is already clean Sediment first in most systems
    Best for well water Often yes Sometimes, depending on taste/odor Sediment for grit; carbon if odor exists
    Best for city water Only if line scale or debris is present Very often Carbon for taste and odor
    Needs certification scrutiny Lower, though materials still matter High, because claims vary a lot Carbon claims deserve more checking

    Carbon does not replace sediment, and sediment does not replace carbon. That is the line people skip. If you have both kinds of problems, the filters do different jobs in series. The order is usually sediment first, carbon second. Not cosmetic. It protects flow and stretches cartridge life.

    I would push back on any setup that claims one cartridge can “do everything” without a clear standards reference. That is especially true in whole-house systems where flow rate matters. If a system promises too much in one stage, it often pays for it in short life, low pressure, or weak contaminant reduction.

    Do I need both filters in one system?

    You need both when your water has particles and also needs taste/odor reduction, or when a downstream filter needs protection from sediment. That is the most common real-world answer, and it is the one people most often underbuy.

    A two-stage setup is usually the sensible middle ground. Sediment ahead of carbon keeps the carbon from becoming a dirt trap. In whole-house systems, this is especially useful if the water source is a private well, a shallow municipal line, or an older building with plumbing debris. In under-sink systems, the same logic applies if the cartridge arrangement starts with a sediment prefilter and then a carbon block or catalytic carbon stage.

    A good example of why both matter is a house with clear-looking water that still stains tea and leaves fine rust in toilet tanks. The water may not look bad in a glass, but sediment in plumbing can still be present, and chlorine or chloramine can still be the reason drinking water tastes flat or sharp. In that case, carbon alone improves taste but may clog early; sediment alone improves clarity but leaves the flavor problem untouched. The 2024 EPA update on corrosion control and treatment choices still depended on the specific water chemistry, which is why symptom-based selection beats guessing.

    The trade-off is real: cost, space, and maintenance all go up. Two stages mean more housings, more cartridges, and more changeouts. There is also more pressure drop than with no filter at all, which matters in low-pressure homes. If your incoming water is already clean and you only hate the taste, a full sediment-plus-carbon stack is overkill.

    My view is plain: both is the default for uncertain water, but not for every tap. If you are guessing, the safer guess is a sediment prefilter plus carbon. If you know the water is particle-free and your only complaint is chlorine taste, carbon alone is enough.

    When to reconsider the whole choice

    Sometimes neither filter is the right answer. That happens when the water issue is not particles or taste/odor, but hardness, iron, bacteria, or a specific contaminant that needs a different technology.

    A sediment filter does not soften water. It will not stop scale from forming in a kettle or on shower glass. For hardness, you are looking at ion exchange softening or a different treatment train, and the U.S. Geological Survey notes that hardness is commonly expressed in grains per gallon or milligrams per liter as calcium carbonate. A carbon filter does not disinfect water; it is not a substitute for UV, chlorination, boiling, or a properly engineered bacteriological treatment plan. If a private well has microbial concerns, I would not pretend a carbon cartridge solves that, and the EPA’s private well guidance recommends testing and targeted treatment instead of assuming one filter fixes everything.

    Sometimes a more specific filter beats a generic one. If your water has iron in dissolved form, manganese, hydrogen sulfide, chloramine, or PFAS concerns, the exact media and certification matter more than the broad label “carbon” or “sediment.” NSF/ANSI standards are the right reference point, and the product listing should say exactly which contaminants it reduces. If it does not, assume less.

    Flow matters too. A whole-house system on a 3/4-inch line with a weak pressure reserve can feel worse after installation if the cartridge is too fine or too small. A 1-micron filter can be excellent on paper and annoying in real life if it starves fixtures. The right filter is the one your plumbing can actually support.

    My verdict: which one to choose and why

    Choose a sediment filter if your water is visibly dirty, gritty, rusty, or debris-filled, or if you need to protect equipment downstream from particles. Choose a carbon filter if your water is already clear but tastes or smells like chlorine or chemicals. Neither if your main problem is hardness, bacteria, or a contaminant that needs a different treatment standard.

    That is the decision tree I would stand behind.

    If I had to pick a default for a house with uncertain water quality, I would choose both, in that order: sediment first, carbon second. That setup handles the broadest set of common complaints and shields the more delicate stage. I would not make that choice for a single-tap taste complaint on clean municipal water, because it adds cost and maintenance without enough benefit.

    For readers comparing actual products, I would look for:
    – a clear micron rating on the sediment stage,
    – an explicit carbon type, such as activated carbon or catalytic carbon,
    – an NSF/ANSI claim that matches the contaminant you actually care about,
    – and retailers beyond one storefront, such as the brand site plus Amazon, Home Depot, Lowe’s, or Walmart, so you can compare current availability and support.

    Quick answers to the questions people ask next

    Can I put carbon before sediment? Usually no. Sediment first protects the carbon and helps preserve flow.

    Will a sediment filter improve taste? Not much unless the taste problem is caused by visible debris or iron rust particles.

    Will a carbon filter remove rust? No. It is not the right tool for particulate dirt or rust flakes.

    If I have well water, do I need both? Often yes, but only if you have both particles and taste or odor issues. A lab test or at least a clear symptom check should guide the choice.

    How often do I replace them? It depends on water quality and cartridge size, so follow the maker’s guidance and watch for pressure drop, smell returning, or visible loading rather than guessing.

  • Home Water Quality Problems — The Complete Guide

    Home Water Quality Problems — The Complete Guide

    Last updated: September 10, 2026

    Key Takeaways

    • Test both after running each for 1 minute.
    • Any nearby construction, hydrant flushing, flooding, plumbing repair, or water-heater service in the last 7 days?
    • For lead, take a first-draw sample after water has sat unused for at least 6 hours.
    • Let a glass sit for 1 to 2 minutes.

    Table of Contents

    Home Water Quality Problems — The Complete Guide

    Odd smells. Rust stains. Grit in the sink. Cloudy water in a glass. Those are the clues most people notice first, and they usually point to something specific rather than a vague “bad water” problem. So the real question is not “Is my water bad?” It is: what kind of home water quality problem is this, what can wait, and what needs testing or treatment right now? Home water quality problems — complete guide readers usually need that answer, because the issue is typically one of three things: a health concern, a nuisance, or a plumbing fault that only looks like a water issue. For municipal water, the EPA’s Consumer Confidence Reports are a solid starting point; the CDC and your state health department can help with health-related questions.

    Who this guide is for — and what I’m assuming you already have

    Homeowners, renters, and property managers are the audience here — anyone trying to make sense of drinking water, shower water, or household water from a municipal supply, a private well, or a building storage system. I’m assuming you can shut off a faucet, pull an aerator, and read a basic water report if one lands in your hands. And I’m also assuming you know the difference between “this looks strange” and “someone may be getting sick,” because those are not the same problem.

    No need to panic over every symptom. A white crust on a kettle is usually hardness, not poison. A sulfur smell after water sits for a long time can come from plumbing or the water heater. On the other hand, if a baby, pregnant person, or anyone with a weakened immune system is drinking the water, I’d be a lot less relaxed about “probably fine.” Honestly, that’s where caution beats optimism. For health-related questions, I’d call in local public health, a certified lab, or your water utility instead of guessing. The CDC and EPA both recommend testing and professional guidance when there is a possible health risk.

    This guide is not a “best filter” shopping list either. One cartridge will not fix chlorine, lead, PFAS, hardness, iron, bacteria, and sediment all at once — that math stops working fast. A $30 carbon pitcher and a $3,000 reverse osmosis system solve different problems, and either one can be the wrong pick if you do not know what is actually in the water.

    Here’s the practical line: if the issue is taste, odor, staining, scale, or cloudiness, start by spotting the pattern yourself. If it’s a boil-water advisory, a known well problem, a lead service line, or a sudden color change after plumbing work, treat it as a testing problem first and a treatment issue second. Unsure? Check with your water utility, local public health department, or a certified water professional. The EPA’s “Consumer Confidence Reports” for municipal water and your state health department’s well guidance are useful places to begin.

    What home water quality problems usually are

    Home Water Quality Problems — The Complete Guide

    Most complaints fit into a few buckets: physical, chemical, biological, or plumbing-related. That framework matters, because the fix changes completely depending on which bucket you’re dealing with. Cloudy water after the tap runs for 30 seconds is not the same as water that smells like rotten eggs after the water heater cycles. A blue-green stain in a sink points somewhere else than reddish-brown sediment in a toilet tank.

    Physical problems are the easiest ones to see. Sediment, rust flakes, cloudy water, and particles all fall in this group. They often come from aging pipes, disturbed mains, a failing water heater, or a well drawing in silt after rain. When the cloudiness clears from the bottom up in a glass after a minute or two, it may just be trapped air. Bubbles look milky and vanish. Sediment sinks. Simple, but not always.

    Chemical issues are usually invisible. Hardness, iron, manganese, chlorine, chloramine, nitrate, fluoride, lead, copper, arsenic, and PFAS may not change the look of the water at all. Hard water is not a poison problem, yet it makes soap act badly, leaves scale, and shortens appliance life. Lead is different. There is no safe level of lead exposure for children, and the source is often plumbing rather than the water coming into town. The EPA Lead and Copper Rule and local utility materials matter here, because the route into the home matters as much as the city supply itself.

    Biological problems cover bacteria, viruses, and protozoa such as Giardia and Cryptosporidium. They show up more often in private wells, after flooding, after a boil-water advisory, or when a backflow event has happened. A well can look perfect and still be unsafe. If you rely on a well, the question is not “does it taste okay?” but “what do the certified lab results say this month?” For well-water basics, see the CDC’s private well guidance and NSF’s water testing resources.

    Plumbing-related problems are the sneaky ones. A bad-anode water heater can create sulfur odor. Copper pipes can leave blue-green staining and a metallic taste if the chemistry is aggressive. Galvanized pipes can shed rust and lower pressure. Old solder, brass fittings, and flexible supply lines can add lead or metals. In those cases, the source water may be fine, and the house itself is the culprit. Classic, really.

    The mistake I see most often is treating all bad water as one issue. The EPA and CDC both stress matching the test to the likely contaminant, because that prevents buying the wrong filter, over-treating water that was fine, or brushing off a real hazard because the stain looked like “just rust.” The smart move is simple: identify the symptom pattern, then match it to the likely source.

    How do I tell what’s wrong with my water?

    Start with symptom, timing, source, and a few plain checks before spending money on treatment. That is the quickest way to narrow things down without making up a diagnosis.

    1. Check whether the problem is at one fixture or the whole house. Run cold water at the kitchen sink, bathroom sink, shower, and an outdoor spigot for 30–60 seconds. Verify whether the odor, color, or cloudiness appears everywhere or only at one tap. When it is isolated, the culprit is often a fixture, aerator, cartridge, or local branch line. When it shows up in multiple places, the issue is upstream or in the main plumbing run.
    2. Separate hot water from cold water. Test both after running each for 1 minute. Verify whether only hot water smells like sulfur or looks rusty. If only hot water is affected, suspect the water heater, anode rod, or heater sediment, not the incoming supply. If both are affected, look at source water, distribution pipes, or a whole-house issue.
    3. Use a clear glass and a white background. Fill a 12-ounce glass and hold it against white paper or a white sink. Wait 2 minutes. Verify whether the cloudiness disappears, settles, or remains. Cloudiness that clears is often air. Cloudiness that settles can be sediment. Cloudiness that persists may need testing, especially if it coincides with a boil advisory or a change in utility work.
    4. Inspect the aerator and showerhead. Unscrew the aerator and look for grit, rust, or white scale. Rinse it into a paper towel. Verify whether debris is inside the fixture. If yes, the issue may be local buildup or pipe corrosion. If the debris returns quickly after cleaning, upstream corrosion or sediment is likely.
    5. Check for staining patterns. Blue-green stains suggest copper and acidic water. Red-brown stains suggest iron or rust. Black staining can point to manganese or biofilm. Verify whether the stain appears in sinks, toilets, the tub, or only around a specific faucet. A repeatable stain pattern is more useful than a vague complaint about “dirty water.”
    6. Review your water source and recent events. Ask: municipal or well? Any nearby construction, hydrant flushing, flooding, plumbing repair, or water-heater service in the last 7 days? Verify whether the problem began suddenly after one of those events. Sudden onset after work on the system often points to stirred-up sediment or a pressure disturbance.
    7. Collect a sample the right way if you plan to test. Use a clean, lab-provided bottle if possible. For lead, take a first-draw sample after water has sat unused for at least 6 hours. For some other contaminants, you may need a flushed sample. Verify the lab instructions exactly; if you mix up first-draw and flushed samples, the result can mislead you badly.
    8. Match the symptom to the likely test. If you have odor, stain, or scale, ask for the relevant panel rather than a vague “water test.” Verify that the lab is certified for your state. If the issue is health-related, the right panel may include total coliform, E. coli, lead, nitrate, arsenic, or hardness depending on the source. A broad home strip kit can be useful for quick screening, but it is not the same as a certified lab result.

    The point of these steps is not to diagnose everything yourself. It is to avoid the classic waste: buying hardness treatment for a chlorine smell, or blaming the city for a water-heater problem. Fifteen to thirty minutes is usually enough for a first pass, and that often tells you whether the next move is a fixture cleaning, a plumber, a utility call, or a certified test.

    What the common symptoms usually mean

    Taste and smell clues help, but only if you read them carefully. A chlorine smell usually means disinfectant is present, which can be normal in municipal water. Chloramine, a combined disinfectant used by some utilities, can smell weaker than chlorine but still bother taste-sensitive people. An activated carbon filter can reduce both, though carbon has limits and needs replacement on schedule, often based on gallons or months from the manufacturer’s specification.

    Rotten egg? Sulfur. Usually hydrogen sulfide gas. In a well, it can come from groundwater chemistry or sulfur bacteria. In a home, the water heater is a frequent source, especially if the odor shows up only in hot water. That distinction matters, because a whole-house treatment system is overkill if the water heater is the problem. I would not start by buying a salt-based softener unless hardness is also present and verified.

    Metallic taste can point to copper, iron, zinc, or low pH. Acidic water can dissolve metals from pipes. If you taste metal and see blue-green staining, copper corrosion deserves attention. If the taste comes with reddish water after the tap sits unused, galvanized piping or iron sediment may be involved. That is a plumbing issue as much as a water chemistry issue.

    White spots on dishes, scale on faucets, and soap that won’t lather are classic hardness signs. Hardness is measured in grains per gallon or milligrams per liter as calcium carbonate. It is a nuisance, not a universal health threat, but it pushes people to drink less water because the taste and film are annoying. A softener or a template-assisted crystallization system can help with scale, and each has trade-offs. A softener needs salt and maintenance; a non-salt conditioner may reduce scale but does not actually remove hardness minerals.

    Cloudiness is not always contamination. Fine bubbles from dissolved air often show up after pressure changes or seasonal temperature shifts. Let a glass sit for 1 to 2 minutes. If it clears, it is likely air. If it leaves grit, that is different. If it stays hazy and coincides with illness, a boil-water advisory, or a well concern, do not shrug it off. When cloudiness is new and unexplained, call a certified lab or your water utility.

    Stains tell their own story. Rust-colored staining usually comes from iron. Black staining may be manganese or bacteria. Blue-green staining points to copper. Pink film on shower walls is usually a biofilm that grows in damp places; it is more of a cleaning issue than a water-supply diagnosis, though high humidity and low disinfectant residual can make it worse.

    The detail people miss is overlap. A sulfur odor can come from water, a drain, or a water heater. A metallic taste can come from source water, new plumbing, or stagnant water in a leaded fitting. That is why symptom-based diagnosis works only when you pair it with source and timing. Otherwise it gets slippery fast.

    When should I stop guessing and get the water tested?

    Stop guessing when the problem could affect health, when it is new and unexplained, or when the symptom does not fit a simple household cause. In those cases, testing is not optional if you want a trustworthy answer.

    Private well water with any new taste, smell, or color change: This can mean the well casing, aquifer, or nearby runoff has changed — get a certified lab test, including total coliform and E. coli at minimum, and add nitrate, arsenic, lead, or other local concerns based on your region. The CDC and state health departments recommend routine well testing and prompt follow-up for changes.

    Any household with a baby, pregnant person, or immunocompromised resident and suspected lead, nitrate, or bacterial contamination: These exposures can matter at low levels — use bottled water or an approved safe source until you have a proper result and a plan. For health-related concerns, consult your pediatrician, clinician, or local public health office.

    Blue-green staining, metallic taste, or greenish water: This can indicate copper corrosion or acidic water — test pH, copper, and lead, and have the plumbing inspected if the water sits in old pipes for hours.

    Brown water after municipal flushing, construction, or pipe work that does not clear within 24 hours: This may be sediment or corrosion in the system — call the utility and document the time, faucet, and sample appearance before assuming it is harmless.

    Rotten-egg odor only in hot water: This often points to the water heater or anode rod rather than the supply — have the heater checked before buying a whole-house treatment system. If you are not sure, consult a plumber or water treatment professional.

    Any boil-water advisory, flood event, sewer backup, or cross-connection/backflow incident: These can introduce pathogens — follow the advisory, disinfect or test as directed, and do not rely on appearance or smell to judge safety. The EPA and CDC both advise treating these as immediate safety events.

    Known lead service line, lead plumbing, or pre-1986 plumbing with a child in the home: Lead risk rises with stagnation and corrosion — use first-draw lead testing and consider immediate exposure reduction while you wait for results. If you cannot confirm the plumbing materials, consult your utility or a licensed plumber.

    Persistent odor from one faucet only after aerator cleaning and flushing: The issue may be in the faucet body, supply line, or local biofilm — if it persists, replace the fixture or have it inspected rather than treating the whole house.

    A good rule of thumb: if the problem is temporary, isolated, and clearly tied to a fixture, you can often troubleshoot it. If it is persistent, health-related, or tied to a source like a well or lead plumbing, testing comes first. A solid lab report beats a hundred guesses, and a certified professional can help interpret results when the pattern is not obvious.

    The mistakes people make with home water problems

    The biggest mistake is treating symptoms instead of causes. A filter can hide taste while leaving lead, nitrate, or bacteria untouched if it is the wrong type. That gives you false confidence. The better move is to identify the contaminant class first, then choose treatment matched to that class.

    Another common error is using a home test strip as if it were a diagnostic lab. Strips can be helpful for a quick read on hardness, chlorine, or sometimes pH, but they are crude. The downside is either overreacting to a bad color match or underreacting to a serious issue. Use a certified lab when the issue affects health or when the reading will drive a treatment decision.

    People also forget that hot water is not the same as cold water. If hot water smells bad, the water heater may be the source. Ignoring that can lead to unnecessary whole-house treatment. The better move is to isolate hot versus cold before doing anything else. A water heater flush, anode replacement, or temperature adjustment may solve the issue.

    A fourth mistake is skipping fixture cleaning. Aerators collect grit, scale, and flakes. The result is mistaking a dirty faucet for contaminated plumbing. Clean the aerator and retest after 5 to 10 minutes of flushing.

    Another error is assuming that “clear” means safe. Lead, nitrate, PFAS, and many pesticides do not change appearance. That can leave exposure untreated. Test based on source and risk, not just looks. If you are on a private well, a yearly bacteria test is a common baseline, but local geology and nearby land use may justify more. The EPA and CDC both provide testing guidance for these decisions.

    Finally, people buy a treatment system without maintenance discipline. Carbon filters saturate, softeners run out of salt, UV systems need clean sleeves and power, and reverse osmosis membranes need periodic replacement. The result is a system that quietly stops doing its job. Choose the simplest system that handles the

  • Plumbing Compatibility and Equipment — The Complete Guide

    Plumbing Compatibility and Equipment — The Complete Guide

    Last updated: September 10, 2026

    Key Takeaways

    • For potable water components, I look for NSF/ANSI 61 or the newer NSF/ANSI 372 if lead content is relevant.
    • Plumbing compatibility means getting the pipe, fitting, valve, fixture, and supply standard to match before you tighten anything.
    • Most plumbing threads are right-hand, but some appliance or specialty fittings differ.
    • Old plumbing is often patched, reduced, or adapted.

    A bad fit shows up fast: a drip, a weak stream, a part that almost seats but never quite does. Plumbing compatibility and equipment — the complete guide — is about lining up the pipe, fitting, valve, fixture, and supply standard before you put a wrench on anything. Miss that, and you can end up with leaks, poor flow, trapped parts, or a joint that looks fine until the threads, seal, or pressure rating give way. In a typical home, that kind of mismatch can burn 2 to 5 trips to the store and turn a 20-minute swap into a half-day job. Ugly.

    Who this guide is for — and what it assumes you already have

    Plumbing Compatibility and Equipment — The Complete Guide

    This guide is for a homeowner, property manager, or careful DIYer who needs to connect plumbing parts without guessing at sizes. I’m assuming you already have the fixture or equipment in hand, a tape measure, and enough access to see the existing pipe material or the threaded end you want to mate with. And I’m also assuming you can tell the difference between a water supply line, a drain, and a gas line; if not, stop there and identify the line before you buy anything.

    The topic here is plumbing compatibility and equipment, not one brand or another. In practice, that means three separate matches have to line up: the connection type, the size standard, and the service rating. A 1/2-inch fitting is not automatically interchangeable with another 1/2-inch fitting. NPT, BSPP, compression, sweat, flare, push-to-connect, and slip-joint parts all seal in different ways. A bathroom faucet supply tube, for example, may use 3/8-inch compression on the shutoff side and a 1/2-inch or 3/8-inch thread on the fixture side, while a drain trap may use a slip-joint nut and washer, not a pressure seal. Small label, big trap.

    This guide is for low-risk compatibility work on potable water, drains, and basic fixture hookups. It is not for gas piping, medical devices, or anything with welded, crimped, or concealed multi-layer piping you cannot inspect. It also is not the right starting point if you are dealing with corroded galvanized pipe, cracked cast iron, or a line that already failed under pressure. Those are repair problems, not matching problems. Different beast.

    The one big rule I want you to keep in mind is simple: threads are not measurements. I have seen too many people buy a part because the label said 1/2-inch, then discover the thread form was wrong. Start with a number alone, and you are already at risk of buying the wrong piece. A 1/2-inch label can mean pipe size, thread size, or connector family, and those are not the same thing.

    What plumbing compatibility actually means

    Plumbing compatibility means the parts can physically join, seal at the right place, and tolerate the same water conditions. That sounds obvious, but in real jobs I see people blur five separate ideas: nominal size, actual outside diameter, thread standard, seal method, and pressure or temperature rating.

    Nominal size is a label that may not directly match the measured outside diameter. For example, 1/2-inch copper tube does not measure 1/2 inch across its outside; its outside diameter is about 5/8 inch. PVC, CPVC, PEX, and metal pipe each use their own conventions. NPSM (National Pipe Straight Mechanical) threads, NPT (National Pipe Taper) threads, and BSP (British Standard Pipe) threads can all look close enough to fool you, but they are not the same. NPT seals by taper; NPSM and BSPP (British Standard Pipe Parallel) usually need a washer or O-ring to seal. Mix them, and the joint may tighten before it seals.

    The other split is between pressurized and non-pressurized connections. Supply lines and valve connections usually need pressure-rated fittings that can handle household water service, which is commonly in the 40–80 psi range in many homes, though local pressure can vary. Drain fittings do not hold the same constant pressure, but they still need the correct slope, size, and trap geometry. A 2-inch shower drain and a 1-1/4-inch lavatory trap are not interchangeable just because both move water away from a fixture.

    Equipment compatibility also includes fixtures and appliances. A dishwasher may need a 3/8-inch compression inlet, a water heater may require dielectric unions or listed flexible connectors, and a toilet fill valve may accept a 7/8-inch ballcock connection. The wrong adapter can work mechanically and still violate the fixture’s listed installation instructions. That matters because some equipment is designed to be connected only in a specific orientation or with a specific gasket. Ignore that, and the leak may not show until after the cabinet swells or the floor ring stains.

    My practical test is simple: if the connection depends on thread form, sealing surface, and rating all at once, you must identify all three before buying. If it depends on only one, the job is usually simpler. That distinction saves far more time than shopping by brand ever will.

    How do I match pipe, fitting, and fixture standards without guessing?

    Plumbing Compatibility and Equipment — The Complete Guide

    You match them by identifying the pipe material, measuring the correct dimension, checking the thread form or seal type, and confirming the service rating before purchase. That is the shortest honest answer, and the order matters.

    1. Identify the material first. Look for copper, CPVC, PVC, PEX, galvanized steel, stainless braided hose, cast iron, brass, or ABS. Verify by color, rigidity, and markings on the pipe or fitting. If the pipe is white and solvent-welded, it may be PVC or CPVC; if it is orange-tan, CPVC is common. Rust, green corrosion, cracking, or an unreadable or missing label are problem signs.
    2. Measure the outside diameter or nominal size correctly. Use a tape measure or caliper on the pipe, not the fitting label. For example, 1/2-inch copper tube is about 5/8 inch outside diameter, while 1/2-inch nominal iron pipe has a different OD. Verify that the measurement matches the standard chart for that material. A number that “almost” fits two standards is a problem sign; usually, that means you have the wrong family of parts.
    3. Identify the thread form or seal method. Check whether the connection is tapered thread, straight thread with a washer, compression, flare, slip-joint, sweat, solvent weld, or push-to-connect. NPT thread will taper and tighten progressively; compression uses a nut and ferrule; slip-joint uses a beveled washer. Verify that the mating part uses the same seal logic. Trying to force a tapered male thread into a straight-thread female port is a problem sign.
    4. Check the mating gender and hand of the connection. Confirm whether each end is male or female and whether any left-hand thread is present. Most plumbing threads are right-hand, but some appliance or specialty fittings differ. Verify that the nut advances normally when turned clockwise. A connector that backs out or cross-threads after one turn is a problem sign.
    5. Confirm the pressure, temperature, and material rating. Read the part markings or packaging for NSF/ANSI 61 on potable-water contact, ASTM standards for pipe material, or the fixture manufacturer’s listed connection. If the part is for hot water, verify its temperature rating. An unlisted flexible line where the appliance manual requires a specific type, such as a water-heater connector or a dishwasher inlet hose, is a problem sign.
    6. Dry-fit every new connection before sealing. Assemble the pieces hand-tight only, with no tape or sealant at first. Verify that the threads catch cleanly for several turns and that the alignment is straight. Wobble, binding, or engagement of fewer than about 3 full turns on a tapered thread are problem signs.
    7. Use the correct sealant only where the joint type calls for it. PTFE tape or pipe dope belongs on many tapered threaded joints, not on compression or flare seats. Slip-joint washers need the washer, not sealant on the threads. Verify the manufacturer’s instructions and the joint geometry. A joint that requires excessive force to stop seeping is a problem sign; that usually means the seal method is wrong, not under-tightened.
    8. Pressure-test or leak-check after assembly. Open water slowly, inspect for seepage, and leave the joint under pressure for at least several minutes before closing the access panel. For drains, run a sustained flow of water and inspect the trap and slip nuts. A damp ring, a drip at the underside of a nut, or a hiss at a compression ferrule is a problem sign.

    If you are buying parts for a common repair, I would rather see you use the old part as the reference than trust the box label alone. The old fitting tells you the seal type, thread style, and common failure pattern. The label often gives only a nominal size and a marketing name.

    A generic article would stop at “measure the pipe.” That is not enough. Two parts can share a size label and still fail because one seals on the thread and the other seals on a washer or gasket. Compatibility is not just fit; it is fit plus seal plus rating.

    What equipment has to match beyond the pipe itself?

    The equipment has to match the water delivery, drain geometry, mounting pattern, and service conditions of the fixture or appliance. A faucet may connect to the right supply line and still fail if the deck holes, reach, or flow restrictor arrangement do not suit the sink. A dishwasher may hook up to the inlet and still be wrong if the drain high loop, air gap, or cord-and-plug arrangement does not match the installation space.

    A toilet is a good example. The tank-to-bowl bolts, fill valve shank, supply connection, and flange height all interact. A replacement fill valve often uses a standard 7/8-inch ballcock inlet, but the supply line below may be 3/8-inch compression. The tank itself may accept a specific shank length, and the toilet bowl may require a certain flush valve design. Miss one piece, and the leak can show up at the tank, not at the visible hose.

    Water heaters are even less forgiving. The inlet and outlet may be 3/4-inch NPT, but the connector must also match dielectric requirements, local code, and the heater’s service instructions. Flexible stainless connectors come in different lengths and end styles; a too-short connector can stress the port, while a too-long one can kink or snag. Some heaters require a sediment trap or specific shutoff location. Those are not optional decorations.

    Appliances bring their own standards. A dishwasher inlet line often uses 3/8-inch compression, but the supply valve under the sink may be 1/2-inch nominal inlet by 3/8-inch outlet, and the drain hose may need a 5/8-inch or 7/8-inch barb depending on the branch tailpiece. Ice maker lines are commonly 1/4-inch tubing, usually with a compression saddle or proper shutoff, though saddle valves are a poor long-term choice because they are prone to clogging and seepage. I would treat saddle valves as a last resort, and I would still suggest checking the appliance manual and local code or asking a licensed plumber before using one.

    The real habit to build is checking the whole system, not just the visible pair of parts. A sink installation can be wrong because of cabinet depth, trap arm alignment, or supply line bend radius even when every size label seems correct. If the equipment manual names a connection style, I would treat that as part of compatibility, not a suggestion. Plumbing compatibility and equipment decisions are safest when the manual, the fitting, and the line all say the same thing.

    The plumbing compatibility checklist I use before I buy anything

    The checklist is: identify the material, confirm the standard, compare the seal type, verify the length and clearance, and match the rating to the job. If you run through those five checks, you eliminate most bad purchases before they happen.

    I start with the pipe family. Copper, PEX, CPVC, PVC, ABS, brass, stainless braided, and galvanized each tell me what kinds of adapters exist. PEX, for instance, can connect with crimp, clamp, expansion, or push-to-connect methods, but each method uses different tooling and fittings. If I see PEX-B with a crimp ring, I know I should be looking for a 3/4-inch or 1/2-inch crimp fitting and the proper ASTM F1807 or F877-compatible system parts, not a random compression adapter. Plumbing compatibility and equipment choices are easier when the system family is known first.

    Next I confirm the standard. For potable water components, I look for NSF/ANSI 61 or the newer NSF/ANSI 372 if lead content is relevant. For pipe material, ASTM standards matter: PVC and CPVC have their own ASTM specs, and PEX has others. For threaded fittings, I check whether the port is NPT, NPSM, BSPT, or BSPP. The wrong standard can feel close enough to start and still fail to seal. That is one of the most expensive little mistakes in plumbing, because it often ruins both the fitting and the female port. According to the EPA, lead in drinking water should be kept as low as possible, and NSF/ANSI 372 is the lead-content benchmark many buyers now check for potable components.

    Then I check the seal surface. A flare fitting seals on the flare, not the threads. A compression fitting seals on the ferrule. A slip-joint nut compresses a washer. Put tape on the wrong surface, and you are not improving the seal; you are hiding the mismatch. That rule matters on drains and supply lines alike.

    After that, I check clearance. A 12-inch supply tube may technically reach, but if it needs a smooth bend radius and the cabinet door rubs it, the line will fatigue. A flexible connector should not be stretched tight or compressed into a sharp S-curve. I want enough slack for service, but not so much that the hose kinks or rests against a hot surface. In a small vanity cabinet, 2 extra inches of slack can be the difference between a clean install and a stressed joint.

    Finally, I match the rating to the job. A hot-water connection needs a hose or pipe rated for that temperature. A potable-water part should be listed for drinking water contact. A drain part should fit the slope and diameter of the fixture. If the packaging does not say enough, I assume nothing.

    If you only remember one check, make it this: “What exactly seals, and what exactly is the standard?” That question catches more errors than brand names, part counts, or diameter labels ever will.

    When should I stop and use a different approach?

    Stop when the connection depends on hidden piping condition, gas service, structural access, or any joint that will be buried or encased after assembly. Those are the situations where compatibility is not the real problem; the underlying system is.

    Corroded galvanized pipe or a seized fitting: The thread may crumble or split when you try to remove it — Stop and plan for a larger repair section rather than forcing a new adapter onto weak metal.

    Cracked PVC, split CPVC, or deformed PEX: The pipe wall is no longer trustworthy — Cut back to sound material and replace the damaged segment, because a fitting cannot repair a compromised pipe wall.

    Unknown thread that will not hand-start cleanly: The standard may be wrong, cross-threaded, or damaged — Do not force it; identify the thread with a gauge or compare to the removed part, then source the correct mating piece.

    Anything involving gas service: The stakes are higher than a water leak — Stop and use a qualified gas fitter, because pipe-seal mistakes on gas lines can create an immediate safety hazard.

    Equipment instructions require a listed connector or a specific install method: The manufacturer has made the compatibility decision for you — Follow the manual, and if the required part is not available, do not improvise with generic fittings.

    The connection will be hidden behind a wall, under a slab, or inside a finished chase: A future leak becomes a demolition job — Redesign the access so the joint stays inspectable, or change the route and fittings until the joint remains serviceable.

    Drain alignment needs force to meet: The trap arm or tailpiece is misaligned — Rework the pipe length or offset, because a forced drain joint will creep, sag, or leak at the washer.

    Mixed metals are present in a wet run, such as copper to steel without a listed transition: Galvanic corrosion can eat the joint over time — Use the proper transition fitting or dielectric separation where required.

    Ignoring those stops usually does not cause instant drama. It causes slow failure. Worse, that kind of leak can sit in a cabinet or wall for weeks before anyone notices. If the job has to be perfect on the first try and cannot be inspected later, I would treat that as a reason to step back, not push forward. A licensed plumber or the equipment manufacturer’s support line is the safer call when there is no second chance.

    The mistakes people actually make, and what they cost

    The most common mistake is buying by nominal size alone. A 1/2-inch label may refer to pipe size, thread size, or connector family, and those are not interchangeable. The cost is obvious: an extra trip, a new part, and sometimes a stripped fitting. The correct alternative is to identify the pipe family and seal type before purchase.

    A second mistake is using tape or thread sealant on every connection. Compression fittings, flare fittings, and slip-joint joints do not need thread sealant on the actual sealing surface. The cost is a false sense of security, plus a joint that masks the real problem until it leaks. The correct alternative is to apply sealant only to threaded joints that require it, and only in the way the manufacturer specifies.

    A third mistake is assuming adapters solve everything. They do not. Every adapter adds another joint, another seal,

  • How to Know If Your Home Needs a Water Filter Installation

    How to Know If Your Home Needs a Water Filter Installation

    Last updated: September 10, 2026

    Key Takeaways

    • A cartridge that needs replacing every 3 to 6 months is a different ownership cost than a media tank that is backwashed automatically.
    • White crust on showerheads and kettle elements usually means hard water, which is calcium and magnesium scale.
    • That distinction changes cost, pressure loss, and how much space the system needs.
    • If the quote is vague, the final bill is usually where the surprise shows up.

    Table of Contents

    How to Know If Your Home Needs a Water Filter Installation

    Brown water is a hard stop. So is fuel smell. Start with the water itself: taste, odor, stains, scale, and test results tell you more than a glossy box on a shelf. If you are trying to figure out how to know if your home needs water filter installation, I would treat that as a practical decision, not a guessing contest — look at the water, the plumbing, and the local source before you spend money, and consult a licensed water-treatment professional if you are unsure. This article applies to homeowners and renters with permission to modify plumbing, and it assumes you already know the difference between a faucet filter, a point-of-use under-sink unit, and a whole-house system. If your water is suddenly brown, smells like fuel, or you suspect contamination from lead, a broken treatment plant, or a plumbing failure, stop using that water for drinking and call your local utility or a licensed water-treatment contractor right away. The U.S. EPA’s private well guidance and local water utility reports are good starting points for how to know if your home needs water filter installation.

    What signs mean your home needs a water filter?

    Taste, smell, staining, scale, and test results are the real clues. Not the brand name. A home usually needs filtration when water causes a noticeable nuisance or when a specific contaminant shows up in a test. If you are trying to decide how to know if your home needs water filter installation, I would not buy a system just because “city water should be fine.” Municipal water can meet basic safety rules and still carry chlorine, sediment from old mains, iron, manganese, or hardness that makes dishes spotty and fixtures grimy. Private well water has a different risk profile and usually deserves more careful testing.

    Start with what you can see and smell. Rotten-egg odor often points to hydrogen sulfide, a gas that can occur in wells and some plumbing systems. A metallic taste can signal iron, copper, or low pH interacting with pipes. White crust on showerheads and kettle elements usually means hard water, which is calcium and magnesium scale. Rust-colored streaks or a reddish tint often point to iron. Cloudy water that clears after a few seconds may be air, but persistent cloudiness can mean sediment. Strange, but true: water can look innocent and still be the problem.

    Then look for context. If your neighborhood has aging service lines, if your home has galvanized plumbing, if you live on a well, or if you recently had plumbing work or a main break nearby, I would raise the odds that filtration or treatment is needed, and I would consult a licensed plumber or water-treatment professional before making a purchase. In older homes, the question is not only “Is the water safe?” but also “Is the water aggressive enough to corrode pipes or carry rust into fixtures?”

    Do not mistake a fridge filter or an under-sink carbon cartridge for a whole-home solution. Those are point-of-use devices. If your laundry, showers, and appliances all show the same problem, the issue may sit upstream of the kitchen tap. The EPA and CDC both note that different treatment devices address different contaminants, so matching the device to the symptom matters.

    How do I tell whether a filter will solve the problem?

    How to Know If Your Home Needs a Water Filter Installation

    A filter helps when the problem is the thing it is designed to remove; it does not help when the issue is hardness, corrosion, bacteria, or dissolved chemicals that need a different treatment. That is the first fork in the road. A sediment filter traps particles. Activated carbon reduces chlorine taste and odor and can help with some organic compounds. A water softener removes hardness by ion exchange, which is not filtration in the usual sense. An iron filter, oxidation system, reverse osmosis unit, UV disinfection system, and whole-house carbon tank each solve different problems.

    The fastest way to sort this out is often a water test, but not always the only step. For municipal water, ask your utility for its Consumer Confidence Report, then compare it with what you see at home. For wells, a basic lab panel should include bacteria, nitrates, hardness, pH, iron, manganese, and any local concern such as arsenic or uranium if those are known in your area. If you are worried about lead, ask for a lead-specific test. A home test strip can be a quick clue, but it is not the final word for health-related decisions. In the U.S., the EPA explains private well testing and common contaminants, and state labs often give sample kits with instructions.

    I would use this rule: if one symptom points to one category, choose a targeted system; if several symptoms overlap, start with testing before any installation. For example, chlorine smell plus sediment after a main break suggests a sediment prefilter and carbon may be enough. Hard water plus orange stains and low flow in fixtures suggests a softener may be the first fix, possibly paired with sediment filtration. Cloudy water plus bacteria in a well usually means treatment beyond a simple carbon cartridge, and a licensed professional should confirm the right approach. A filter that does not match the contaminant wastes cartridge life and money. That math stops working fast.

    What should I check before I call for installation?

    You should check the water source, the plumbing layout, the contaminant type, and the flow rate before you book anyone. I would not ask for a quote until I knew whether the job is point-of-use, point-of-entry, or both. Point-of-use means one faucet or one appliance. Point-of-entry means the whole home at the main line. That split changes cost, pressure loss, and how much space the system needs. According to the EPA, whole-house and point-of-use systems solve different problems, so the installation choice matters.

    First, note the supply type: city water or private well. That single detail changes the likely contaminant list. Well owners usually need a pump, pressure tank, shutoff valves, and enough electrical access for certain systems, especially UV or iron treatment. City-water homes often need better sediment control, chlorine reduction, or lead mitigation at specific taps.

    Second, check the main line location and available space. A whole-house unit needs room near the point where water enters the home, usually with enough clearance for a tank, bypass valves, and service access. If the main is in a crawlspace or tiny utility closet, installation can take longer and cost more. I would expect a straightforward retrofit to take a few hours; a cramped or older plumbing setup can take most of a day. In many cases, a plumber can tell you in 10 to 15 minutes whether the location is workable.

    Third, get the numbers that matter: static pressure, flow, and hardness if scale is part of the complaint. Static pressure is the pressure with no water running. If pressure is already low, adding a filter with a large pressure drop can make showers and appliances worse. A contractor should be able to explain the expected pressure loss across the system and whether a 20-inch prefilter, a carbon tank, or a cartridge housing makes more sense. A 10-psi drop can be noticeable in homes that already start near the low end.

    Fourth, ask what maintenance looks like. A cartridge that needs replacing every 3 to 6 months is a different ownership cost than a media tank that is backwashed automatically. The cheapest system to buy can be the most expensive to live with if cartridges are hard to find or the filters foul quickly. The CDC and EPA both recommend planning for maintenance before installation.

    How do I know if the installation is worth the cost?

    It is worth it when the problem is repeatable, measurable, and tied to a use case you care about. The purchase price is only part of the cost. Installation prices vary with the system type, plumbing access, and whether the job needs shutoff upgrades, new bypass valves, electrical work, or drain connections. A simple under-sink filter usually costs less to install than a whole-house filter or softener, but a whole-home system may save money if every showerhead, appliance, and faucet is affected. I am avoiding hard price claims here because local labor and equipment prices swing too much for a single national number to be honest.

    Think in terms of avoided damage and daily friction. Scale shortens the life of heaters and fixture cartridges. Sediment can clog aerators and washer screens. Chlorine taste can make people avoid drinking tap water and push them toward bottled water. A system pays off faster when the home has multiple points of the same complaint. It pays off slowly when the issue is minor and limited to one kitchen faucet. EPA guidance on water efficiency and fixture maintenance supports that same logic.

    Ask for a written scope before you agree to work. A good quote should say whether the job includes a pressure-reducing valve adjustment, bypass loop, new shutoffs, drain line routing, startup flushing, and filter media size or cartridge type. It should also say what happens if the plumber finds corroded pipe or a nonstandard main valve. If the quote is vague, the final bill is usually where the surprise shows up. A clear scope is especially useful on jobs that take 2 to 6 hours rather than 20 minutes.

    What are the common mistakes people make?

    The biggest mistake is treating every water problem as a filter problem. That leads to the wrong equipment and a complaint that never gets fixed. Hard water does not go away with carbon. Bacteria do not go away with a sediment cartridge. Lead mitigation is not the same as taste-and-odor reduction. The better path is testing first, then matching the treatment to the contaminant. The EPA and CDC both publish contaminant-specific guidance for this reason.

    A second mistake is installing a system with too little capacity. A small cartridge housing on a whole-house line may clog fast, cut pressure, and create more maintenance than the homeowner expected. The better alternative is to size for peak flow and actual water use, not just the first month of operation. A typical home can see peak demand in the morning and evening, so the system has to handle those minutes, not just the average day. Small box, big headache.

    A third mistake is ignoring pressure loss. Every filter creates some resistance. If your home already has weak pressure, a dense filter or undersized housing can make showers miserable. The fix is to check the system’s rated flow and pressure drop and choose a lower-restriction layout if needed.

    A fourth mistake is skipping maintenance. Carbon loses effectiveness, sediment filters plug, and UV lamps have a service life measured in months, not forever. If you will not change cartridges on schedule, choose a simpler system or one with longer service intervals. Otherwise the home ends up with a dead filter that still looks installed. Many UV lamps, for example, are replaced on a 12-month schedule.

    A fifth mistake is putting in a whole-house system when the issue is only one tap. That increases cost and complexity without much benefit. If the concern is drinking water at the kitchen sink, a point-of-use reverse osmosis unit or certified faucet filter may be the smarter move.

    When should I stop and choose a different approach?

    You should stop and change course when the symptom points to a safety issue, a plumbing defect, or a treatment need outside basic filtration. In those cases, a filter is the wrong first move.

    Sudden brown, black, or oily water: This can mean main-line disturbance, corrosion, or contamination — stop using the water for drinking and cooking, contact the utility or a licensed plumber, and do not assume a filter will solve it.

    Rotten-egg smell that gets stronger at hot taps: This may involve water heater bacteria, anode-rod reaction, or sulfur in the source — have the heater and source water evaluated before buying a filter.

    Lead concerns in an older home: This is a health issue, not a taste issue — use a lead-specific test and choose treatment certified for lead reduction; if you cannot verify that, use another safe water source until you can.

    Well water with bacteria or nitrate concerns: A sediment or carbon filter alone is not enough — ask for lab testing and appropriate disinfection or treatment such as UV or reverse osmosis, depending on the result, and consult a water-treatment professional.

    Very low water pressure already in the house: A restrictive filter may make showers and appliances worse — fix the pressure problem first or choose a lower-pressure-drop system.

    No easy access to the main line or a damaged valve setup: The installation may turn into a plumbing repair job — have the plumbing corrected before the filter goes in.

    What does a good installation look like, and how long does it take?

    A good installation is neat, serviceable, and matched to the water problem. I would expect labeled shutoffs, a bypass valve on whole-house systems, leak-free fittings, and enough room to change cartridges without dismantling half the cabinet. On an under-sink setup, the tubing should be secured, the drain connection should be clean, and the faucet should not wobble. On a whole-house system, the main line should be accessible, the unit should be level, and the installer should flush the system until fines and carbon dust are gone.

    The timeline depends on scope. A simple point-of-use installation can take less than a day. A whole-house filter, softener, or multi-stage setup can take several hours, especially if the contractor needs to add shutoffs, reroute pipe, or install a drain. If the home has galvanized pipe, cramped access, or a badly placed main shutoff, the job can stretch longer because the plumbing has to be made serviceable first. In that case, the installation is really two jobs: plumbing prep and filter setup.

    A good result has a clear before-and-after in the problem you were trying to fix. The chlorine smell drops, the sediment clears, the scale slows down, or the test result changes in the right direction. If the water still tastes wrong or the same stains return within a short time, the system is either undersized, the wrong type, or installed in the wrong place. That is not “normal settling in”; it is a sign the diagnosis was off.

    I would also ask for the model or media specification, not just “a filter.” Terms matter. Activated carbon, pleated sediment, ion exchange, reverse osmosis, and UV each do different work. If the installer cannot explain which contaminant the system targets, I would not sign off yet.

    Which water problems need a different solution than a filter?

    Hardness, corrosion, bacteria, and some dissolved contaminants need treatment that may sit beside filtration, not inside it. Hard water is usually handled by a softener, not a filter. Corrosion can require pipe repair, pH correction, or material changes. Bacteria in a well may require UV disinfection, chlorination, or well service. Some dissolved contaminants, such as nitrate, arsenic, or fluoride, may need reverse osmosis or another certified treatment stage at the tap. The EPA’s drinking-water resources separate these treatment paths for a reason.

    This is where local conditions matter. Well depth, nearby geology, old service lines, and municipal treatment practices all affect the answer. A home on granite-rich ground may fight different mineral issues than a home on clay or limestone. A city with chloramine disinfection creates a different odor and carbon demand than one using free chlorine. That is why I would never choose a system solely by a neighbor’s recommendation.

    If you want a clean decision, keep the question narrow: what is in the water, where is the problem showing up, and what does each treatment remove? Once those three answers line up, the right installation becomes much easier to justify. That is the practical core of how to know if your home needs water filter installation.

    FAQ

    Can I tell if I need a water filter without a lab test?

    Yes, but only for obvious nuisance problems like chlorine taste, sediment, rust, or scale. For health-related concerns such as lead, nitrate, or bacteria, I would not rely on appearance or taste alone. The EPA recommends lab testing for those concerns.

    Is a whole-house filter always better than a faucet filter?

    No. A whole-house system helps when the whole home has the same issue, but it costs more and can add pressure loss. If the problem is only drinking water at one sink, a point-of-use system is often the better fit.

    How often do filters need changing?

    It depends on the system and the water quality. A cartridge might need replacement every 3 to 6 months, while some larger media tanks are serviced much less often. The manufacturer’s schedule matters.

  • Common Water Filter Installation Mistakes That Cause Leaks

    Common Water Filter Installation Mistakes That Cause Leaks

    Last updated: September 10, 2026

    Key Takeaways

    • Wipe each joint dry with a paper towel and watch for fresh moisture for at least 5 minutes.
    • For a straightforward under-sink cartridge swap, a careful person can often finish in 30 to 90 minutes.
    • A typical point-of-use water filter install often takes 30 to 90 minutes, depending on the fittings, access, and whether any old parts need replacing.
    • A $30 filter can leak for the same reason a $300 one does: a tiny gap or twisted seal.

    Leaks after a water filter install usually trace back to a short list of avoidable missteps: the wrong fitting, a missed seal, a bad cut on the tubing, or over-tightening a plastic housing. Countertop units, under-sink cartridge systems, reverse osmosis setups, and refrigerator filter lines all tend to fail in the same few ways. Good news, though: most of these leaks can be pinned down in under an hour if you know where to look.

    Who this applies to, and what I assume you already have

    Common Water Filter Installation Mistakes That Cause Leaks

    This is for someone installing a point-of-use water filter at a sink, fridge, or small appliance — not a whole-house system tied into a main line. I’m assuming you already have the filter kit, the shutoff valve closed, basic hand tools, and the ability to tell a compression fitting from a push-fit fitting. I’m also assuming you know which way water is supposed to flow through the unit, because a backward install can cause immediate dripping or a pressure lock that makes fittings weep.

    Whole-house work is a different beast. So are damaged copper lines, corroded shutoff valves, and jobs that need soldering. A badly installed cartridge housing under a sink can flood a cabinet; a bad tee on a supply line can do even more damage. At that point, the question stops being “which washer did I miss?” and becomes “is the plumbing itself sound enough to modify?”

    Most leak-causing mistakes are not mysterious. They cluster around a handful of details: tubing cut square, O-ring seated, thread type matched, sealant used only where it belongs, and pressure restored slowly. A lot of readers blame the filter brand when the real issue is the install method. Honestly, that happens a lot. A $30 filter can leak for the same reason a $300 one does: a tiny gap or twisted seal.

    If you are trying to decide whether to call someone, I would draw the line at anything involving brittle plastic housings, hidden leaks behind finished walls, or supply lines that have already been patched once. That kind of “almost fixed” plumbing is where a minor drip turns into a cabinet replacement.

    What usually leaks first

    The first drip often shows up at the connection you touched most recently, but that is not always the real source. Water runs along tubing, drops off the lowest edge, and makes the wrong fitting look guilty. I check four spots first: the inlet fitting, the outlet fitting, the filter head-to-cartridge seal, and any threaded adapter that was added to bridge two different connection types.

    Names matter here. An O-ring is the round rubber seal inside many filter housings. A compression fitting seals when a ferrule, sometimes called an olive, squeezes onto tubing. A push-fit fitting seals when the tube is cut clean and seated past the internal grab ring. A male NPT thread, common on many adapters, seals on tapered threads and usually needs thread sealant or PTFE tape; a compression joint does not. Mix those up, and you get a leak. Simple as that.

    The usual failure mode is straightforward: the installer assumes “tight enough” means the same thing for every fitting. It doesn’t. Plastic housings want snug hand force and maybe a quarter turn with the supplied wrench, not brute force. Compression nuts need firm resistance but should not be cranked until the tube bows. Push-fit ends need a clean 90-degree cut, not a crushed end from dull cutters.

    Pressure is the other trap. If a home sits at the high end of residential pressure, a marginal joint can seep even when it looks fine during the first few minutes. Many filter systems are happiest in typical residential pressure ranges, often around 40 to 60 psi, but the safe operating range is the one printed by the manufacturer. If the housing or line is stressed beyond that, no amount of tape will fix it. The International Association of Plumbing and Mechanical Officials notes that water pressure above typical residential ranges can create performance and leak issues, and EPA guidance also recommends checking for excessive pressure before assuming a fixture problem.
    See the EPA’s WaterSense leak guidance and IAPMO resources on plumbing system pressure.

    How to install it without creating a leak

    Common Water Filter Installation Mistakes That Cause Leaks

    You dodge most leaks by treating the install like a sequence, not a single “hook it up” step. Here is the method I would follow for a standard under-sink or point-of-use filter with flexible tubing and push-fit or compression connections, with the manufacturer’s instructions always taking priority:

    1. Shut off the supply and relieve pressure. Close the cold-water stop valve fully, then open the faucet for 10 to 20 seconds until flow slows to a drip. Verify: the line is no longer pressurized. Problem sign: water keeps forcing out of the tube or valve after shutoff, which points to a bad stop valve or trapped pressure upstream.
    2. Identify every fitting type before assembly. Match push-fit to smooth tubing, compression to the correct outside diameter, and NPT threads only where the adapter calls for them. Common tubing sizes are 1/4 inch and 3/8 inch. Verify: the labeled size on the tubing matches the port. Problem sign: a tube that wiggles in the fitting or threads that only catch on one or two turns.
    3. Cut tubing square with a sharp cutter. Make a clean 90-degree cut, not a diagonal bite or crushed end. Trim at least 1/2 inch back if the end is scratched or oval. Verify: the cut face is flat and round. Problem sign: visible gouges, a ridge, or a flattened edge that will not seat fully.
    4. Seat push-fit tubing fully. Push the tube in until it stops, then pull back lightly to confirm the internal grab ring has engaged. On many fittings, that means the tube goes in about 5/8 inch to 3/4 inch, but follow the fitting’s own insertion mark if it has one. Verify: the tube will not back out when tugged. Problem sign: the tube can slide out or only part of the end enters the collar.
    5. Prep O-rings and housings. Inspect the O-ring for cuts, flattening, or grit; wipe it clean and seat it evenly in the groove. If the manufacturer allows it, apply a thin film of food-safe silicone grease, not pipe dope. Verify: the O-ring sits flat with no twist. Problem sign: a pinched edge, dry crack, or housing that closes unevenly.
    6. Use thread sealant only on threaded pipe joints. Wrap PTFE tape 2 to 3 turns clockwise on male threads, or use a compatible thread sealant approved for potable water. Keep sealant off O-rings and compression ferrules. Verify: threads hand-start smoothly for several turns. Problem sign: cross-threading, white tape clumps, or a joint that binds immediately.
    7. Tighten with restraint. For plastic housings, hand-tighten and then use the supplied wrench only to the manufacturer’s mark or about a quarter turn. For compression nuts, tighten until resistance increases, then stop and test before adding more. Verify: no visible gap at the housing seam and no tube distortion at the compression fitting. Problem sign: cracked plastic, a bent tube, or a nut that needs repeated force to keep sealing.
    8. Restore pressure slowly and inspect in stages. Open the stop valve half a turn first, check for 30 to 60 seconds, then open it fully. Wipe each joint dry with a paper towel and watch for fresh moisture for at least 5 minutes. Verify: the towel stays dry and no bead forms. Problem sign: a slow reappearing sheen, which often means the seal is being forced out by pressure.

    This sequence works because it separates the usual failure points before the system is under full pressure. Catch a leak in step 8, and it’s a quick fix. Miss it until the cabinet fills, and now you’re in insurance-claim territory. For a basic point-of-use water filter, the sequence also gives you a clean way to compare your work with the installation steps in the manufacturer’s manual and a plumbing source such as the EPA’s WaterSense guidance.

    What mistakes people actually make, and what each one costs

    Wrong sealant, wrong place. That is the top one. PTFE tape belongs on tapered threaded joints, not on O-rings or compression fittings. Wrap tape around a compression ferrule, and the ferrule may not bite correctly; the joint then drips later. The correct alternative is to seal only threaded pipe threads and leave compression surfaces clean.

    Over-tightening plastic housings is another classic. People assume “tighter” means “safer,” but many filter bowls and heads are designed to seal with modest force. Cranking harder can deform the O-ring, split the housing lip, or make the next cartridge change a pain. The correct alternative is hand-tight plus the manufacturer’s specified fraction of a turn, not muscle.

    A third mistake is using dull side cutters or household scissors on tubing. The end looks close enough, but the oval or crushed edge leaves a tiny gap inside a push-fit connector. That gap becomes a drip under pressure. The right move is a dedicated tubing cutter that leaves a square edge, especially on 1/4-inch polyethylene tubing.

    Push-fit fittings bring their own trouble. If the tube is not fully seated, it may hold during the first minute and fail later when pressure cycles. The correct alternative is to push until it stops, then confirm with a light pull. On fittings with a release collar, you should also see the tube pass the depth mark.

    Reusing damaged O-rings is another one. A flattened seal can look usable and still leak the moment the bowl is pressurized. That mistake often costs time, wasted cartridges, and a wet cabinet bottom. The right alternative is to inspect the O-ring every time you open the housing and replace it if there is any cut, twist, or hardening.

    The last problem is rushing the pressure test. A dry towel for 20 seconds does not prove much. Small leaks often show up only after the line settles and the housing warms or cools. I’d keep an eye on the joints for 5 to 10 minutes and then check again after the first full draw of water. That slower pace feels fussy, but it saves headaches.

    When should I stop and call someone?

    Stop when the leak points to a deeper plumbing problem, not a filter-install problem. Here are the situations where I would not keep tightening and hoping:

    The shutoff valve will not fully stop flow: that means the supply is still live or the valve seat is failing — stop, avoid opening fittings, and get the line isolated before continuing.

    The plastic housing is cracked or shows white stress marks: that means the body has been damaged and may fail under pressure — replace the part, and if the crack is at the head or manifold, have the setup evaluated before reuse.

    The tubing end is scarred, oval, or repeatedly pops out of a push-fit connector: that means the tube is the wrong size or has been damaged by previous cuts — cut back to clean tubing or replace the line.

    The leak is behind a wall, under a floor, or inside a cabinet base you cannot fully inspect: that means water may be spreading where you cannot see it — stop and have the line traced and repaired before restoring normal service.

    The system needs a saddle valve, soldered tee, or corroded adapter to connect: that means the install is no longer a simple filter hookup — do not improvise with mismatched parts, because the joint will likely seep.

    Water pressure feels unusually strong, or the filter housing hammers when the faucet closes: that means pressure or water hammer may be stressing the fittings — check pressure regulation and line support before assuming the filter itself is the issue.

    For a straightforward under-sink cartridge swap, a careful person can often finish in 30 to 90 minutes. Once the work starts involving old metal pipe, fragile plastic, or hidden leaks, the risk shifts from nuisance drip to structural damage.

    What changes in older homes, fridges, and high-pressure areas?

    Older homes and refrigerator lines need more caution because the materials are less forgiving. In a house with old copper, brittle plastic, or corroded compression stops, the fitting that looks normal may not seal well after one disturbance. Refrigerator water lines often use 1/4-inch tubing and compact push-fit connectors, which are sensitive to a sloppy cut. A tiny nick that would survive at a sink can drip at the fridge because the line is longer, thinner, and moved more often.

    High-pressure neighborhoods are another special case. If the static pressure is above the manufacturer’s recommended range, even a correct installation can seep at the first weak point. That is where a pressure-reducing valve, usually set in the residential range around 40 to 60 psi, matters more than another wrap of tape. If you do not know the pressure, a basic gauge that screws onto a hose bib is cheaper than guessing. The EPA recommends checking home water use and pressure-related symptoms before assuming the filter is at fault, and many plumbing manufacturers publish the same advice.

    Very hard water also changes the picture. Mineral scale can hide a drip until the fitting is disturbed, then the dried crust breaks away and the leak shows up again. On cartridge housings, scale can make the O-ring groove gritty enough that the bowl never seats cleanly. In that case, wipe the sealing surfaces carefully and inspect for pitting before reassembly.

    Reverse osmosis systems are their own category because they add more fittings, more tubing runs, and a storage tank connection. There are simply more places to make a mistake. If the leak is at the drain saddle, the fix is not “tighten harder”; it is checking whether the gasket is centered and the hole size is correct. A slightly misaligned drain saddle can seep constantly. For RO systems, the EPA’s drinking water and water filter guidance is a useful reference point, and the manufacturer’s diagram matters even more.

    If you are on a well system, pressure cycling can expose marginal joints faster than a city supply. Short, repeated starts from the pump can make a small leak appear and disappear, which is a good reason to test the system through several cycles before declaring it fixed.

    How long should a proper install take, and what does a good one look like?

    A proper point-of-use water filter install usually takes 30 to 90 minutes, depending on the fittings, access, and whether any old parts need replacing. A simple cartridge swap may take less time, while a first-time install with new tubing, adapters, or a cramped cabinet can take longer.

    Speed is not the main thing. The finished result is. The filter should sit square, the tubing should route without kinks, and the joints should stay dry after the first pressurization and again after a few minutes of use. If you are still smelling sealant, seeing white PTFE tape strands, or finding that one connection needs repeated tightening, the job is not done yet. Then check the manufacturer’s instructions, review the fitting type, and compare the setup with a plumbing source such as the EPA’s WaterSense page or the CDC’s drinking water guidance.

    A finished installation is also quiet. It should not hiss, knock, or pulse when the faucet opens and closes. If it does, the leak may be coming with pressure imbalance or a loose line clip. That is the moment when a fresh pair of eyes, or a plumber, can be cheaper than another round of trial and error.