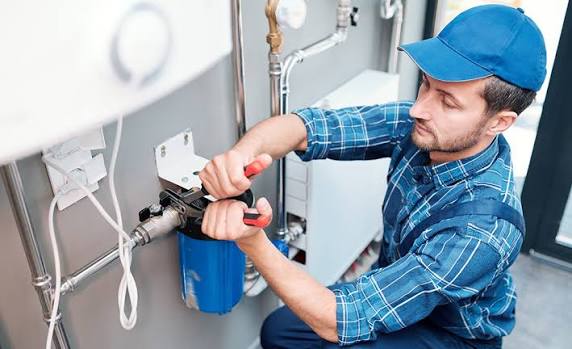
Blog

  • Water Filtration Installation Basics — The Complete Guide

    Water Filtration Installation Basics — The Complete Guide

    Last updated: September 10, 2026

    Key Takeaways

    • For an under-sink unit, measure cabinet width, depth, and height, plus 2 to 4 inches of clearance for cartridge removal or tank access.
    • Wipe every fitting dry, pressurize the line, then inspect again after the system has run for 5 to 10 minutes.
    • A simple under-sink cartridge install may take about 1 to 2 hours in a clean cabinet with existing shutoffs.
    • Under-sink systems often connect to a cold-water branch with a dedicated faucet.

    Cleaner water at the kitchen sink is not a mystery, but the install can still go sideways fast. One crooked fitting, one missed clearance, and the whole thing turns fussy.

    This water filtration installation basics — complete guide answers the real question: which setup fits your plumbing, your water source, and how much maintenance you can tolerate? I’ll say it plainly. A lot of good equipment gets undermined by a bad layout, the wrong bypass, or a sloppy connection.

    Who this applies to, and what you need before you start
    Water Filtration Installation Basics — The Complete Guide

    Homeowners, landlords, and property managers are the main audience here. You already know you want a filtration system installed; now you need to decide how the job should be done. I’m assuming you know your basic water source — municipal or private well — and whether you want a point-of-use system under one sink or a point-of-entry system for the whole house. If you do not know that yet, pause. Figure out the goal first.

    Why? Because the installation changes a lot between a single faucet cartridge and a whole-house tank or multi-stage setup. No two paths look the same.

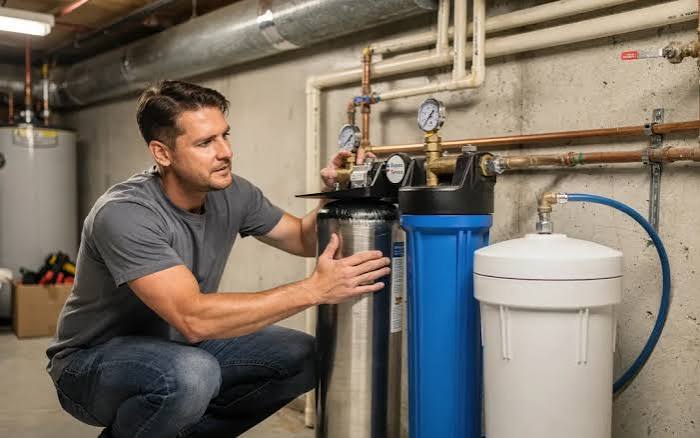
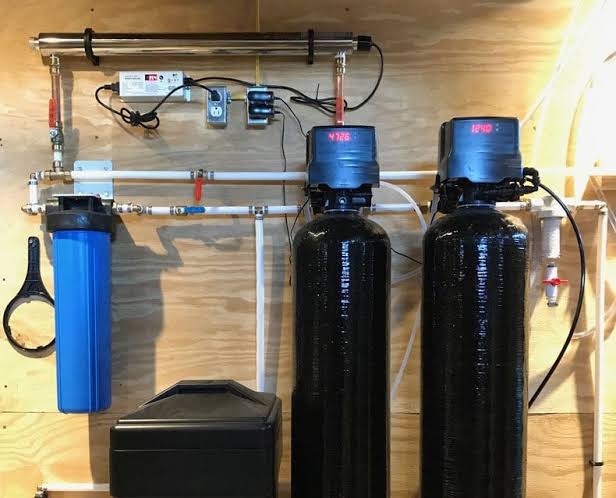
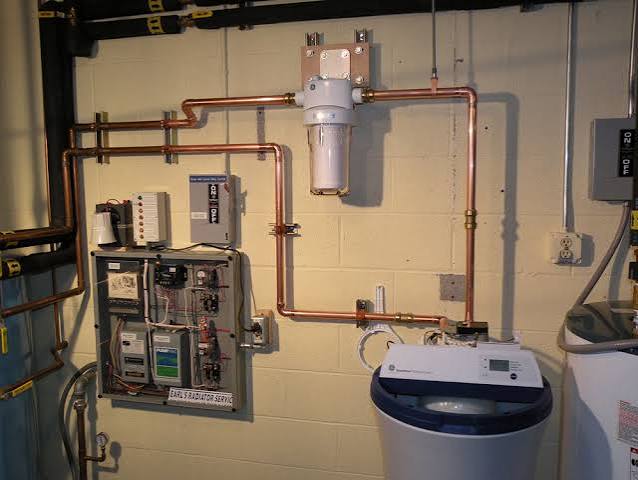
    A whole-house filter usually sits on the main water line after the shutoff and pressure tank, if there is one, and before the distribution branches. Under-sink systems often connect to a cold-water branch with a dedicated faucet. Reverse osmosis, or RO, systems also need a drain connection and a place for the storage tank. That matters because plumbing, cabinet space, drain access, and water pressure all decide what is realistic.

    Not every job is a DIY job. If your home has galvanized pipe, corroded shutoffs, hidden leaks, very low pressure, a private well with unknown water quality, or a required plumbing permit in your area, I would treat that as a reason to consult a qualified plumber or water-treatment installer. The same goes for any installation that needs soldering near finished surfaces, cutting into a slab-adjacent main line, or adding a drain line where one does not already exist. A bad install can mean leaks, pressure loss, or a system that simply does not deliver what the spec sheet promised. Ugly, but true.

    Match the filter type to the water problem. Make sure the flow direction and size are right. Leave room for servicing. Then verify the installation with a pressure and leak check before you put the system into use. Industry standards such as NSF/ANSI 42, 53, 58, and 61 are worth knowing because they tell you what a product is designed to reduce or how it is intended to contact drinking water. If a system claims more than it can be installed to do, the trouble usually shows up right there in the plumbing.

    What kind of water filtration installation do you actually need?

    You need the installation type to fit the job, not the other way around. A kitchen-only taste-and-odor issue usually points to an under-sink carbon filter or an RO system with a dedicated faucet. Sediment, rust, and scale in the whole house usually point to a larger point-of-entry system. If the water is microbiologically unsafe, the filter is only one piece of the answer, and I would consult a water professional or local health authority so the installation is planned around disinfection or a properly certified treatment train. CDC guidance for private wells and drinking water treatment makes the same point: testing and source-specific treatment matter before relying on a filter alone.

    The main installation categories are:

    • Point-of-use (POU): one tap or one appliance. Common in kitchens and wet bars.
    • Point-of-entry (POE): the whole house, usually installed on the main line.
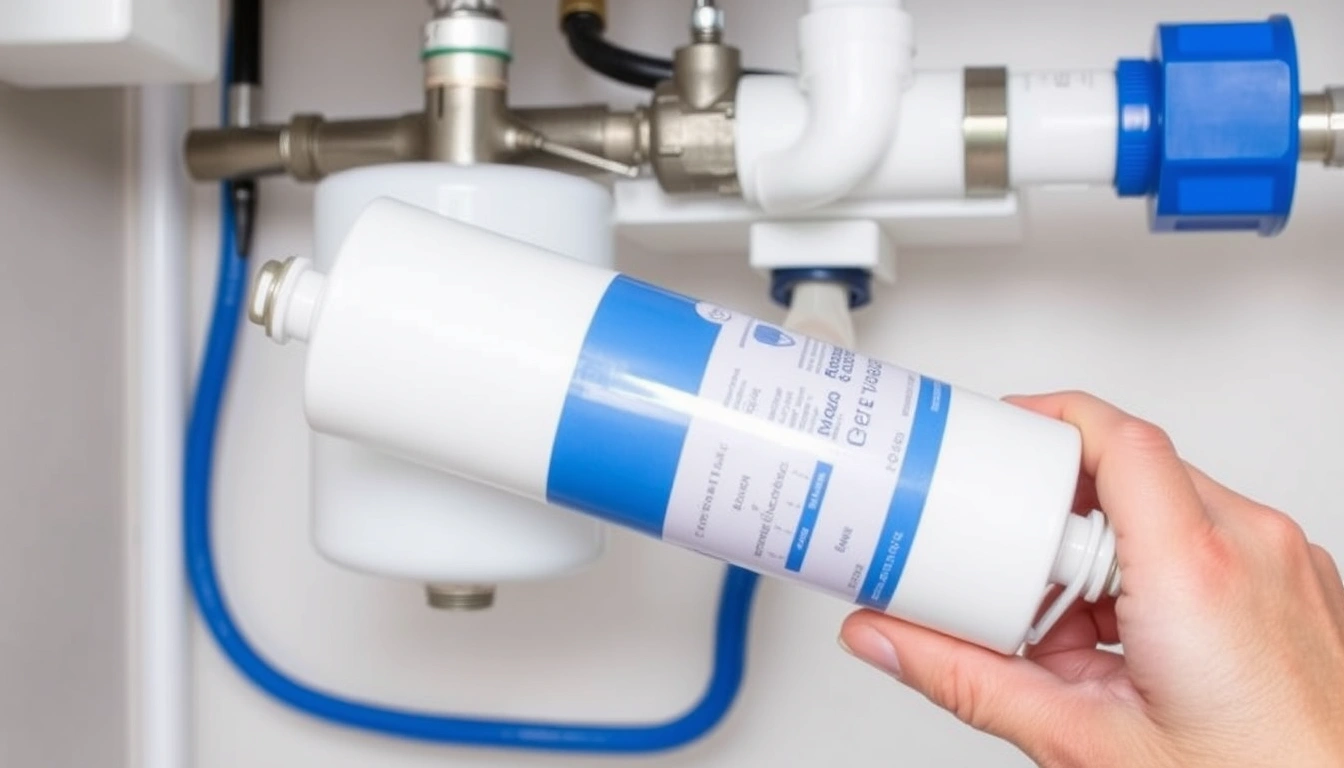
    • Under-sink cartridge systems: compact, easy to service, usually 1/4-inch or 3/8-inch tubing.
    • Reverse osmosis systems: more parts, a drain connection, and usually a storage tank.
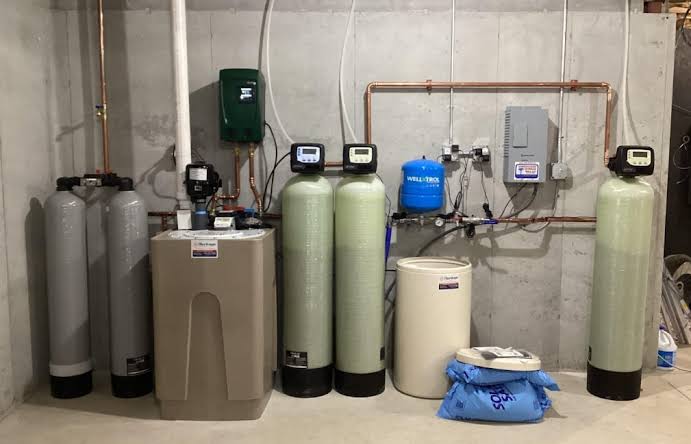
    • Whole-house sediment or carbon tanks: larger flow rates, more mounting and bypass hardware.

    Here’s the bit generic articles miss: water problems pile up. Sediment can clog carbon. Iron can foul cartridges. Hardness can shorten the life of a carbon-only setup if scale is the actual culprit. A filter that is perfect for chlorine reduction in city water may be a poor fit for a well with iron, manganese, or bacteria concerns. If the local water report shows chlorine, chloramine, turbidity, or lead concerns, I would have a qualified installer or treatment specialist confirm the right system before the install goes forward. Chloramine, for example, often needs a different carbon approach than free chlorine. EPA’s drinking water pages and consumer guidance are a good place to verify those source-specific concerns.

    A good installer starts with the water report or test results and then checks the flow demand. A kitchen faucet does not need the same gallons-per-minute, or gpm, as a whole-house shower line. Many whole-house systems are selected based on 7 to 10 gpm home demand, but the exact sizing depends on fixture count and pressure. Too small, and pressure drops. Too large but badly placed? Then service access gets awkward, and nobody wants to maintain it.

    Cost depends on the category. A simple under-sink installation may be a few hundred dollars for labor and parts if the plumbing is straightforward, while a whole-house system can run into the low thousands once the unit, bypass, fittings, drain work, and labor are included. A common under-sink RO setup is often quoted in the roughly $300 to $900 range for equipment and professional installation, while a whole-house install can exceed $1,500 to $3,000 depending on access and system size. The biggest cost drivers are not fancy features; they are access, pipe material, and whether the installer has to alter the main line or add drainage.

    How do you install a water filter without creating leaks or pressure problems?
    Water Filtration Installation Basics — The Complete Guide

    Install it by matching the plumbing layout to the system’s required flow, connection size, and service clearance, then checking every joint under pressure before the system goes live. Simple enough. The order still matters. I would not start cutting pipe until I had the manufacturer’s installation diagram, the pipe size, the shutoff location, and a clear plan for where the filter can be replaced later without moving the unit. Water filtration installation basics — complete guide work best when the layout is planned before a single fitting is opened.

    1. Shut off the water and depressurize the line. Close the main or branch shutoff, then open a faucet downstream until the water stops. Verify that pressure has dropped to zero by checking that no water comes out when a low fixture is opened. A problem is any continued seepage, which means the shutoff is passing and the line may need a repair before installation.
    2. Measure the available space and clearances. For an under-sink unit, measure cabinet width, depth, and height, plus 2 to 4 inches of clearance for cartridge removal or tank access. For a whole-house unit, measure wall space and the pipe run length needed for inlet, outlet, and bypass. Verify you can remove housings without dismantling adjacent plumbing. A problem is a layout that blocks sump removal or leaves no room to change a cartridge wrench.
    3. Confirm the pipe size and connection type. Identify whether the line is 1/2-inch, 3/4-inch, or 1-inch nominal pipe, and whether you are transitioning to compression, push-to-connect, threaded, or sweat fittings. Verify the filter ports match the flow path. A problem is forcing reducers into a narrow spot, which often creates pressure loss and noisy flow.
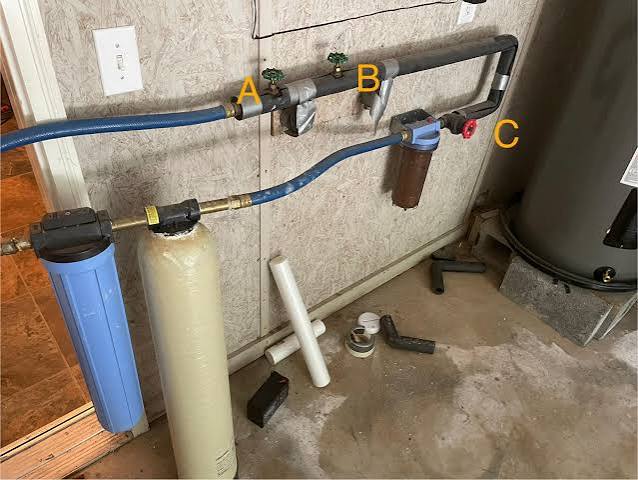
    4. Install the shutoff, bypass, or tee arrangement required by the system. Whole-house systems often need a bypass valve so you can service the filter without cutting water to the home; under-sink systems need a feed valve or saddle tee only where allowed by code and product instructions. Verify the bypass can be fully opened and fully closed. A problem is a partial bypass that leaves the filter isolated in a way that defeats service or leaks around the valve stem.
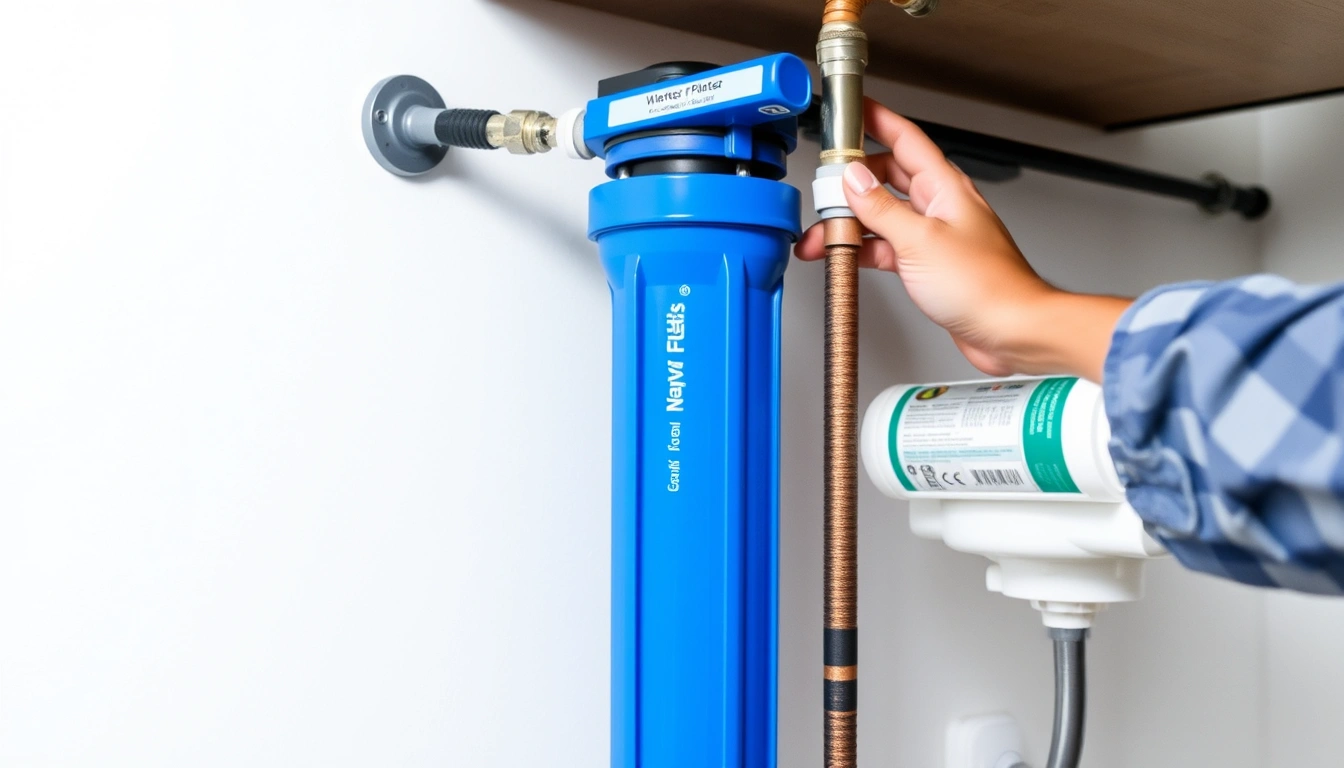
    5. Mount the housing or bracket securely. Anchor the bracket into framing, masonry, or a suitable backer board, using the fastener size the manufacturer calls for. For wall-mounted systems, keep the unit level so housings and tanks do not twist the connections, and if the wall or anchor point is questionable, consult a plumber or installer before mounting a heavy unit. Verify the bracket does not flex under the system’s weight when full of water. A problem is a loose mount that stresses fittings and can crack plastic heads over time.
    6. Make the plumbing connections in the correct direction. Follow the inlet/outlet arrows on the head or housing. On RO systems, connect feed, permeate, and drain lines exactly as labeled, usually with 1/4-inch tubing and a flow restrictor on the drain. Verify that inlet and outlet are not reversed and that every tubing cut is square. A problem is a reversed connection, which can ruin performance or stop the unit from producing water.
    7. Add the drain connection where the system requires one. RO systems and some specialty filters need a drain saddle or dedicated air gap connection. Verify that the drain line has a proper slope and is not kinked. A problem is a drain tied in too low or too tightly, which can cause gurgling, backflow, or poor flush performance.
    8. Flush the system according to the installation manual. Run water until carbon fines, air, and preservatives are cleared; this may be several minutes for simple cartridges or a longer cycle for RO storage tanks. Verify the water clears and the flow stabilizes. A problem is a cloudy first draw that never clears, which can indicate trapped air, a missing flush step, or a damaged cartridge.
    9. Check for leaks under static and flowing conditions. Wipe every fitting dry, pressurize the line, then inspect again after the system has run for 5 to 10 minutes. Open and close nearby fixtures to see whether pressure surges expose a weak joint. A problem is any drip, even slow, because a tiny leak under a sink can ruin cabinets before anyone notices.
    10. Document the service interval and date. Mark the cartridge change date on the housing or near the unit, and record the model number and replacement interval in months or gallons if the manufacturer gives both. Verify the installation can be serviced without removing the whole assembly. A problem is a “finished” install with no record of what was installed, making future maintenance guesswork.

    The most common hidden failure in water filtration installation basics — complete guide work is not a day-one leak; it is serviceability. I’d rather see a slightly less elegant layout with straight access to housings than a tight, polished install that nobody can open six months later. A filter that is hard to service gets ignored, and ignored filters become pressure problems or taste complaints.

    RO systems usually take longer because of the drain, tank, and faucet drilling. A simple under-sink cartridge install may take about 1 to 2 hours in a clean cabinet with existing shutoffs. A whole-house job can take half a day or more if valves, unions, or a bypass need to be added. Old piping or a cabinet packed with a garbage disposal and shutoffs slows everything down. Time stretches. Fast.

    What should I check before I call the job finished?

    Check pressure, flow, sealing, direction, and maintenance access before you accept the work. A filter system can look neat and still be wrong if the installer left you with restricted flow or a bypass that does not actually isolate the unit. I’d check five things every time: no leaks, correct orientation, acceptable pressure, clean flush, and easy cartridge access.

    Start with the water running at the faucet or fixture the filter serves. Watch the stream and listen. If the flow pulses, hammers, or gets much weaker than expected, the system may be undersized or partially blocked. On a whole-house system, I expect a minor pressure drop; I do not expect showers to feel starved. On an under-sink system, I expect the dedicated faucet to run steadily, though RO flow is naturally slower than a standard tap because the storage tank and membrane govern output.

    Check the following before signing off:

    • Leak points: every compression nut, threaded joint, and push fitting.
    • Flow direction: arrows on the head or housing must match the plumbing path.
    • Mounting: no sag, twist, or visible strain on tubing.
    • Access: can a cartridge or sump be removed with ordinary hand tools?
    • Flush quality: water should clear after the required flush volume or time.

    If the system has a pressure gauge, note the reading before and after the filter. The exact acceptable drop depends on the manufacturer, but a sudden large drop after installation usually means a clog, a misaligned cartridge, or an under-specified filter for the home’s demand. If there is no gauge, use behavior: slow faucet recovery, whining at a fixture, or toilet fill delays after the system starts are clues that the plumbing arrangement is not right.

    I also like to verify that the filter is installed where future service will not shut down more of the house than necessary. That is why bypass valves exist. If your whole-house system cannot be isolated without losing service to the entire property, the next filter change will be harder than it should be. A simple bypass can save a service call later.

    One more thing people skip: check what the filter is actually certified to reduce. NSF/ANSI 42 covers aesthetic claims like chlorine taste and odor; NSF/ANSI 53 addresses specific health-related contaminants such as lead or cyst reduction claims; NSF/ANSI 58 applies to reverse osmosis systems; NSF/ANSI 61 covers material safety for components in contact with drinking water. If the install looks fine but the claim you need is not part of the certification, the plumbing cannot fix that. NSF International’s standards pages are the cleanest reference point for those labels.

    When should you stop and hire a plumber or water-treatment installer?

    Stop when the installation would force you to guess, improvise, or work around plumbing that is already marginal. That is the cleanest rule I can give. If the job needs a drain, a main-line cut, a bypass, or code-sensitive changes and you are not fully confident, the cost of a mistake is usually more than the service call. Water filtration installation basics — complete guide advice is to pause before you create a plumbing problem.

    Corroded or brittle shutoff valves: This means the valve may not close fully and can snap when turned — replace the valve before installing the filter, or have a plumber do the work. A failed shutoff can turn a simple install into an emergency leak.

    Galvanized, very old copper, or mixed-metal piping: This means the pipe may be too fragile or incompatible with quick fittings — use a contractor who can transition the line properly. Mixing metals without the right dielectric strategy can create future corrosion problems.

    Private well water with no recent test: This means you do not know whether the issue is sediment, hardness, iron, bacteria, nitrates, or something else — test first, then choose the treatment train. Installing the wrong filter can waste money and leave the actual problem untouched, and CDC and EPA guidance both point readers back to testing and source-specific treatment.

    Need for a new drain connection or air gap: This means the job is no longer just a filter hookup — hire someone who can add the drain correctly, especially for RO. A bad drain tie-in can cause odor, backflow, or compliance issues.

    Low water pressure before installation: This means the system may underperform once a filter is added — have the pressure issue diagnosed first. A filter can add enough resistance to make a marginal system frustrating.

    Hidden leaks, mold, or cabinet rot: This means the plumbing area is already compromised — stop and repair the damage before adding equipment. Mounting new gear over a wet base is asking for failure.

    Required permit or code review in your area: This means the installation may need inspection, approved materials, or a licensed installer — check local rules before starting. A filter can be simple in one town and regulated in another.

    Whole-house treatment for a multi-unit building or commercial space: This means demand, backflow, and service access are more complex — use a professional familiar with larger systems. Residential shortcuts do not scale well.

    The point of stopping is not caution for its own sake. It is avoiding the kind of partial installation that seems fine for a week and then turns into a leak, a pressure complaint, or a warranty dispute. If your answer to any step is “I’ll make it fit,” that is usually the wrong answer for water plumbing.

    What mistakes do people actually make during installation?

    They usually make the same five mistakes, and each one costs something concrete: pressure, time, or a water-damage risk. A good installer treats the filter like part of the plumbing system, not an add-on ornament.

    1. Choosing the filter before checking the plumbing. The consequence is a system that does not fit the cabinet, line size, or flow demand. The correct alternative is to measure first and pick a layout that matches the space, such as a slim under-sink cartridge or a wall-mounted whole-house housing with a bypass.

    2. Ignoring service clearance. The consequence is a cartridge that cannot be changed without removing half the assembly, which means it gets delayed. The correct alternative is to leave the 2 to 4 inches of access the system needs and orient housings so a sump wrench or filter head tool can swing freely.

    3. Using the wrong connection method for the pipe and code. The consequence is leaks at threaded adapters, slow drips at compression fittings, or a prohibited saddle valve in a place that should have a proper tee. The correct alternative is to match the fitting to the line: push-to-connect where allowed and appropriate, compression on accessible small tubing, sweat or threaded transitions where the existing piping demands it.

    4. Skipping the flush. The consequence is cloudy water, carbon dust, odd taste, or an RO tank that fills with contaminated first water from manufacturing residue. The correct alternative is to flush exactly according to the manual. No shortcuts.
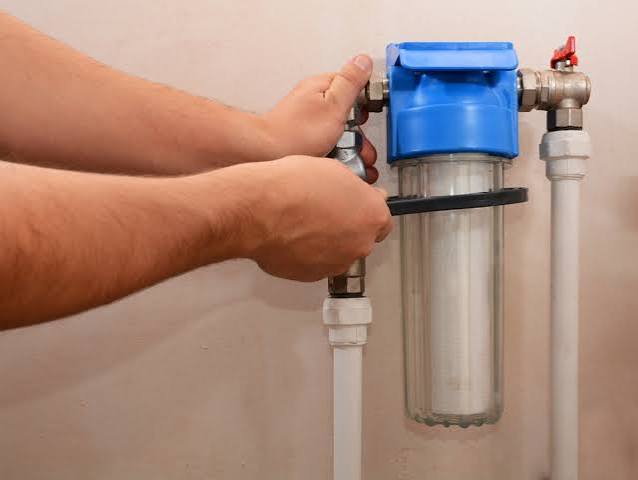
  • Water Filter Maintenance Schedule for Homeowners

    Water Filter Maintenance Schedule for Homeowners

    Last updated: September 10, 2026

    Key Takeaways

    • Usually every 2 to 12 months, depending on the filter type, water quality, and household use.
    • RO systems: prefilters commonly every 6 to 12 months; membrane every 2 to 5 years depending on feed water and use.
    • If your household uses a lot of filtered water, consider shortening replacement intervals based on the manufacturer’s guidance and the filter’s actual condition.
    • I check pressure, taste, leak points, and cartridge condition, and I do it in under 10 minutes.

    A home filter can look fine for months, then quietly bog down. So the basic rule is this: check it monthly, swap cartridges every 3 to 12 months depending on the filter, sanitize the housing whenever you change one, and do not treat the setup like a “set and forget” appliance. The right timing depends on the filter type, your water quality, and how much water your household uses. NSF/ANSI certification, manufacturer manuals, and EPA guidance all point the same way: follow the product instructions and watch performance, not just the calendar. Miss that, and clean water turns into a sluggish, underperforming system.

    I’m writing for homeowners who already have a point-of-use filter under the sink, a pitcher filter, a refrigerator filter, a whole-house sediment filter, or a reverse osmosis (RO) system. I’m assuming you know where the filter is, can shut off a valve, and can read the model number or cartridge label. I am not assuming you know the right interval, because that is where most people go wrong. Water suddenly tastes odd? Pressure drops sharply? Or maybe flooding, a boil-water advisory, or a well issue has you worried? At that point, maintenance is not the main question anymore; testing and troubleshooting are. For additional background, see the EPA drinking water guidance and the CDC advice on water safety after flooding.

    What maintenance schedule should I follow for my water filter?

    Water Filter Maintenance Schedule for Homeowners

    The schedule depends on filter type, water use, and water quality, not some generic “change it once a year” rule. A carbon block cartridge in a kitchen faucet system, a sediment prefilter on a well line, and an RO membrane do not age at the same pace. As a baseline, I would use this:

    • Pitcher or refrigerator filters: check monthly; replace every 2 to 6 months or when the manufacturer’s indicator says so.
    • Under-sink carbon filters: inspect monthly; replace every 6 to 12 months in many homes, sooner with heavy use or high chlorine.
    • Sediment prefilters: inspect monthly; replace when pressure drops or the cartridge visibly loads up, often every 1 to 6 months.
    • RO systems: prefilters commonly every 6 to 12 months; membrane every 2 to 5 years depending on feed water and use.
    • Whole-house filters: inspect monthly; change cartridges when pressure loss becomes noticeable or at the interval the housing maker specifies, often around 3 to 12 months.

    Broad? Yes. Necessary? Also yes. A house on city water with little sediment can stretch the timing. A house on a private well, especially with visible rust or silt, can chew through cartridges fast. Calendar dates alone are a bad compass for any system that sees changing load; in practice, that math stops working fast. Check the manufacturer’s instructions, and if you are pushing the interval longer, talk with a water treatment professional first.

    The second part of the schedule is maintenance, not replacement. Wipe housings, check O-rings, verify seals, and flush the system after cartridge changes. A new cartridge that leaks around a bad O-ring is not “new”; it is a plumbing problem waiting to happen. For replacement parts and setup details, check your system’s manufacturer manual or a comparable product guide from the brand that made your unit.

    For a simple paper trail, I keep one line in a notebook or phone note: installation date, cartridge type, and next due date. It takes 2 minutes and stops the most common failure, which is forgetting whether the filter has been in place for 4 months or 14.

    How do I set up a maintenance calendar for my home water filter?

    I build it around three checkpoints: monthly, every changeout, and one annual review. That structure catches almost every problem without turning filter care into a chore. The goal is not perfection; it is staying ahead of pressure loss, taste changes, and cartridge overrun.

    1. Record the filter model and cartridge type. Write down the exact housing or system model, plus the cartridge part number from the label or manual. Verify the micron rating if it is listed, such as 5 micron or 1 micron. A problem is a mismatched replacement cartridge, which can fit physically but perform differently.
    2. Set a monthly reminder. Choose the first day of each month and inspect the system for leaks, slow flow, staining, or odor. Verify that the housing is dry and the water still runs normally. A problem is a drop in flow or a damp ring near the housing seam.
    3. Track water use, not just the date. If your household uses a lot of filtered water, consider shortening the interval based on the manufacturer’s guidance and the cartridge’s actual condition. Verify whether the filter serves drinking water only or also refrigerator ice, cooking, or coffee. A problem is using one small cartridge for a large family and letting it run beyond capacity.
    4. Replace cartridges on schedule or on pressure loss, whichever comes first. For many point-of-use systems, that means 6 to 12 months; for sediment cartridges, it can be 1 to 6 months. Verify inlet and outlet flow before and after replacement. A problem is reduced pressure after a change, which points to a clogged cartridge, a wrongly seated element, or upstream sediment.
    5. Inspect and lubricate O-rings at every cartridge change. Clean the groove, check for cracks, and use only food-grade silicone lubricant if the manufacturer allows it. Verify the O-ring is flat, continuous, and not twisted. A problem is a leak at startup or a housing that will not tighten evenly.
    6. Flush the new cartridge. Run the system for the volume specified by the maker; for many carbon filters that may be several gallons, and for RO systems it is often a tank flush plus a few full tanks before use. Verify the water clears and the initial carbon fines are gone. A problem is black flecks, cloudiness, or a strong carbon smell after flushing.
    7. Sanitize the housing when the system opens. If the manual calls for it, use a dilute bleach solution or the sanitizer specified by the maker, then rinse thoroughly. Verify there is no chlorine smell left unless the system is designed to remove it downstream. A problem is biofilm, slime, or musty odor in the sump.
    8. Do one annual review. Compare the actual change interval with the label interval and adjust the schedule by season, water source, and usage. Verify whether the filter is meeting the job it was bought for. A problem is repeatedly changing cartridges too late or too early, both of which waste money and water quality.

    A schedule only works if it fits real life, so the best one is the one you can keep up with. If you are away for long stretches, add a reminder tied to another fixed event, such as changing HVAC filters or paying a quarterly bill. If you live in a rental and the landlord owns the unit, still keep your own date record; “I thought someone else handled it” is how filters get ignored for a year. The NSF consumer guide is also a useful reference for understanding filter ratings and replacement expectations.

    What should I check each month?

    Water Filter Maintenance Schedule for Homeowners

    Pressure, taste, leak points, and cartridge condition — that is my quick monthly sweep, and it takes under 10 minutes. That short look is where you catch a filter that is still “working” on paper but has already started to fail in practice.

    Start with flow rate. A faucet filter that used to fill a 1-quart pitcher in a reasonable time and now crawls is telling you the cartridge is loading up. For a whole-house sediment filter, a pressure drop across the housing is a stronger clue than taste. If the system has pressure gauges before and after the housing, note both readings. Even without gauges, a shower or kitchen tap that feels starved after the filter is a sign to inspect.

    Next, check water appearance and odor. Cloudiness right after opening a new cartridge may be normal for the first flush. Cloudiness that appears later is not normal. A chlorine smell returning after it had been removed suggests exhausted carbon. A musty or swampy odor can mean the cartridge or housing needs cleaning, not just replacement. The EPA’s consumer resources on home water treatment are a good reference for matching symptoms to likely maintenance issues.

    Then check the housing and seals. Look for a damp lower rim, drips, salt-like residue from hard water, or tiny cracks in clear housings. A clear sump that has turned brown or green deserves a deeper clean, not another cartridge dropped into the same mess.

    For RO systems, look at the storage tank behavior. If the tank seems to fill slowly, the faucet sputters, or the membrane seems to recover poorly after several hours, the prefilters, tank air charge, or membrane may need attention. That is not a single-part problem every time.

    If the system has a date sticker or electronic indicator, do not trust it blindly. I would use it as a reminder, not a judge, and I would confirm any unusual reading with the manual or a qualified technician. Indicators can fail, get reset incorrectly, or be based on flow volume assumptions that do not match your house.

    The mistakes homeowners make with water filter maintenance

    The biggest mistake is waiting for taste to change, and by then the filter is already overdue. Taste is a late signal. Chlorine breakthrough, sediment loading, and membrane fouling often start before anyone notices anything. The fix is a calendar and a log, not your tongue.

    Another common error is replacing only the cartridge and ignoring the housing. That leaves dirt, slime, and worn O-rings in place. The consequence is leaks, bad seals, or contaminated surfaces. The correct move is to clean the sump, inspect the cap, and check the seal every time the housing is opened.

    A third mistake is buying the wrong replacement because “it fit.” Fit is not enough. Micron rating, carbon type, flow direction, and certification matter. A 5-micron sediment cartridge and a carbon block cartridge may both thread in, but they do different jobs. The correct alternative is to match the exact part number or a clearly compatible equivalent listed by the manufacturer.

    People also skip flushing. New cartridges can shed carbon fines or trapped air, and RO tanks can need several cycles before taste stabilizes. The consequence is black specks, cloudy first draws, or odd flavor. The correct alternative is to flush for the volume the manual specifies; if there is no manual, flush until the water runs clear and odor-free.

    Another error is using a single annual replacement date for a system with heavy sediment or high use. That sounds organized, but it fails fast in homes on wells or in older plumbing. The consequence is a clogged filter that stresses the housing and cuts flow. The correct alternative is a shorter interval, often 1 to 6 months for sediment prefilters under load.

    Finally, people forget to shut off pressure before opening the housing. On a pressurized whole-house canister, that can mean a messy release and a cross-threaded sump. The correct alternative is to close the inlet and outlet valves, bleed pressure, and open the housing only after the line is depressurized.

    When does the standard schedule not apply?

    The standard schedule needs to change when the water source, usage, or filter design changes, and that happens more often than many homeowners think. A private well, a basement flood, a seasonal cabin, or a house full of guests can shorten intervals dramatically. A city water system with a sudden utility notice can do the same.

    Private well water with visible sediment: the filter may load in weeks, not months — use a pressure-based changeout rule and inspect every 2 weeks at first.

    Post-flood or post-repair water: the filter may catch debris, rust, and microbial load the cartridge was not designed to handle — replace the cartridge immediately and sanitize the housing before normal use.

    Long vacancies, 30 days or more: stagnant water can leave taste and odor problems — flush the system thoroughly before drinking, and replace cartridges if they sat wet beyond the maker’s recommended standby period.

    High-use households: more people means more gallons through the cartridge — shorten the interval based on the manufacturer’s guidance and watch for flow loss.

    RO systems with poor feed water: hard water, high chlorine, or heavy sediment shortens membrane life — stay strict with prefilter changes, because a membrane is expensive and easy to foul early.

    Any system that shows biofilm, slime, or recurring odor: the schedule is no longer the main issue — clean and sanitize the housing, verify the cartridge type, and consider whether the source water needs testing or pretreatment.

    This is where generic advice falls apart. “Change it every year” is fine only for a light-duty system on stable municipal water. It is wrong for a well pump pushing sediment after spring rain, and it is wrong for a kitchen filter serving a family that cooks at home every day.

    How do I know the filter is actually doing its job?

    A filter is doing its job when water flow stays usable, taste and odor stay consistent, and the cartridge is changed before it is visibly overloaded. That sounds simple, but it needs three checks: the calendar, the performance, and the condition of the parts.

    For performance, I look for stable pressure and no sudden flavor return. A carbon filter that no longer removes chlorine effectively is spent even if water still runs. For condition, I look at the cartridge itself. A sediment cartridge that has turned dark brown from top to bottom is telling you it has been doing real work. A cartridge that looks clean after a year may mean your water is clean, or it may mean the cartridge is oversized and not the right match.

    For whole-house systems, a good result also includes protecting downstream fixtures. If aerators, valves, or ice makers are less clogged than before, the prefilter is probably doing its job. If not, the maintenance schedule may be too lax or the filter type may be wrong for the sediment load.

    The trade-off is simple: shorter intervals cost more cartridges and a little more time, but they reduce nuisance problems and the risk of running an exhausted filter. Longer intervals save money only if the filter is still within spec. Once flow drops or the media is spent, the savings disappear.

    A practical standard I respect is this: if a filter’s use is uncertain, change it earlier rather than later. For a homeowner, the cost of a cartridge is usually smaller than the cost of a leak, a clogged faucet, or a week of doubting the water. The CDC’s household water guidance is useful here because it emphasizes using the right device, maintaining it, and replacing parts as directed.

    Quick answers homeowners ask me all the time

    How often should I replace a home water filter cartridge?
    Usually every 2 to 12 months, depending on the filter type, water quality, and household use. Sediment prefilters often need the shortest interval.

    Can I just change my water filter once a year?
    Only if the manufacturer says that is appropriate for your system and your water conditions. For many households, a shorter interval is safer.

    How do I know it’s time to change the filter early?
    Slow flow, bad taste, odor return, pressure drop, visible sediment loading, or repeated leaks are all signs to inspect sooner.

    Do RO filters need special attention?
    Yes. RO systems usually have prefilters, a membrane, and a storage tank, so the maintenance schedule is layered and should follow the manual closely.

    What if my water comes from a well?
    Test the water regularly and watch the filter more closely, because sediment, iron, and seasonal changes can shorten the schedule.

  • Why Is My Water Pressure Lower After Installing a Filter?

    Why Is My Water Pressure Lower After Installing a Filter?

    Last updated: September 10, 2026

    Key Takeaways

    • You can usually pin down the cause in about 20 to 40 minutes with a few checks and one simple comparison.
    • Bigger housings often make sense. Especially when you want filtration and usable pressure.
    • Sometimes the filter is not the whole story; call a licensed plumber or water-treatment professional, especially if low pressure affects more than one fixture.
    • A filter lowers pressure because every cartridge, screen, membrane, and valve adds resistance to flow.

    Right after a filter goes in, a weak tap can be maddening. Why is my water pressure lower after installing filter? Usually, the answer is plain: the unit is too restrictive, it was installed backward, or it is catching debris already sitting in the line. I mean actual pressure loss at the faucet, not the normal difference between a main line and a bathroom sink. This article applies if you installed a point-of-use filter, under-sink filter, shower filter, whole-house cartridge, or reverse osmosis prefilter, and you already know the filter is the new variable in the system.

    Whole-house weak pressure is a different animal. So is sudden pipe banging, rusty water after a shutoff, or a pressure issue that started before the filter went in. In those cases, the filter may be only part of the problem. Call a licensed plumber or water-treatment professional instead of assuming the cartridge is to blame.

    Why the filter changed your pressure

    Why Is My Water Pressure Lower After Installing a Filter?

    A filter lowers pressure because every cartridge, screen, membrane, and valve adds resistance to flow. Normal. What is not normal is a drop big enough to make a faucet feel weak, a shower spray turn thin, or an appliance take forever to fill.

    The term to watch is pressure drop: the loss of pressure between the inlet side and the outlet side of the filter. Every filter has some of it. The question is whether yours is small and expected, or large enough to signal trouble. A 5-micron sediment cartridge will usually restrict flow more than a 20-micron cartridge. A carbon block filter is often more restrictive than loose granular carbon. And an RO membrane system is supposed to be restrictive; the storage tank is there to compensate.

    A generic article often stops at “filters reduce pressure.” That misses the useful part. If the filter is installed correctly, a noticeable drop usually means one of four things: the filter is too fine for the job, it is clogged early, it is installed backward or with a valve partly closed, or the home already had marginal supply pressure and the filter pushed it over the edge. That math stops working fast.

    I’d split the issue into two questions. Did the pressure fall only at the filtered outlet, or across the house? And did it happen immediately after installation, or after a few days or weeks? Those two answers point you in different directions.

    Is my filter too restrictive for my plumbing?

    Yes — if the filter’s rated flow is below the fixture demand, the pressure will feel low even when the supply is fine. A kitchen faucet can live with modest flow loss; a shower or whole-house setup cannot.

    Start with the specs, not the marketing copy. Look for:
    – micron rating
    – flow rate in gallons per minute
    – maximum operating pressure
    – whether the cartridge is pleated, spun, carbon block, or membrane-based

    A 10-micron sediment filter removes finer particles than a 20-micron filter, but it usually creates more resistance. A carbon block cartridge often gives better taste reduction than loose carbon, yet it can choke flow faster. If you installed a shower filter with a tiny cartridge and then a low-flow showerhead, the combined restriction can make the spray feel weak even though nothing is “broken.”

    Also check whether the filter matches the pipe size and fixture type. A 3/8-inch under-sink line feeding a high-demand faucet through a small inline filter is a common bottleneck. So is a whole-house cartridge rated for 5 gpm on a home that needs much more when two showers and a washing machine run at once. In one NSF/ANSI 42 test context, cartridge pressure drop is reported at a defined flow rate, which is why the rated gallons per minute matter as much as the micron number.

    The practical rule is simple: if the filter’s flow rating is close to or below the fixture’s demand, expect pressure loss. If you do not know the demand, treat a sudden drop at one fixture as a sign that the filter may be undersized for that job, and verify the setup with a plumber or water-treatment pro if needed. Thin straw, big gulp. Bad pairing.

    How do I tell whether the filter, the install, or the supply is the problem?

    Why Is My Water Pressure Lower After Installing a Filter?

    You can usually isolate the cause in about 20 to 40 minutes with a few checks and one simple comparison. Do the checks in order so you do not replace a part that is fine.

    1. Bypass the filter if the system allows it. Set the bypass valve to open or remove the filter cartridge according to the manufacturer’s design. Verify that water flow returns to normal at the same faucet or hose bib. If pressure does not improve, the filter is probably not the only restriction; a plumber can check the PRV, shutoff valves, and piping.
    2. Check the inlet and outlet orientation. Look for arrows on the housing or head and confirm water enters the inlet and exits the outlet. Verify the labels against the piping, not just the way the housing sits on the wall. A backward cartridge housing can starve flow or prevent sealing.
    3. Confirm every shutoff valve is fully open. Turn the supply valve counterclockwise until it stops, then back it off slightly if the handle design requires it. Verify the handle is parallel to the pipe on quarter-turn valves. A valve left half-open can mimic a clogged cartridge.
    4. Inspect the cartridge seating and O-rings. Remove the housing, seat the cartridge squarely, and check that the O-ring is clean, lubricated if the manufacturer calls for it, and not pinched. Verify there is no twisting or cocking. A pinched seal can restrict flow and leak at the same time.
    5. Flush the filter for the manufacturer’s recommended volume. Many carbon filters need several gallons of flush water before they stop shedding fines. Verify the water clears and the flow improves after flushing. If it stays cloudy or weak, the cartridge may be packed too tightly or defective.
    6. Check for sediment at the inlet screen or prefilter. Shut off water, remove the screen, and look for sand, scale, or rust flakes. Verify the screen is clean and seated properly. Debris often appears right after a shutoff because disturbed pipe scale breaks loose.
    7. Measure pressure before and after the filter. Use a simple hose-thread pressure gauge or a gauge tee, then compare the inlet and outlet under the same condition. Verify the difference is small at rest and larger only when water is flowing. A large gap under flow points to excess restriction in the filter or piping.
    8. Test another fixture on the same branch. Open a nearby faucet or spigot. Verify whether the drop is isolated to one filtered tap or affects the whole branch. If only the filtered outlet is weak, the issue is local. If multiple fixtures drop, the supply or main valve may be involved.

    A good result is easy to spot: the filtered faucet runs close to its pre-filter flow, the water clears after flushing, and the outlet pressure no longer sags sharply when you open the tap. If the cartridge is already dirty after a short time, the line likely carries more sediment than the filter can handle alone.

    What should I check before I blame the filter?

    Check the home’s incoming pressure, the age of the plumbing, and where the filter sits in the line. A filter often gets blamed for a problem that was already there but had not shown up yet.

    A pressure-reducing valve, often called a PRV, is a common source of confusion. It sits on the main line and keeps house pressure in a safe range. If the PRV is set low, a filter added downstream can make the whole system feel weak. A partially closed main shutoff can do the same thing. Seeing low pressure at multiple taps, not just the filtered one, means the filter may have exposed a marginal supply.

    Pipe material matters too. Older galvanized pipe, especially where internal corrosion has narrowed the bore, reacts badly to any added restriction. A filter that seems fine on newer PEX or copper can reveal weakness in old steel lines. That is why a whole-house cartridge on an older home often needs a larger housing and a coarser prefilter than a small apartment setup.

    Component order matters as well. A softener, sediment filter, carbon block, and UV unit can each add resistance. Put them in the wrong sequence and you can create a bottleneck. In many treatment trains, sediment removal comes first, then carbon, then the finer device if one is needed, but the right order depends on the water and equipment, so confirm it with the manufacturer or a professional. If a carbon block is placed before the sediment stage in a dirty-water application, it can clog quickly.

    I would not assume “new means better” here. A 1-micron cartridge is not automatically an upgrade over a 5-micron cartridge. It may improve particle removal but worsen flow enough that the faucet becomes annoying to use.

    When should I stop troubleshooting and change the setup instead?

    Stop chasing small fixes when the filter is simply the wrong tool for the flow you need. These are the cases where I’d change the setup, not keep trying the same cartridge.

    The pressure drop is only at one filtered faucet and the filter has a low flow rating: The cartridge is undersized for that fixture — replace it with a higher-flow model or a larger housing.

    The filter clogs again within days or a few weeks: The incoming water has more sediment than the cartridge can handle — add a proper sediment prefilter or a larger first-stage filter.

    The filter is a fine carbon block on a whole-house line: That setup can be too restrictive for multiple fixtures — move the carbon stage downstream or use a larger housing rated for higher flow.

    The home already has weak pressure at multiple taps: The filter is not the root cause — check the PRV, main shutoff, or old piping before changing more filter parts.

    The system is an RO unit and the faucet feels slow: That is often normal for reverse osmosis because the tank and membrane are part of the design — verify the storage tank charge and the prefilters before assuming a fault.

    The filter housing is small, opaque, or hard to service: A compact design can be a maintenance trap — a larger clear housing or easier cartridge format may save time even if it costs more upfront.

    Common mistakes people make after a filter install

    The first mistake is using a cartridge that is too fine for the job. A 1-micron filter can be excellent on dirty water, but it can also make a kitchen faucet feel starved. The fix is to step up to a coarser stage, such as 5 or 10 microns, or increase housing size.

    The second mistake is forgetting to flush carbon fines. Carbon block filters often shed black dust at first. If the cartridge is not flushed per the manufacturer’s instructions, the outlet can feel sluggish and the water may look dirty for longer than it should. The fix is to flush until the water clears and flow stabilizes.

    The third mistake is leaving a valve partly closed. Basic, yes. Common, too. The result is a false diagnosis: people replace a cartridge that was never the problem. The fix is to verify every valve position and not trust handle position alone.

    The fourth mistake is installing the cartridge backward. Some housings make this hard to see, especially under a sink. The result can be a severe pressure drop or no flow at all. The fix is to read the arrows on the housing head and match inlet to outlet before closing the canister.

    The fifth mistake is ignoring sediment upstream. If the new filter quickly loads with rust, sand, or scale, it is doing its job and showing you the real problem. The fix is to add a sediment stage, clean the inlet screen, or address the piping source.

    The sixth mistake is assuming every low-flow symptom is pressure. Sometimes the faucet aerator, showerhead, or hose bib screen is partly clogged, and the filter just happens to be the last thing installed. The fix is to test flow with the aerator removed or by checking an unfiltered outlet on the same branch. That simple test is often enough to separate a clogged screen from a filter issue.

    What does a good fix look like, and how long should it last?

    A good fix restores useful flow without sacrificing the filtration you actually need. Plain and simple. The tap should feel normal again, the cartridge should not clog immediately, and the pressure difference across the filter should stay reasonable during ordinary use.

    For a point-of-use filter, I would want the faucet to run steadily without sputtering, and I would expect a pressure gauge to show only a modest loss across the housing at rest. For a whole-house setup, I would want showers, sinks, and appliances to work together without one fixture collapsing when another opens. If the filter is part of an RO system, some slow delivery is expected, but the tank should refill in a sensible amount of time and the stream should not fall off a cliff after a few seconds.

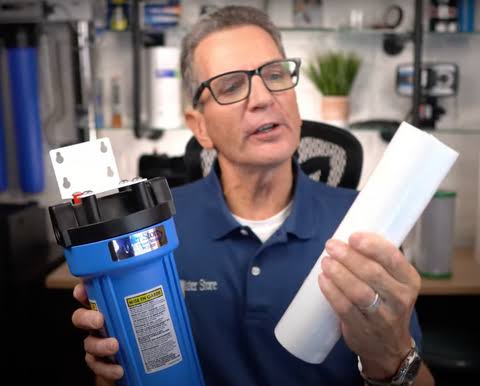
    Durability depends on water quality, cartridge size, and usage. A filter in a sediment-heavy house may need service far sooner than the package suggestion. A larger housing, such as a standard 10-inch or 20-inch canister, usually gives more surface area and less restriction than a tiny inline unit. That is why bigger housings often make sense when the goal is both filtration and usable pressure.

    I would choose the least restrictive filter that still solves the water problem you actually have. If you want taste improvement, you may not need ultra-fine filtration. If you want sediment protection, a staged approach often works better than one tight cartridge. The wrong setup can be technically “better” on paper and worse in daily life.

    Quick answers to the questions people ask most

    Can a new water filter lower pressure? Yes. Any filter adds resistance, and a fine or clogged cartridge can make the drop noticeable.

    Is low pressure after a filter always the filter’s fault? No. A partly closed valve, a bad PRV, old galvanized pipe, or debris in the line can cause the same symptom.

    How do I know if the cartridge is clogged? The flow gets weaker over time, the pressure drop increases when water is running, and the filter may look dirty or load up faster than expected.

    Should I remove the filter if pressure is low? Only as a test or if the filter is the wrong size for the job. If you need filtration, the better fix is usually a larger or less restrictive setup.

    Do reverse osmosis systems always have low flow? They are designed to be slower than a normal faucet, but they should still work within the limits of the tank, membrane, and prefilters. NSF notes that filter and system performance depends on the tested configuration, so verify the model rather than assuming all RO units behave the same.

    For more on pressure loss and flow, see NSF/ANSI drinking-water filtration standards, the EPA’s guidance on home water treatment, and your filter manufacturer’s published flow ratings.

  • Installation Services and Project Planning: The Complete Guide

    Installation Services and Project Planning: The Complete Guide

    Last updated: September 10, 2026

    Key Takeaways

    • Those are the things that make a $2,500 install behave like a $7,500 one.
    • Materials can take 1–12 weeks depending on the item and supplier.
    • Procurement can take anywhere from same-day purchase to 6–10 weeks for custom items; for exact timing on installation services and project planning, consult a professional and check the manufacturer’s lead-time guidance.
    • A problem shows up when the route is 2 inches too narrow, a turning radius is too tight, or the item cannot be carried upright.

    A $2,500 install can turn into a $7,500 headache fast. That is the blunt version. If you are hiring installation services for a home, shop, office, or light industrial site, the real question in installation services and project planning is not “Who installs it?” It is “How do I plan the job so the install finishes on time, passes inspection, and does not create expensive rework?” I’m going to answer that directly, because most bad installations start as bad planning, not bad tools. For planning and scheduling, see the U.S. Small Business Administration’s guidance on hiring contractors and the International Code Council’s permit resources.

    Who this guide is for — and what it assumes you already know

    Installation Services and Project Planning — The Complete Guide

    This guide is for someone deciding who to call for an installation project and how to manage the job before the crew arrives. Broadly, it assumes you already know what you want installed — flooring, cabinets, signage, shelving, fixtures, AV equipment, a fence, a generator, or commercial machinery — but the scope, bid comparison, and risk signals may still be fuzzy.

    I’m not writing for the person who wants a product recommendation. I’m writing for the person who needs a job done once, with as little surprise as possible. So the focus stays on the parts that move cost and timing: site conditions, access, power, substrate, permits, lead times, and coordination with other trades. Those are the things that make a $2,500 install behave like a $7,500 one.

    Half the job is the install itself. The other half is readiness. A crew can be excellent and still lose a day because the site is not measured, the wall is not framed, the slab is not flat, the circuit is not live, or the wrong door width was ordered. Ugly, but common. If the project involves gas, structural work, electrical service changes, roof penetrations, or anything that needs a permit or inspection, that is not casual DIY territory. In those cases, the installer may still be the right starting point, but the plan should include the licensed trade or inspector from the beginning.

    This guide also assumes you want a usable budget range, not fantasy certainty. Installation pricing is usually quoted as labor only, labor plus materials, or a fixed project price. For a simple residential job, the labor portion may be a few hundred dollars; for a multi-day commercial install with lifts, after-hours work, or coordination with other trades, the labor can climb into the thousands. The exact number depends on scope, not on a slogan. According to the U.S. Small Business Administration, written scope and bid comparisons are essential when evaluating contractors.

    Remember this one thing: the right installer can only rescue a weak plan so far. A good plan strips out ambiguity before anybody unpacks a tool bag.

    What should be planned before an installer is booked?

    The scope, site, and sequence should be nailed down before you sign anything. A vague “install this sometime next month” is how jobs drift, change order by change order, until the schedule and budget both break.

    Start with a one-page scope sheet. Name the exact items to be installed, the quantity, the finish level, the location, and what is excluded. “Install kitchen cabinets” is too loose. “Install 14 linear feet of base cabinets, 8 feet of uppers, crown molding, and filler strips; include scribing to uneven walls; exclude plumbing hookup and countertop templating” is usable. A contractor can price that. And a later argument is less likely when the exclusions are visible from the start.

    Then define the site conditions. Measure the openings, ceiling height, floor flatness, wall plumb, access width, elevator availability, and loading route. Flatness matters more than many people expect: a floor that is out by 1/4 inch over 10 feet can change how a cabinet run, rack, or machine sits. If the project involves tile, flooring, or equipment that needs level support, note whether the slab has cracks, moisture issues, or dips. Do not guess. If you do not know the condition, say so and budget for field verification.

    Lead times belong in the schedule too. Materials can take 1–12 weeks depending on the item and supplier. Custom fabrication often extends that. If the installer is expected to store material on site, say where and for how long. Storage on a wet slab, under a tarp, or in a public hallway creates damage risk and neighbor problems.

    Dependencies should be mapped as well. A wall-mounted HVAC unit should not be scheduled before electrical rough-in and wall finishing are complete. A floor install should not start before the room has reached the manufacturer’s temperature and humidity range, which is often specified in the product literature. If the installer gives you a sequence that ignores a dependency, that is not a detail mistake; it is a planning fault. For flooring product constraints, the National Wood Flooring Association and manufacturer instructions are useful references.

    Finally, define acceptance in plain language. What counts as complete? A clean trim line? Operating equipment? Passed inspection? Signed-off punch list? For many jobs, I would want the install plan to include at least one punch-list walk, even if it is only 15 minutes, because it gives the site owner a chance to catch misalignment, damage, missing fasteners, or unfinished caulk before the crew leaves.

    How do installation services and project planning work, step by step?

    Installation Services and Project Planning — The Complete Guide

    Measure, verify, sequence, price, permit, stage, install, close out. That is the order. Skip one step, and the risk usually shows up as delay, extra cost, or a result that looks finished only from 20 feet away.

    1. Measure the real site, not the brochure version. Take opening widths, heights, depths, ceiling clearance, stair turns, elevator interior dimensions, and loading access in inches, not estimates. Verify the actual path from truck to final location. A problem shows up when the route is 2 inches too narrow, a turning radius is too tight, or the item cannot be carried upright.
    2. Check substrate and support conditions. For wall-mounted or load-bearing installs, confirm stud spacing, blocking, joist direction, slab condition, or anchor points. Verify that the support surface is rated for the load and is not damaged. A problem shows up as cracked drywall, flexing, loose anchors, or a floor that deflects under weight.
    3. Define the finish level and tolerances. State whether you need flush reveals, centered layout, level lines, or simple functional placement. Use real tolerances where possible, such as “level within 1/8 inch over 10 feet” or “gap not to exceed 3/16 inch.” A problem shows up when one side is visibly off, trim does not cover the edge, or adjacent components do not align.
    4. Map out trade dependencies. Put electrical, plumbing, drywall, painting, flooring, data, or inspection work in the correct order. Verify that rough-in work is complete before finish installation begins. A problem shows up when a crew arrives to find an outlet missing, a pipe in the wrong place, or a wall not closed up.
    5. Lock the scope and exclusions in writing. List labor, materials, disposal, permits, protection, cleanup, equipment rental, and after-hours work separately if needed. Verify that both sides understand what is not included. A problem shows up as a change order for “minor” work that was never priced, such as haul-away, caulking, patching, or silicone sealing.
    6. Set the schedule around lead times and access windows. Ask when materials must arrive, how long the job takes, and what hours the site allows work. Verify delivery dates and any building restrictions. A problem shows up when product arrives early and gets damaged, or arrives late and the crew stands idle.
    7. Plan for permits, inspections, and shutdowns. If the work touches electrical, gas, fire protection, structural members, or public rights-of-way, check whether a permit or inspection is needed in your area. Verify who pulls the permit and who meets the inspector. A problem shows up as a stop-work order, failed inspection, or a job that cannot be legally closed out. The International Code Council and local building departments are the right places to verify the rules.
    8. Stage tools, protection, and access before day one. Confirm drop cloths, floor protection, dust control, lift access, lockout/tagout procedures where relevant, and a clear path to the work area. Verify that the site is ready by the evening before installation starts. A problem shows up as damaged finishes, blocked access, or an unproductive first day spent moving obstacles instead of installing.

    That sequence sounds basic because it is basic. And that is exactly why it gets missed. A pricing gap is often just a planning gap in disguise. If one quote is 20% lower than the others, I would ask whether it excluded prep, disposal, equipment, or coordination rather than assume it is a bargain.

    For the budget, I would split it into three buckets: pre-install work, installation labor, and post-install correction. On a simple residential job, prep may be a small line item. On a commercial site, prep can equal or exceed install labor. That is not unusual. It is the cost of making the site ready enough that the installation goes quickly instead of being improvised.

    How much should installation services cost, and what changes the price?

    Price is driven by labor time, access difficulty, prep work, and risk, not just by what gets installed. A straightforward job can be priced in hours; a complicated one is really priced in problems avoided.

    There is no honest universal price list, because the same category can swing widely. A small repair or single-item install may fall into a few hundred dollars of labor. A larger residential install often lands in the low thousands once prep, protection, and cleanup are included. Commercial or multi-trade projects can rise far beyond that, especially if lifts, scaffolding, night work, travel, or shutdown coordination are needed. If anyone quotes a flat number without seeing the site and asking about access, I would treat that number as provisional and ask for a site walk or written assumptions.

    The biggest price drivers are usually these:

    • Access. A second-floor walk-up, narrow stair, or long carry from the truck raises labor.
    • Prep and demo. Removing old materials, patching, leveling, or reinforcing the substrate adds time.
    • Precision. Tight reveal work, visible finish carpentry, or equipment alignment costs more than simple placement.
    • Permits and inspections. If the job needs a permit, someone has to handle the paperwork and inspection window.
    • Materials and lead times. Custom or backordered components force rescheduling and can create storage costs.
    • After-hours work. Work in retail, hospitality, or occupied offices often needs evening or weekend pricing.
    • Damage risk. Fragile finishes, glass, stone, or high-value equipment require more protection and caution.

    I would ask every bidder to price the same scope sheet and to label exclusions in writing. That is a practical way to compare apples to apples. If one bidder includes haul-away, floor protection, and minor carpentry while another excludes all three, the cheaper number is not really cheaper — well, usually cheaper.

    A useful trick is to ask how the price changes if the site is not ready. For example: “What is the charge if the opening is 1 inch too narrow?” or “What happens if the electrical rough-in is not complete?” A serious contractor can answer that in plain language. A vague answer is a warning.

    Do not ignore contingency. For planning purposes, many project managers set aside a reserve of 10% to 20% on a job with uncertain site conditions. That is not a magic rule; it is a practical allowance for surprises such as hidden framing, out-of-square walls, damaged substrate, or delayed materials. A job with clear site conditions and repeatable scope may need less. A first-time or renovation project usually needs more.

    How long does an installation project take?

    The duration depends on the site prep, not just the install itself. A one-day install can become a three-day project if the room is not ready, the delivery is late, or a missing dependency stops the crew.

    I would break the timeline into five parts: planning, procurement, prep, installation, and closeout. Planning can take an afternoon or several weeks depending on the complexity. Procurement can take anywhere from same-day purchase to 6–10 weeks for custom items; to avoid schedule mistakes, consult a professional and confirm the lead time with the manufacturer or supplier. Prep may be a few hours for a clean retrofit or several days if demolition, framing, patching, or leveling are needed. Installation may be a single shift or multiple days. Closeout — testing, punch list, cleanup, and sign-off — can add half a day or more.

    A simple install often looks short on paper because the visible labor is short. But the hidden time is usually in the handoff points. For example, if cabinets need templating, countertops, then final plumbing reconnection, the project spans multiple visits and drying windows. If flooring is involved, acclimation may be required by the manufacturer before the product goes down. If wall-mounted equipment is being installed, electrical or structural work may need to finish first. Each dependency adds another clock.

    The question I would ask a contractor is not “How long will it take?” but “What has to be true for you to finish in that time?” That forces the schedule to reveal its assumptions. You want to hear specifics: materials on site by a certain date, walls closed up, room cleared, power live, access available, and the right decision-maker present for sign-off.

    A good result usually has three signs. First, the install is square, level, and aligned within the tolerance agreed at the start. Second, the system works as intended: doors open, fixtures operate, fasteners hold, and nothing rattles or rubs. Third, the site is left usable, with debris removed and unfinished items documented. If the crew leaves behind a pile of “small fixes,” the project is not finished; it is deferred.

    If the job is time-sensitive — a retail opening, tenant turnover, inspection deadline, or production start — build a buffer of at least one workday where possible. That buffer is often cheaper than premium labor or expedited shipping. It is also the difference between a controlled schedule and a panicked one.

    What should I ask before I hire an installer?

    You should ask questions that expose scope, coordination, and accountability, not just price. A clean answer matters more than a low number because a low number can still become expensive once the job starts changing.

    The best questions are concrete:

    • What exactly is included in your price?
    • What site conditions do you need from me before you start?
    • How do you handle changes or surprises?
    • What work do you exclude?
    • Who is responsible for permits, inspections, and disposal?
    • How long will the job take once materials are on site?
    • What does a completed job look like?
    • What problems do you expect on a job like this?

    If the installer gives broad answers without naming measurements, that is a weak sign. If they can tell you, for instance, that they need a minimum 36-inch access path, a flat substrate within 1/8 inch over 10 feet, or a clear 2-hour window for delivery and staging, they are already thinking like a planner. That matters more than a polished sales script.

    I would also ask for the order of operations. A serious installer can explain whether the job needs demolition first, then substrate repair, then installation, then trim, then sealant, then testing. If they cannot explain the sequence, they may be planning to improvise on your dime.

    One more question that saves money: “What are the most common reasons this job gets delayed?” That answer can reveal whether the contractor understands the failure points. For a flooring job, the answer might involve moisture readings, acclimation, or levelness. For a sign install, it might involve power, wall structure, or permit timing. For a commercial fixture install, it might involve after-hours access, lifts, or building rules.

    I would not choose a bidder solely on whether they answer quickly. I would choose the one whose answers reduce uncertainty. Speed without clarity is cheap only until the first problem.

    When should installation work stop, and what should happen instead?

    Installation should stop when the site is not ready, the scope is changing faster than the plan, or the work crosses into a trade that needs a different license or permit. At that point, pushing ahead usually creates rework, inspection failure, or damage.

    The opening, wall, or substrate is out of tolerance: If the opening is 1 inch too narrow, the wall is badly out of plumb, or the floor is not flat enough for the product, forcing the install will make the finished work look wrong or fail early — stop and correct the substrate or revise the design before continuing.

    Materials arrived damaged or incomplete: Missing parts, broken panels, bent trim, or the wrong finish will stall the job and can create a mismatch in the final result — stop, document the issue with photos, and replace the item before the crew proceeds.

    Electrical, gas, structural, or fire-related work is uncovered: If the install now requires a new circuit, gas connection, load-bearing change, or fire protection adjustment, that is no longer a simple installation — stop and bring in the proper licensed trade and any required permit process.

    The room is occupied or not protected: If floors, walls, fixtures, or nearby inventory cannot be protected, the risk of scratches, dust damage, and cleanup cost rises sharply — stop until protection and access are in place.

    The scope is still changing on site: If the decision-maker keeps moving outlets, changing heights, or adding items after the crew has started, the job will likely produce change orders and delays — stop and freeze the scope before continuing.

    The installer cannot explain the sequence: If the contractor cannot say what happens first, what depends on what, and what the finish standard is, the project is being guessed at rather than planned — stop and get a written sequence before more labor is spent.

    Permits or inspections are required but not secured: If the work must be inspected and the permit is missing, the job

  • How to Tell What Contaminants Are in Your Tap Water

    How to Tell What Contaminants Are in Your Tap Water

    Last updated: September 10, 2026

    Key Takeaways

    • Reports often show systemwide results, not what comes out of your kitchen faucet after 8 hours of stagnation.
    • If you suspect plumbing contaminants, collect a first-draw sample after water has sat unused for 6–18 hours.
    • Verify the faucet was not used for showers, dishwashing, or flushing during that window.
    • It does not assume you know chemistry terms like “MCL” or “ppb”; I’ll define them as I go.

    Start with the utility report, sure. But if your house has old pipes, that report alone can miss the real culprit. That is the blunt answer to how to tell what contaminants are in your tap water. The utility data reflects water at the plant or out in the distribution system; a tap test shows what reaches your glass after pipes, solder, fixtures, and time in the plumbing have done their work.

    Who this applies to — and what you need before you start

    How to Tell What Contaminants Are in Your Tap Water

    Anyone on municipal water or a private well fits here, especially if you want a likely answer without guessing wildly. You should be able to read a basic water quality report, label a sample bottle, and wait a few days for lab results. No chemistry degree required. “MCL” and “ppb” get explained along the way.

    For a public water system, your first stop is the annual Consumer Confidence Report (CCR), also called a water quality report. U.S. utilities have to provide it once a year under EPA rules. Handy? Absolutely. Complete? Not quite. It usually does not capture lead released from your own plumbing, and it may miss a problem that shows up only at one faucet after water sits overnight.

    On a private well, there is no utility report to lean on. You build the picture yourself with lab testing. For well owners, a broad panel is usually the sensible place to begin because groundwater shifts by region, depth, and season. Muddy, inconsistent, a little annoying. That is normal.

    This topic carries real weight because a bad read can overlook lead, nitrate, arsenic, or microbial contamination. When water is discolored, smells like sewage, came from a flooded well, or a child or pregnant person is involved, the DIY route stops being the smart first move. Use a certified lab, and for urgent safety concerns, follow local public health guidance before drinking any more of it.

    What your water report can tell you — and what it cannot

    Your water report can tell you which contaminants the utility found, at what levels, and whether those levels were below the EPA’s Maximum Contaminant Level (MCL), meaning the legal limit for many regulated contaminants in public drinking water. It can also show whether treatment is doing its job for things like chlorine, fluoride, nitrate, disinfection byproducts, copper, and some metals. Still, if the result affects health decisions, talk to a professional and use EPA or state guidance with the report.

    But it has blind spots.

    • Lead from your own home plumbing. Lead often shows up after water leaves the utility, especially in homes built before 1986, homes with lead service lines, or homes with brass fixtures that leach lead.
    • Contaminants not required in the report. Some chemicals are unregulated or only monitored under specific programs.
    • Averages instead of your tap. Reports often show systemwide results, not what comes out of your kitchen faucet after 8 hours of stagnation.

    The practical move is to read the report for the big categories, then decide whether you need a tap sample. A first-draw sample is the first water out of the faucet after water has sat in the pipes for at least 6 hours and no more than 18 hours. That sample is the one most likely to reveal lead or copper from plumbing.

    Two useful public references are the EPA’s page on the Consumer Confidence Report and the EPA’s lead-in-drinking-water guidance. I’d begin there:
    – EPA: Consumer Confidence Reports
    – EPA: Lead in Drinking Water

    If your report lists contaminants at low levels but your concern is a specific symptom, odor, stain, or plumbing issue, the report by itself is not enough. A neat little “everything is below the limit” line can still hide a problem that appears only at one faucet, after water stagnates, or in a certain season; if the result matters for health decisions, consult a professional and check the EPA or your state health department guidance.

    How do I tell what contaminants are in my tap water?

    How to Tell What Contaminants Are in Your Tap Water

    You figure it out by combining three things: the utility report, targeted tap testing, and a few clues from the water itself. I’d use that order because it keeps you from paying for random tests before you know what makes sense.

    1. Get the water utility’s latest Consumer Confidence Report. Find the most recent PDF or mailed copy and look for the contaminant table, source water, and “definitions.” Check whether the system uses surface water or groundwater, because that changes the likely risks. A warning sign is a report that only says “compliance” and skips the results table; that usually means you have the wrong document.
    2. Check the sample type and timing. If plumbing contaminants are your concern, collect a first-draw sample after water has sat unused for 6–18 hours. Make sure the faucet was not used for showers, dishwashing, or flushing during that window. A sample taken after the tap runs for several minutes can wash away lead or copper and give you a falsely calm result. That math stops working fast.
    3. Decide which contaminant classes fit your situation. Homes with older plumbing should prioritize lead and copper. Wells call for nitrate, arsenic, bacteria, and often iron, manganese, and hardness. Check that the lab panel lists units such as mg/L for nitrate and ppb or µg/L for lead. A problem sign is buying a “basic water test” that only checks pH and hardness; that tells you almost nothing about toxic contamination.
    4. Use a certified laboratory for anything health-related. Pick a lab accredited under the EPA’s drinking water lab recognition program or your state’s equivalent. Make sure the test method and detection limit appear on the report. A strip test with a color block that cannot separate 3 ppb from 15 ppb for lead is just too blunt to guide a decision.
    5. Collect the sample exactly as instructed. Use the bottle the lab sends, do not rinse it unless instructed, keep cold samples refrigerated at about 4°C if the kit says to, and ship within the stated time window, often 24–48 hours. Check that the chain-of-custody form is complete if the lab requires it. An unlabeled bottle, a missing collection time, or a sample left in a hot car can wreck the result.
    6. Read the result against the right benchmark. Compare regulated contaminants to the EPA MCL or your local standard, not to a random internet number. For lead, remember there is no truly safe level; EPA action levels are not the same thing as a health threshold. “Below the limit” is not identical to “no concern.” If the result matters for a child, pregnancy, or an ongoing health issue, consult a professional.
    7. Repeat if the first result is borderline or inconsistent. If a result sits near the action level or clashes with what you smell, see, or taste, retest from the same faucet and from a second faucet. Check whether the issue is limited to one fixture, one floor, or the whole house. One sample does not settle it forever; contaminants can change by day and by draw point.
    8. Map the source. If the utility report looks clean but your tap result does not, the likely source is the home system: lead service line, brass fixture, corrosion, or a treatment device that is failing. Compare a kitchen sample, a bathroom sample, and if possible a sample from a point before any softener or filter to see where it starts. Blaming the city for a lead result that appears only after water passes through your own plumbing is the wrong target; if you are unsure, consult a certified plumber or water professional.

    The best outcome is not a giant chemical list. It is a short, credible set of contaminants that are actually present, with enough detail to tell whether they come from the source water or from your house.

    What contaminants should I test for first?

    Begin with the contaminants that match your water source and your home, not a giant panel with 50 analytes you do not need. For public water, I’d prioritize lead, copper, and disinfection byproducts if you are worried about plumbing or taste. For wells, start with coliform bacteria, nitrate, arsenic, and the geology-driven metals that matter in your region.

    Here is the practical way to choose:

    • Lead: test if your home was built before 1986, has a lead service line, or has brass fixtures of unknown age.
    • Copper: test if water tastes metallic, leaves blue-green staining, or your plumbing is new and has recently been soldered.
    • Nitrate: test if you are on a well, especially in agricultural areas, because nitrate is a particular risk for infants.
    • Arsenic: test well water in areas where arsenic is known to occur naturally in groundwater.
    • Coliform bacteria / E. coli: test wells, especially after flooding, pump repair, or a new well start-up.
    • PFAS: consider it if your area has known industrial, military, airport, or landfill impacts. PFAS are a class of persistent synthetic chemicals; not every lab panel includes them, and they are not always the first test I would order unless the local risk is credible.

    A generic article will tell you to “test for everything.” Sounds careful. It is not. It burns money and slows the answer you actually need. A $25 strip panel that checks pH, hardness, chlorine, and iron may help with taste or staining, but it will not tell you whether your child’s bottle water has 8 ppb of lead or whether a well has bacteria.

    If you are unsure, a state drinking water program, county health department, or an accredited lab can often tell you which analytes are standard for your ZIP code. That advice is worth more than buying a broad consumer kit with no clear detection limits.

    What do the numbers on the lab report actually mean?

    The numbers matter only when you know the unit, the benchmark, and the sample type. A result of 0.010 mg/L for lead is the same as 10 µg/L, or 10 ppb. If the report does not make that conversion obvious, write it down before you compare anything. Simple? Not always.

    For regulated contaminants in public water, compare the result to the EPA MCL or action level listed in the report. For private wells, there may be no legal limit, so you compare to health-based guidance from the EPA, your state, or the lab’s interpretation sheet. Even then, that is not the same as “safe.”

    A few interpretation rules help:

    • Non-detect does not mean zero. It means below the lab’s detection limit.
    • Below the limit does not always mean no issue. Lead is the classic example because the action level is a systemwide regulatory trigger, not a personal safety threshold.
    • Turbidity is cloudiness, usually measured in NTU. A spike in turbidity after rain can point to sediment intrusion or well problems, and it can make disinfection less effective.
    • Hardness is not a contaminant in the health sense. It matters for scale and taste, but it is not the same kind of concern as lead or nitrate.

    If a result feels confusing, I’d read the lab’s method sheet before I trust a color-coded consumer summary. The method name, detection limit, and collection instructions tell you more than a slick “safe/unsafe” badge ever will.

    When should you stop trusting the usual approach?

    Stop using the usual report-plus-home-test approach when the situation points to an urgent health or contamination problem, because delays can matter.

    Water has a sewage smell, a rotten-egg odor plus illness in the household, or visible contamination after flooding: This may mean microbial contamination or intrusion — Stop drinking it, use bottled water or a verified safe source, and contact local health or water authorities the same day.

  • Your home has a lead service line, and a first-draw tap sample shows elevated lead: This means the plumbing is part of the source — Do not assume flushing solves it; arrange repeat testing and plan for corrosion control or service-line replacement.

    A baby, pregnant person, or anyone immunocompromised will drink the water and the well has not been recently tested: This raises the stakes for nitrate and bacteria — Get a certified well test now rather than relying on taste, smell, or an old report.

    The water is brown, orange, or black after utility work or a nearby main break: This can be sediment, iron, or disturbed scale — Run only enough water to see whether the issue clears quickly; if it persists, contact the utility and do not assume a filter will fix it.

    The report says “compliant,” but your tap water has a strong metallic taste, blue-green stains, or repeated sample failures: The source may be inside the house — Test another faucet and sample before any softener or filter, because the problem may be your plumbing rather than the supply.

    You need a result for a legal, real estate, or medical decision: Consumer kits are the wrong tool — Use an accredited lab and keep the chain of custody intact.

    If you are seeing acute symptoms and suspect contamination, get medical advice promptly. Water testing is useful, but it is not a substitute for diagnosis.

    The mistakes people make when they try to identify tap-water contaminants

    The biggest mistake is assuming taste, smell, or clarity tells the whole story. Lead, nitrate, and arsenic can be invisible and tasteless. That error costs time and can leave a serious exposure in place.

    1. Testing only once. Water quality can vary day to day, especially in wells and after plumbing changes. The result is a false sense of certainty. The better move is to retest from the same faucet and, if needed, from a second fixture.

    2. Using the wrong sample type. A flushed sample can miss lead from stagnant plumbing; a first-draw sample can overstate source-water contamination if you really want the utility supply. The result is a misleading diagnosis. Match the sample to the question.

    3. Buying a broad consumer strip kit and treating it like a health report. Those kits may help with quick screening for chlorine or hardness, but they are not enough for a health decision about contaminants such as lead or bacteria. A certified lab is the better choice when the question is safety, not convenience.

    4. Ignoring the report’s units. A number without units is easy to misread. Parts per billion, milligrams per liter, and micrograms per liter can describe the same concentration in different ways, so always convert before deciding what matters.

    5. Assuming compliance equals safety. A utility can meet its legal obligations and still leave you with a home-specific issue, especially if plumbing or fixtures are contributing contaminants. That is why a tap sample matters when the concern is your faucet, not just the system.

    A simple comparison table for choosing a test

    Situation Best first test Typical cost Turnaround Notes
    Public water, want systemwide contaminants Consumer Confidence Report Free Annual Good for utility-level data, not home plumbing
    Public water, suspect lead from plumbing First-draw tap sample at an accredited lab $25–$75 3–10 days Sample after 6–18 hours of stagnation
    Private well, no recent testing Broad well panel $100–$300 3–10 days Include bacteria, nitrate, arsenic, and local metals
    Flooded well or sewage smell Certified microbiological test $30–$100 1–5 days Do not rely on strips or taste
    Legal, real estate, or medical use Accredited lab with chain of custody $50–$200+ 3–10 days Keep paperwork intact

    What to do after you get the results

    Use the result to decide the next step, not to collect more paper. If the contaminant is in the utility report, look for the utility’s treatment updates, annual trends, and public notices. If the contaminant is at your tap but not in the report, focus on plumbing, fixtures, filters, and any point-of-use treatment device.

    If the number is clearly above the benchmark, do not wait for a second opinion before reducing exposure. Use bottled water, an NSF-certified filter if appropriate, or alternate water until you have a fix. If the result is borderline, retest with a careful sample and, if needed, ask a certified plumber, local health department, or water professional to help interpret the pattern.

    If the result is low but your concern remains, keep notes on the faucet, time of day, stagnation time, and any recent plumbing work. Patterns are often more useful than a single number. That little notebook can save a headache later.

    Bottom line

    You figure out how to tell what contaminants are in your tap water by pairing the utility report with the right tap sample, then reading the numbers in context. That gives you a realistic answer to how to tell what contaminants are in your tap water without wasting money on random tests. If you need help, use the EPA, your state drinking water program, an accredited lab, or a certified professional rather than guessing from taste, smell, or a single result.

  • What Size Water Filter Do I Need for My House?

    What Size Water Filter Do I Need for My House?

    Last updated: September 10, 2026

    Key Takeaways

    • Add at least 25% headroom above your estimated peak flow.
    • Next, measure pressure with a $10 to $20 pressure gauge screwed onto an outdoor spigot or laundry tap.
    • A problem shows up when the estimate is below what your family actually does at 7 a.m.
    • What matters is the cartridge surface area and the pressure drop at your actual flow.

    Table of Contents

    What Size Water Filter Do I Need for My House?

    The right answer to what size water filter do I need for my house is the filter size that fits your household’s peak flow, your water problem, and the pressure drop your plumbing can live with. Not the logo. Not the box size. For a typical whole-house water filter, gallons per minute matter more than marketing copy, because the wrong pick can leave you with weak shower pressure, short filter life, or a setup that never quite solves the issue.

    Who this applies to, and what I’m assuming

    This is for a homeowner or property manager who wants a point-of-entry, whole-house water filter — not a pitcher, and not a single faucet cartridge. I’m assuming you already know whether the issue is chlorine taste, sediment, iron staining, sulfur odor, hardness, or an unknown well-water problem. I’m also assuming you can read a water bill or at least estimate how many fixtures may run at the same time.

    Also, I’m assuming a typical house with a 3/4-inch or 1-inch main line and municipal water or a private well. If you have a commercial building, a fire line, a booster pump, or a treatment problem that needs reverse osmosis on the entire house, talk to a qualified water-treatment professional because the sizing logic shifts. It shifts a lot. Same goes for very low inlet pressure, heavy sand, or a well that only yields a few gallons per minute. In those cases, the “standard 10-inch canister” answer people like to toss around is usually off base.

    The real question is not “What filter brand should I buy?” It is “How many gallons per minute can the filter pass without choking the house?” That number matters more than cartridge diameter by itself. A 10-inch filter housing can work fine for a small apartment-style load; a larger family home with several fixtures running may need a much bigger cartridge, multiple housings in parallel, or a backwashing system. If you have to answer what size water filter do I need for my house, I’d treat this as a sizing job first and a product choice second. And if the plumbing or water quality is anything but straightforward, I’d confirm the design with a water-treatment professional.

    Cloudy water after storms? Rotten-egg smell? Orange or black stains? Any health-related contamination concern? Then the sizing conversation should wait until you know the water report. For a private well, that usually means a lab test or, at minimum, a detailed field test panel. Without that, you’re guessing at the wrong problem. That math stops working fast.

    How do I size a water filter for my house?

    What Size Water Filter Do I Need for My House?

    You size a whole-house water filter by matching the house’s peak demand to the filter’s rated flow, then leaving room for pressure loss and dirt loading. For what size water filter do I need for my house, the cleanest method is simple: estimate peak gallons per minute, choose a filter rated above that figure, and check that the pressure drop at normal flow still leaves the house usable. The U.S. Environmental Protection Agency’s private well guidance and NSF product certification information are solid starting points for checking water quality and treatment claims. EPA private wells and NSF standards and certifications can help you confirm the problem before you size the fix.

    Here’s the process I’d use.

    1. List the fixtures that can run at the same time. Count bathrooms and any other likely simultaneous use. A shower is commonly 2.0 to 2.5 gpm, a washer roughly 1.5 to 2.0 gpm, and a hose bib can be 5 gpm or more. Check that total against the fixtures you actually have. A problem shows up when you assume only one bathroom will ever run. And then the morning rush laughs at you.
    2. Estimate peak household flow in gpm. Add the likely simultaneous uses. A smaller home may peak around 5 to 8 gpm, while a larger family house can push 10 to 15 gpm or more. Make sure the total reflects real use, not every fixture on paper. A problem shows up when the estimate is below what your family actually does at 7 a.m. Brutal, but true.
    3. Check your static pressure and usable pressure. Static pressure is the pressure with no water flowing. You want to know both static and dynamic pressure. If static pressure is already low, a filter with 8 to 15 psi of pressure drop can make the house feel weak. Measure it with a gauge at a hose bib or laundry tap. A problem shows up if you start below about 40 psi and then add a restrictive filter.
    4. Identify the contaminant and the filter type it demands. Sediment filters are sized differently from carbon filters, iron filters, or catalytic media tanks. A 5-micron cartridge catches fine particles; a 20-micron cartridge passes more water but catches less. Check that the media matches the problem. A problem shows up when you use a sediment cartridge to solve dissolved iron or chlorine. See also our [whole-house filter guide](/whole-house-water-filters) and [water test guide](/water-testing-guide) before you choose a treatment path.
    5. Read the manufacturer’s flow rating and pressure-drop curve. The flow rating tells you how much water the filter can pass; the pressure-drop curve tells you how much pressure it steals at that flow. Check that the rating is for the same micron rating and housing size you plan to buy. A problem shows up when the brochure gives one number at an unrealistically low restriction.
    6. Add at least 25% headroom above your estimated peak flow. If your house needs 8 gpm, I’d look for a filter path rated for about 10 gpm or more, unless the water is very clean and pressure is plentiful. Check that there’s room for cartridge loading over time. A problem shows up when the system is sized exactly to the edge on day one. Tight fit. Bad bet.
    7. Check the plumbing size and location. A 3/4-inch main may be fine for modest flow, but 1-inch service gives more breathing room. Check that the filter can physically fit where the main enters, with enough clearance to change cartridges. A problem shows up when you have to cut into a cramped corner and cannot service the unit without draining half the basement.
    8. Compare cartridge life to your sediment load. Heavy silt, rust, or sand can clog a small cartridge in days or weeks. Check whether the system is meant for light sediment or heavy loading. A problem shows up when a filter is technically large enough for flow but plugs too quickly to be practical. See our [sediment filter page](/sediment-filters) for a more detailed breakdown.

    The practical rule is plain: bigger homes, higher simultaneous flow, dirtier water, and lower inlet pressure all point you toward a larger filter or a different design. A small cartridge in a clear-water city house may be fine. The same cartridge on a sandy well? No chance.

    What size water filter do I need for my house?

    For what size water filter do I need for my house, many homes land in the 10 to 20 gpm range for the treatment train, not because every house uses that much water continuously, but because peak flow needs to pass without a noticeable drop in pressure. That often means a large cartridge housing, a pair of housings in parallel, or a backwashing whole-house unit, depending on the problem. If you’re unsure, consult a water-treatment professional and use the manufacturer’s flow and pressure-drop data rather than guessing from case size.

    A single 10-inch filter housing is often too small for a full-sized house unless the flow demand is modest and the water is already fairly clean. Common, yes. Sufficient, not always. What matters is the cartridge surface area and the pressure drop at your actual flow. A large-diameter or “big blue” style housing generally gives more capacity than a slim housing, and a backwashing tank gives still more room for sediment or iron because it cleans itself on a cycle instead of clogging and stopping.

    Here’s the trade-off, and I want to be blunt: choose a finer filter, such as 1 micron, and you’ll usually catch more particles but lose more pressure and clog faster. Go coarser, say 20 microns, and the water flows more easily but more fine grit gets through. So sizing and filtration level should be chosen together. I would not use a fine cartridge as a substitute for the wrong treatment method. A professional can help confirm whether your issue needs staged filtration, a media tank, or something else.

    If you’re on municipal water and mainly want chlorine reduction, a carbon filter sized around the household’s peak flow may be enough. On a well with visible sediment, I’d usually think about staged filtration: a spin-down prefilter or coarse sediment stage first, then a finer cartridge or tank. If the well water carries iron or manganese, plain sediment filtration is the wrong tool. Common mistake. It wastes money fast. See our carbon filter guide for municipal systems and iron filter guide for well-water treatment.

    For the local service angle, the cost is driven less by the box on the shelf than by labor, plumbing modifications, bypass valves, media type, and whether the water issue needs one stage or three. A straightforward whole-house cartridge install might be a few hundred dollars in labor plus parts, while a multi-stage system or backwashing setup can run much higher. I’m not giving a fixed price because the spread is wide and water quality changes the bill. Simple as that.

    What do I check before I call a contractor?

    Check your water pressure, your pipe size, your water source, and your contaminant problem before you call anyone. Those four facts decide whether the contractor should quote a simple cartridge housing, a larger dual-stage setup, or a backwashing treatment tank, and they also help answer what size water filter do I need for my house without overspending.

    Start with the water source. Municipal water and well water behave differently. City water often needs chlorine or taste treatment plus sediment control, while well water can bring iron, manganese, hydrogen sulfide, tannins, sand, or bacteria concerns. Then measure pressure with a $10 to $20 pressure gauge screwed onto an outdoor spigot or laundry tap. If static pressure is low, tell the contractor. After that, identify the service line size if you can: 3/4 inch or 1 inch matters because it affects allowable flow and where the filter can be installed. See our water pressure guide before you buy hardware.

    I’d also ask what pressure drop the proposed filter adds at 5 gpm, 10 gpm, and 15 gpm — not just what the “capacity” is. Capacity claims without flow data are thin gruel. Ask whether the system can be serviced with a bypass valve, how often cartridges usually need replacement under your water conditions, and whether the quote includes drain routing, unions, and a shutoff valve. Those details decide whether maintenance is a 10-minute job or a service call every time.

    If your water report shows a specific issue, ask for the standard used in sizing or reduction. For drinking-water treatment claims, NSF/ANSI standards are the right language to see in the paperwork. For example, NSF/ANSI 42 is commonly used for chlorine, taste, and odor; NSF/ANSI 53 covers certain health-related contaminants; NSF/ANSI 61 relates to material safety. I’m not saying every install needs all three. I am saying the standard should match the problem. The NSF consumer guide is a useful reference when you compare products.

    A contractor who skips over pressure, peak flow, and water source is not sizing the system; they are guessing.

    What are the mistakes that make a filter feel “too small”?

    The most common mistake is buying by house size instead of by flow. A “whole-house” label does not tell you whether a filter can handle 6 gpm or 15 gpm. The consequence is low pressure at showers and laundry, especially when two fixtures run together. The better move is to size to peak demand and check pressure-drop data. See our whole-house filter installation checklist if you want to compare options before you buy.

    Another mistake is choosing micron rating too aggressively. A 1-micron cartridge on moderately dirty water can plug quickly and starve the house. The result is frequent replacements and a filter that feels useless after a short time. The better move is staged filtration or a coarser first stage, often 20 microns first and finer later if needed.

    A third mistake is ignoring water chemistry. Sediment media will not fix dissolved iron, manganese, or sulfur gas. The result is staining, odor, and false confidence that the “filter” is working. The better move is to match the treatment method to the contaminant, not to the symptom on the faucet.

    A fourth mistake is installing a restrictive unit before a pressure-reducing valve or on an already weak system without checking the numbers. The result is a house that loses usable pressure every time a tap opens. The better move is to measure static and flowing pressure first and consider a larger diameter housing or parallel filters.

    A fifth mistake is forgetting maintenance access. If the filter is wedged beside a furnace or behind a water heater, cartridge changes get delayed. The result is a clogged housing, poor flow, and sometimes bypassing the system entirely. The better move is to leave enough room to spin off the canister, swap the cartridge, and inspect O-rings without removing other equipment. Otherwise, the setup becomes a nuisance.

    When does the standard sizing approach stop working?

    The standard sizing approach stops working when the water problem is not simple sediment or chlorine, when pressure is already marginal, or when the house draws more water than a single filter path should handle.

    Very low well production: If the well cannot sustain the home’s peak demand, filter sizing is not the first fix — reduce the treatment burden, add storage, or address the well system first. A filter cannot create flow that the well does not produce. Not even close.

    Visible sand or grit after every rain: This usually means heavy particulate loading — use a spin-down separator or backwashing sediment stage ahead of any fine cartridge. A cartridge alone will clog too fast and become a maintenance headache.

    Iron staining, orange fixtures, or rotten-egg odor: These point to iron, manganese, or hydrogen sulfide, not just “dirty water” — use the correct oxidation or specialty media system, not a bigger sediment filter. Otherwise, the size may be right and the result still wrong.

    Low incoming pressure, especially below about 40 psi static: A restrictive filter can make the house feel weak — choose a lower-pressure-drop design, larger housings, or a parallel setup. Ignore this, and the showers will tell you immediately.

    Household peak use above one filter path’s rating: If the home regularly runs two showers plus laundry, or an irrigation branch shares the same treatment path, one cartridge housing may be undersized — split the load or move to a larger system. The consequence of staying small is nuisance pressure loss.

    Unknown water quality on a private well: If you have not tested for the likely contaminants in your area, you do not yet know what to size for — test first, then size. A wrong first purchase can cost more than the test.

    Space limits at the main entry: If there is no room for a larger canister or service clearance, the standard setup may be physically impossible — a contractor may need to reroute piping or use a different configuration. Crowding is a real design constraint, not a minor inconvenience.

  • Will a Water Filter Work with My Existing Plumbing?

    Will a Water Filter Work with My Existing Plumbing?

    Last updated: September 10, 2026

    Key Takeaways

    • A cartridge that is nominally rated for 6 months can foul much faster in dirty water.
    • If replacing a cartridge takes 20 minutes, a towel, and a basin, that is reasonable
    • Within the first 24 hours, I would check every joint with a dry paper towel and look for seepage, not just dripping.
    • Match the flow demand: Compare the filter’s GPM rating with the fixture it will serve.

    Table of Contents

    Will a Water Filter Work with My Existing Plumbing?

    Yes — in most homes, a water filter will work with existing plumbing, but only when the filter type matches the pipe size, pressure, and fixture setup already in place. Ask it another way: will a water filter work with my existing plumbing? Usually, yes. But the real test is whether it fits the line, keeps pressure steady, and still leaves enough flow for the sink, shower, or whole house. I’m being blunt because the bad outcomes are predictable — leaks, weak pressure, and a system that needs extra parts just to sit there.

    What I need to know before I say “yes”

    Three things decide it: pipe or hose size, water pressure, and the spot where the filter will sit in the line. Most residential plumbing uses nominal sizes such as 1/2 inch, 3/4 inch, or 1 inch for pipe, while faucet and appliance hookups often rely on threaded fittings like 3/8 inch compression, 1/2 inch NPT (National Pipe Thread), or 3/4 inch garden hose thread. A 3/8-inch compression unit under a sink is one thing; a whole-house cartridge filter on a 1-inch main is a different animal entirely.

    Copper, PEX, CPVC, and galvanized pipe can all be part of the picture. So can renters and homeowners who can reach the shutoff valves under a sink or at a laundry supply line. Also, you may already know whether you want point-of-use filtration at one tap or point-of-entry filtration for the whole house. Don’t start by shopping on appearance alone. That road goes nowhere.

    I would not call “existing plumbing” a simple yes-or-no question until I checked a few basics: available space, shutoff valves, drain access if the unit needs one, and local water pressure. Most under-sink filters need a small cabinet and a shutoff valve; reverse osmosis systems often need a drain connection and a pressurized tank; whole-house systems need room, a bypass valve, and enough clearance to change cartridges, often every 3 to 12 months depending on the media and water quality. For that sort of check, the EPA’s homeowner guidance on filtration and the NSF consumer resources are useful starting points.

    This is where the first hard stop appears. A corroded main, active leaks, old galvanized pipe that is narrowing from the inside, or even uncertainty about which line feeds which fixture means the plumbing issue comes first and the filter comes later. The filter does not heal bad pipework. Not even close.

    Will a water filter work with my existing plumbing?

    Will a Water Filter Work with My Existing Plumbing?

    Yes, as long as the plumbing can supply the right connection, pressure, and flow without making the filter work outside its design. That sounds neat on paper; in practice, the trouble usually starts with picking the wrong category. A pitcher filter needs no plumbing at all. A faucet-mounted filter usually fits a standard aerator thread, though pull-down kitchen faucets can be a nuisance. An under-sink cartridge filter usually tees off the cold-water line with 3/8-inch or 1/2-inch fittings. A whole-house system sits on the main line, where flow rate matters far more than at one tap.

    Flow rate is measured in gallons per minute, or GPM. A sink filter can usually live with lower GPM because it serves one outlet. A whole-house filter has to pass enough water for more than one fixture at once. When it can’t keep up, pressure drop shows up: the water slows, showers feel thin, and appliances refill sluggishly. That is not your house misbehaving. It is a mismatch.

    Here is the plain version I would use. If your plumbing already has a shutoff valve and a standard branch line, most under-sink filters can be adapted with the right fittings. If your faucet has a nonstandard spray head or a built-in pull-out hose, faucet-mounted filters are often the wrong pick. If your house uses well water with sediment, whole-house filtration may still work, but the prefilter has to catch grit before it clogs the finer media. And if your water pressure is already low, a restrictive cartridge can push it below a usable range. That happens a lot with reverse osmosis and dense carbon blocks.

    People often miss this: compatibility is not just about thread size. It also comes down to pressure loss, access, and the way the filter changes the water path. A filter can physically fit and still be a lousy match if it cuts flow by 30% or needs a drain you do not have. The NSF/ANSI standards and EPA consumer guidance both stress matching the system to the job, not merely the connection. Clean fit, bad performance? That’s a dead end.

    What should I check before I buy anything?

    Verify the connection type, space, pressure, and rated capacity before you spend a dollar. I’d check in that order because it usually avoids returns and surprise plumbing errands, and I would still consult a professional if the shutoff, pressure, or drain setup is unclear.

    1. Identify the connection point: Measure the cold-water branch under the sink, faucet aerator, or main line with a tape measure or thread gauge. Look for 3/8-inch compression, 1/2-inch NPT, or 3/4-inch garden hose thread. Match the filter or adapter to the actual fitting. A problem shows up when you need force, tape, or “close enough” threading just to get it started.
    2. Check available space: Measure cabinet height, width, and depth in inches, and leave at least 2 to 4 inches of clearance around cartridges or housing caps for service. Verify that you can remove the sump or cartridge without disconnecting the whole unit. A problem shows up when the tank, valve head, or tubing bend radius blocks the door or drawer.
    3. Confirm water pressure: Look at the home’s static pressure, usually measured in psi, at a hose bib or main line gauge. Many residential systems expect roughly 40 to 60 psi; the exact acceptable range depends on the product. Verify that the filter’s minimum pressure is below your actual reading. A problem shows up when the pressure is already low before anything is installed.
    4. Match the flow demand: Compare the filter’s GPM rating with the fixture it will serve. A kitchen sink can tolerate less flow than a shower or whole-house line. Verify that the system can supply your intended use without obvious restriction. A problem shows up when the spec sits far below the use case.
    5. Check for a drain requirement: Reverse osmosis and some backwashing systems need a drain connection or waste line. Verify that there is a nearby air gap or approved drain path. A problem shows up when the only practical drain is too far away or may not meet local code.
    6. Inspect the shutoff valves: Make sure the cold-water shutoff turns fully, does not leak, and actually stops water. Verify that you can isolate the branch you want to modify. A problem shows up when the valve spins, drips, or refuses to close all the way.
    7. Confirm the media rating: Look for the contaminant class, such as sediment, chlorine, lead, or cyst reduction, and any standard listed by NSF International or the Water Quality Association. Verify that the filter is meant for your water problem, not just your plumbing. A problem shows up when the filter is sold as “taste and odor” only but you need structural filtration.

    For terminology, NSF International’s consumer guidance and the Water Quality Association’s certification pages are both useful. Want the formal standard language? NSF/ANSI 42 covers aesthetic effects like chlorine taste and odor, NSF/ANSI 53 covers health-related contaminants, and NSF/ANSI 58 covers reverse osmosis systems. The EPA’s Private Drinking Water Wells guidance also helps if you are on a well.

    How do I tell if my plumbing will need adapters or changes?

    Look at the fitting, the valve, and the route the tubing has to take. Most of the time, you need adapters instead of pipe replacement. Good news. An adapter is a short fitting that changes one thread or size to another; it is not proof the system is failing.

    A standard under-sink install often uses a tee fitting on the cold-water line and then a 1/4-inch or 3/8-inch tube to the filter head. With a modern quarter-turn stop and a 3/8-inch outlet, you may be able to connect directly. A pull-out faucet with a braided hose is different; the filter may need a separate feed line instead of an inline faucet adapter. Whole-house systems usually call for unions, bypass valves, and a filter housing rated for the pipe size already in the home.

    Force is not a fitting strategy. That’s the mistake. PTFE tape, also called plumber’s tape, belongs on the correct threaded joint, not as a cure for a mismatched part, and a plumbing pro can tell you whether a given joint should use tape, a gasket, or a compression seal. Compression fittings seal by the ferrule and nut, not by tape on the threads. Unsure? Stop and ask a plumber instead of muscling it together.

    Copper and PEX usually make the filter easier to work into the system than old galvanized pipe. Galvanized lines can carry mineral scale and rust flakes, which clog cartridges quickly. In that case, I would want a sediment prefilter ahead of a finer carbon block, or I would expect frequent cartridge changes. A cartridge that is nominally rated for 6 months can foul much faster in dirty water.

    Some installation styles barely depend on the house plumbing at all. Faucet filters, countertop filters, and refrigerator line filters are the least invasive. Their trade-off is obvious: they usually serve one outlet and may not suit pull-down faucets, sprayers, or nonstandard aerators. They fit a renter who wants no pipe cutting and no cabinet work. They do not fit a family that wants filtered water at the shower or laundry line.

    When does a filter stop being the right answer?

    A filter stops being the right answer when the plumbing problem is bigger than the filtration problem. That line matters. Miss it, and you spend money on the wrong setup while the water still acts up.

    Active leaks at joints or valves: This means the plumbing needs repair before filtration — fix the leak first, then install the filter. A filter adds more fittings, which adds more leak points.

    Old galvanized lines with visible rust flakes or severe pressure loss: This means the pipe may be restricted or deteriorating inside — plan for plumbing replacement or a coarse sediment strategy, not a fine filter alone.

    Pressure below the filter’s minimum requirement: This means the unit may not function correctly — choose a lower-restriction system or address the pressure issue first.

    No place to connect a drain for reverse osmosis or backwashing equipment: This means the chosen filter type does not fit the site — use a no-drain option, a faucet filter, or a different treatment method. If the drain or waste line is questionable, consult a plumber before buying.

    Pull-down or specialty faucets with nonstandard hoses: This means faucet-mounted filters often will not attach cleanly — use an under-sink or countertop system instead.

    You need to treat a verified safety issue in the water, but you have not identified the contaminant: This means guessing with a filter is risky — test the water through a lab or local water authority, then choose a certified system under NSF/ANSI 53, 58, or the relevant standard, ideally with guidance from a water professional.

    These are not edge cases. They are where people burn the most time. A homeowner with a corroded 1950s branch line can spend $200 to $1,000 on a filter setup and still have weak flow because the real restriction is upstream. A renter with a pull-out faucet can buy a faucet mount that will not physically fit. In both situations, the right move is to change the approach, not force the hardware. Sometimes the pipe is the culprit, plain and simple.

    What mistakes do people make with existing plumbing?

    They usually make the same five mistakes, and each one carries a clear cost.

    1. Buying by contamination label alone. The cost is a filter that removes the wrong thing or restricts flow too much. The fix is to match the standard and the plumbing, not just the marketing claim.

    2. Ignoring pipe size and thread type. The cost is extra adapters, leaks, or a return. The fix is to identify the actual fitting before ordering.

    3. Skipping pressure checks. The cost is weak flow, noisy operation, or a reverse osmosis system that produces water painfully slowly. The fix is to check psi first.

    4. Using the wrong installation point. The cost is a faucet filter on a pull-out sprayer or a whole-house unit where only one tap needs treatment. The fix is to choose point-of-use or point-of-entry based on use.

    5. Not planning cartridge changes. The cost is a system that works for a month and then clogs. The fix is to leave cabinet space and a service path, ideally with enough room for a 10-inch or 20-inch housing if that is the format.

    6. Assuming the first adapter you find is acceptable. The cost is cross-threading or an insecure seal. The fix is to match compression to compression, NPT to NPT, and only adapt when the part is designed for it.

    If I had to boil all of that down, it would be this: a water filter should fit the plumbing without turning the home into a plumbing project. Otherwise, you may be looking at pipe replacement, rerouting, or repeated workarounds — and that is the wrong system.

    What counts as a good result after installation?

    A good result is steady flow, dry fittings, and the right water at the right fixture. During the first 24 hours, I would check every joint with a dry paper towel and look for seepage, not just dripping. Then I would run the water long enough to flush air and loose carbon fines, which some new cartridges release at first. With an under-sink filter, the flow should feel normal enough that you do not avoid using it. With a whole-house filter, showers, laundry, and taps should still act like a house with ordinary plumbing.

    A good result also means the filter is easy to service. If replacing a cartridge takes 20 minutes, a towel, and a basin, that is reasonable, especially if the manufacturer’s instructions say the first cartridge change is due after 6 months or 12 months, depending on the model and water quality.

  • Where to Install a Whole House Water Filter in Your Plumbing System

    Where to Install a Whole House Water Filter in Your Plumbing System

    Last updated: September 10, 2026

    Key Takeaways

    • Leave at least the filter housing length plus 6 to 12 inches of working space on each side for unions, valves, and cartridge removal.
    • The biggest mistake is putting the filter where it is easy to reach but wrong for the plumbing.
    • The time depends less on the filter itself than on where the plumbing allows it to go.
    • I’m writing this for a homeowner or property manager who already knows they want filtration but is not sure where it belongs in the plumbing run.

    Usually, the right spot is the main cold-water line, after the meter or pressure tank and before the first branch that feeds the house. One filter. One entry point. That placement lets the whole home benefit from a single treatment stage, but a licensed plumber or local code official should still check the layout because code rules and pipe runs vary.

    I’m writing this for a homeowner or property manager who already knows they want filtration but is not sure where it belongs in the plumbing run. I’m assuming you can identify the main shutoff, the water heater, and the main line coming into the house. I’m also assuming your goal is clean, reliable installation — not a temporary hose-and-clamp experiment.

    Who this applies to — and who should do something else

    Where to Install a Whole House Water Filter in Your Plumbing System

    This guidance applies to most homes with a single point of entry for water: municipal service with a meter, or a private well with a pressure tank and pressure switch. In those setups, the filter belongs on the incoming main line before the plumbing splits into hot and cold branches. That is often the standard layout because a whole house filter treats the water once, then every fixture downstream benefits, but local code and the manufacturer’s instructions should confirm the final arrangement.

    The basic idea is simple. The details are not. A sediment cartridge filter, for example, is often installed after the shutoff valve and before the water softener or heater, depending on the water quality problem and the rest of the treatment train; consult a professional because the exact order can change with the system. A carbon filter may need a bypass loop so you can service it without shutting off the entire house. Most whole-house housings are built for 3/4-inch, 1-inch, or 1 1/4-inch pipe, and the size has to match the home’s flow demand or pressure drop becomes obvious. The U.S. Environmental Protection Agency notes that point-of-entry treatment is often selected based on the contaminant and the system design, not on one universal layout.

    This does not fit every house. If your main line is old galvanized steel, corroded copper, or buried in a wall, the best location may be harder to reach and may require replumbing. If you have a well system with a pressure tank, the filter location can be affected by the pump cycle and the tank’s drawdown. If your water contains high iron, sulfur, or hardness, a single filter may not solve the whole problem; you may need filtration plus softening or oxidation.

    I would not treat this as a decorative add-on; consult a professional if the piping is crowded, hidden, or already marginal. The wrong placement can starve pressure, make cartridge changes miserable, or leave the water heater and fixtures unprotected. If you are dealing with a fire sprinkler tie-in, a recirculation loop, or a building with multiple units, this stops being a simple home project and becomes a layout problem that should be planned from the plumbing schematic, not guessed at the wall.

    Where should a whole house water filter go in the plumbing?

    It should go on the main cold-water supply line, upstream of all branch lines and downstream of the meter or pressure tank, with enough straight pipe for the housing, unions, and shutoff valves. That is the shortest answer, and it is the one I would use unless your plumbing has a special feature that changes the order. For a typical residence, the filter is usually installed on the cold inlet before the first tee, but check the code and manufacturer guidance for your area.

    The usual sequence is:

    1. Municipal water: service line → meter → main shutoff → pressure-reducing valve, if present → filter → softener or other treatment, if used → house branches.
    2. Private well: well pump → pressure tank → pressure switch area → filter → softener or UV, if used → house branches.

    That sequence matters because a filter belongs where it can protect the rest of the system without filtering water you do not need to treat. The water heater should usually be after the filter so sediment does not load up the tank or tankless heater. Put the sediment filter after the heater, and you miss the chance to protect the appliance. The International Plumbing Code and the Uniform Plumbing Code both expect equipment to be installed in a way that preserves access, serviceability, and proper flow.

    I usually think in terms of three practical goals:

    • Treat the whole house, not one branch.
    • Keep the filter accessible for 6- to 12-month cartridge changes, or whatever interval the cartridge rating calls for.
    • Avoid pressure loss from unnecessary elbows, tight turns, or undersized pipe.

    The right spot is not always the closest spot. A filter crammed into a crawlspace corner may be technically “on the main line” and still be a bad install because nobody can service it without draining the house. A straight section in the basement or utility room, near the main shutoff, is often better even if it means a little more piping.

    If your home has a pressure-reducing valve, check whether it sits before or after the meter assembly and local code requirements. In some layouts, you want the filter on the house side of the PRV so the filter sees a controlled pressure. In others, the PRV itself should be protected from sediment by being upstream of the filter. Local plumbing code and the equipment instructions should drive that decision.

    How do you place it correctly?

    Where to Install a Whole House Water Filter in Your Plumbing System

    Place it where the main line is easy to reach, can be isolated, and has enough length for service; then verify flow direction, clearance, and shutoff access before you cut pipe. I’d treat this as a layout job first and a cutting job second.

    1. Find the exact main line entry point. Trace the pipe from the meter or pressure tank to the first distribution split. Verify which line is cold supply only and which branch feeds the water heater. If you cannot trace it confidently, stop; a wrong cut can isolate half the house.
    2. Choose a straight run with room for service. Leave at least the filter housing length plus 6 to 12 inches of working space on each side for unions, valves, and cartridge removal. Verify that the sump or housing can drop downward far enough to change the filter. If the canister hits a wall, shelf, or floor, the location is wrong.
    3. Confirm flow direction and orientation. Most housings have an arrow showing inlet to outlet. Install with the inlet on the supply side and the drain or sump pointed down if that is the design. If the arrow is reversed, the filter media may not work correctly and pressure loss can increase.
    4. Install shutoff valves on both sides. Put a full-port ball valve before and after the filter so you can isolate it. Verify you can close both without emptying the entire system. If only one side is valved, cartridge changes become messy and slow.
    5. Add a bypass loop if the cartridge or media needs downtime. A three-valve bypass lets water continue around the filter during service. Verify the bypass is labeled clearly. If the bypass is unlabeled, someone will open the wrong valve later and send untreated water through the house.
    6. Respect pipe size and pressure drop. Match the housing ports to the existing line — often 3/4-inch or 1-inch in a residence. If the filter body or cartridge is undersized for the home’s flow, shower pressure and appliance fill rates will drop when multiple fixtures run.
    7. Use the correct fittings for the pipe material. Copper needs sweat or press fittings; PEX needs the proper crimp, clamp, or expansion method; CPVC needs solvent-weld fittings rated for potable water. Verify that the fittings are rated for the static pressure in the system, commonly 50 to 80 psi in residential use. A loose or mismatched fitting will show up as seepage during the first pressure cycle.
    8. Pressure-test and flush before putting it into service. Slowly repressurize, inspect every joint, then flush the filter per the manufacturer’s instructions until the water runs clear. If the system hammers, leaks, or drops pressure sharply, stop and find the cause before leaving the line in service.

    A clean install usually takes a few hours in an accessible basement or mechanical room. A cramped crawlspace, pipe reroute, or well-system modification can take longer. If the work requires soldering near finished walls, that adds both labor and risk.

    For standards and code context, the International Association of Plumbing and Mechanical Officials’ Uniform Plumbing Code and the International Plumbing Code are the reference points many jurisdictions adopt in some form. Local amendments matter, so the code book alone is not the whole answer.

    What happens if you put it in the wrong place?

    The wrong place usually costs you pressure, convenience, or both. A whole house filter is not just a container of media; it is a restriction in the line. Put it badly, and every shower and appliance reminds you.

    The most common bad locations are after the water heater, after the first branch split, or in a spot with no room to service the housing. After the heater is the worst of the three because sediment reaches the tank first. After a branch split means only part of the house is filtered, which defeats the point. A hard-to-reach place turns routine cartridge replacement into a messy shutdown.

    There is also a subtle failure mode: installing a filter upstream of a pressure-reducing valve or softener without checking the system pressure and flow demand. On paper the line looks correct. In use, the house feels sluggish because the filter, PRV, and other treatment components all add resistance. If you see pressure swings when two fixtures run at once, the system may be undersized or arranged poorly. That math stops working fast.

    For municipal water, I would be cautious about placing any treatment device where it becomes difficult to isolate from the meter or backflow assembly. For wells, the pump and pressure tank create cycling pressure, so the filter should be placed where it does not become the weakest point in a system that already works hard. Well water with heavy sediment may also need a spin-down separator ahead of the finer cartridge stage. That is a different setup, not just a bigger filter.

    A good result looks boring: steady pressure, clean water, easy cartridge access, and no puddles around the housing after a pressure cycle. If you have to move furniture, drain half the house, or fight the wall every time the filter changes, the location is wrong even if it “works.”

    When should you stop and change the plan?

    You should stop and change the plan when the plumbing layout, water quality, or access makes a single inline filter the wrong tool. That is not failure; it is good judgment.

    No straight pipe run of at least 12 to 18 inches: the housing, valves, and unions will be cramped — choose a different location or reroute the pipe so the cartridge can be removed cleanly.

    Main line is buried behind finished surfaces: cutting into it may create a large repair job — move the install to the utility side or have the line reworked at an accessible point.

    House pressure is already marginal, below roughly 40 psi at fixtures: any added restriction can make the home feel weak — size the filter differently or solve the pressure issue first.

    Water has heavy iron, manganese, sulfur, or very high sediment: a single cartridge filter may clog too fast — use a staged treatment setup such as a sediment prefilter, iron treatment, or softener as appropriate.

    The system includes a recirculation loop, fire protection, or multiple dwelling branches: the piping logic is more complex — the filter location should be planned from the whole system, not from one wall cavity.

    You cannot identify the main shutoff or pressure tank confidently: the risk of cutting the wrong pipe is too high — trace the system completely before touching a saw or torch.

    Those are the moments when “just put it near the water heater” turns into an expensive mistake. A good layout protects the equipment and the person who will service it later.

    The mistakes I see most often

    The biggest mistake is putting the filter where it is easy to reach but wrong for the plumbing. That usually means a branch line, the hot side, or a spot after the heater. The consequence is partial treatment or no protection for the heater. The better alternative is to stay on the main cold-water entry line.

    Another common error is ignoring the direction arrow on the housing. If the inlet and outlet are reversed, some cartridges perform poorly and some housings do not seal the way they should. The fix is simple: read the flow marking before tightening the unions.

    People also undersize the system. A small housing on a house with multiple bathrooms can cause a noticeable pressure drop when two fixtures open at once. The alternative is to choose a housing and cartridge rated for the home’s expected flow, not just the pipe size.

    I also see installs with no bypass and no isolation valves. That turns one dirty cartridge into a house-wide shutdown. The correct alternative is a shutoff on both sides, and often a bypass loop for service.

    The last mistake is skipping the flush. New filters can shed carbon fines or trapped air, and sediment housings can collect debris from cutting the pipe. If you do not flush per the manufacturer’s instructions, the first water from the tap may be cloudy. That is not usually dangerous, but it is a sign the system was not brought online properly.

    How long does installation take, and what should a good quote include?

    A straightforward whole house filter install often takes 2 to 4 hours in an accessible mechanical room, but a tight crawlspace, pipe relocation, or multi-stage treatment setup can take most of a day. The time depends less on the filter itself than on where the plumbing allows it to go.

    If you are asking a contractor for a quote, I would want to see these items spelled out:

    • exact filter location
    • pipe material and size
    • whether shutoff valves and a bypass are included
    • whether the install includes a pressure test and flush
    • whether drywall repair, electrical work for a UV unit, or disposal of old parts is included
    • cartridge or media replacement cost, if the same company will service it later

    A quote that only says “install whole house filter” is too thin to compare. If the price is low because the contractor plans to cut into a hidden line or skip isolation valves, that is not a bargain. If the price is higher because the install includes a proper bypass, union fittings, and pressure testing, that may be the better job.

    I would also ask what maintenance interval the filter is designed for. Some sediment cartridges need changing based on gallons filtered, not just months. A good quote should also say whether the first cartridge change is included and whether the system is sized for the home’s peak demand.

  • How Long Does It Take to Install a Water Filtration System?

    How Long Does It Take to Install a Water Filtration System?

    Last updated: September 10, 2026

    Key Takeaways

    • A simple under-sink carbon filter can be done in under 2 hours.
    • Leave the system pressurized for 10 to 15 minutes and check again.
    • A simple install with accessible shutoffs and no drain work may take 90 minutes to 3 hours.
    • A whole-house system can run 4 to 8 hours, and longer if the bypass loop has to be built from scratch.

    A plumber at the sink. A drill on the counter. That is the scene. Most people asking how long does it take to install a water filtration system want a booking window, not a classroom lecture. Most water filtration systems take 2 to 6 hours to install if the plumbing is straightforward, and a full day or more if the job needs new lines, a drain connection, electrical work, or a bulky whole-house unit. If you need the short answer because you are calling someone this week, that is the range I would use first. The exact time depends on the system type, where it sits, and whether your plumbing is easy to reach.

    Who this answer applies to

    How Long Does It Take to Install a Water Filtration System?

    This answer applies to a homeowner or property manager deciding whether to hire a plumber or water-treatment contractor for a point-of-use system at one sink, a reverse osmosis unit under the counter, or a whole-house filtration system on the main line. Not sure whether the work is straightforward? Consult a professional and compare the job against local plumbing rules before you book. I am assuming you already know where the unit will go and that you want to understand the job length well enough to book it, compare quotes, and spot a contractor who is guessing.

    I am not talking about a softener-only setup, a portable pitcher, or a simple faucet filter that screws on in minutes. Different jobs. When the system ties into a main water line, a drain, or electrical service, consult a licensed plumbing professional and check whether local code requires a permit or a pressure test.

    The biggest time variable is not the brand name on the box. It is the site conditions: copper vs. PEX, crawlspace vs. slab, how close the cold-water line is, whether there is a nearby drain for reject water, and whether the installer must cut drywall to reach a shutoff. A simple under-sink carbon filter can be done in under 2 hours. A reverse osmosis system with a storage tank and dedicated faucet usually takes longer because of the faucet hole, drain saddle, and flush cycle setup. A whole-house system can run 4 to 8 hours, and longer if the bypass loop has to be built from scratch. That part can snowball fast.

    If you have galvanized pipe, severe corrosion, no working shutoff, or water pressure that already swings wildly, the clock changes fast. Those are not “surprises”; they are the job. If the housing, piping, or pressure condition looks uncertain, consult a licensed plumber before treating the project as routine.

    How long does it take to install a water filtration system?

    About half a day. That is the practical answer most people need before they book an appointment. I would expect a simple point-of-use carbon filter to be faster, and a reverse osmosis system or whole-house setup to be slower. On a typical service call, the most realistic range is 90 minutes to 3 hours for a simple install and 4 to 8 hours for a whole-house job.

    Here is the job in the order a contractor usually handles it:

    1. Shut off the water and relieve pressure. Close the nearest stop valve or main shutoff, then open the cold tap for 5 to 10 seconds to drop pressure. Verify the line is no longer under load before cutting or disconnecting anything. If water still sprays when the line is cracked, the shutoff is failing or you are on the wrong valve.
    2. Confirm the installation point and clearances. Measure the cabinet or wall space in inches: height, width, and depth. A tank-style reverse osmosis system often needs more than the filter housing alone because the storage tank and tubing bends take space. Verify the unit can sit level and the tubing can turn without kinking. A problem shows up when doors will not close, tubing pinches, or the sediment filter cannot be removed later.
    3. Mount the bracket or housing. Mark the centerline, predrill if needed, and fasten to a solid surface with screws sized for the substrate. For drywall, the bracket should not hang from loose anchors if the unit is heavy when wet. Consult the manufacturer’s instructions if the housing weight, wall type, or mounting surface is uncertain. If it shifts when you tug it by hand, it is under-supported.
    4. Tap into the feed line. Install the supplied tee, saddle, or adapter on the cold-water line, using the correct tubing size such as 1/4-inch or 3/8-inch where specified. Verify the compression fittings seat cleanly and the line is not cross-threaded or over-crushed. A drip at this stage means the fitting was not seated or the tubing end is ovalized.
    5. Install the drain connection if the system needs one. Reverse osmosis units commonly discharge reject water to a drain via a saddle clamp or air-gap fitting. Keep the clamp above the trap and follow the manufacturer’s angle and height instructions. Verify the drain flows freely and does not back up. If water gurgles or backs into the line, the drain setup is wrong.
    6. Add the faucet, faucet hole, or dedicated outlet. If the system needs a separate dispenser, drill the countertop or sink deck only after confirming material type. A stainless sink, solid-surface top, and granite all have different cutting risks. Verify the faucet sits tight and the hole is deburred. Chipped laminate, cracked stone, or wobbling hardware means the cutout was rushed.
    7. Flush and test the cartridge or membrane. Run the system for the manufacturer’s specified flush time, which is often measured in gallons rather than minutes. Verify the water runs clear and pressure stabilizes. If flow is weak, cloudy, or full of black carbon dust after the flush period, the cartridge may be installed backward or not seated.
    8. Check for leaks under real pressure. Reopen the shutoff slowly, then inspect every joint with a dry paper towel. Leave the system pressurized for 10 to 15 minutes and check again. Verify there is no seepage at the fittings, housing cap, or faucet shank. A delayed drip usually points to a loose compression nut or a damaged O-ring.

    A simple install with accessible shutoffs and no drain work may take 90 minutes to 3 hours. Add another 1 to 2 hours if the installer must cut in a bypass, drill a countertop, or route tubing through a basement ceiling. Whole-house filtration often lands in the 4 to 8 hour range because the unit is larger, the pipe is larger, and the mounting matters more. No magic there.

    The honest limitation: if the job requires electrical power for a UV stage, pump, or control head, or if the piping is not standard copper/PEX, time estimates get less reliable. I would not trust anyone who promises a same-day number without seeing the site.

    What changes the timeline most?

    How Long Does It Take to Install a Water Filtration System?

    Extra connections. That is what usually stretches the schedule, not how “advanced” the filter sounds on the box. A basic sediment-and-carbon unit can be faster to install than a cheaper-looking reverse osmosis kit that needs a faucet, drain, and tank. That is why how long does it take to install a water filtration system often depends more on plumbing access than on the filter media.

    The main time drivers are these:

    Access. A sink cabinet with a clean shutoff and open floor space is one thing. A cramped cabinet with a garbage disposal, dishwasher hose, and disposal cord bundle is another. If a plumber has to crawl behind stored items or cut access holes, expect the clock to move by 30 to 90 minutes.

    Pipe material. PEX is usually quicker to adapt than old galvanized steel. Copper is common and workable, but hard to modify if the pipe is cramped or oxidized. Galvanized can slow the job because fittings seize and pipe walls are often reduced by mineral buildup. That does not make the job impossible; it makes the estimate less generous.

    Whole-house vs. point-of-use. A whole-house system installed on the main line may need a bypass valve, pressure gauge, shutoff valves, and enough straight pipe length to fit the housing. Point-of-use systems are smaller, but some still need a dedicated faucet or drain line. The filter size does not tell you the labor time by itself.

    Countertop material. A drilled hole for a RO faucet can be quick on a pre-scored sink deck and slow on stone. Granite, quartz, stainless, and laminate all behave differently. A bad cut costs more time than a careful one because it can mean replacing the sink or patching the counter.

    Water quality goals. If you are just reducing chlorine taste and odor, a carbon block or GAC filter may be enough. If you are trying to reduce dissolved solids, nitrates, or fluoride, the system may need RO or a specialty media tank. Those systems carry more tubing, more parts, and more time to assemble correctly.

    I would be cautious about any quote that bundles “installation” without saying whether it includes a new faucet, bypass valve, drain tie-in, or old-system removal. The missing items often account for the extra hour or two, and they are the kind of details that decide whether how long does it take to install a water filtration system stays on schedule.

    What should I ask a contractor before booking?

    Ask five plain questions before you set a date; each one helps pin down whether the job is a 2-hour visit or an all-day installation.

    Ask: “Is this a simple swap or a new install?” A swap means an existing unit is coming out and a similar one goes in. A new install means the contractor is adding the feed line, drain, faucet, or mounting point from scratch. Those are not priced or timed the same way.

    Ask: “Does your estimate include the shutoff, drain tie-in, countertop drilling, and leak test?” If the answer is vague, expect add-ons. A clear estimate should say what is included in writing. If you are comparing quotes, this is where the hidden time lives.

    Ask: “What pipe material will you be working with?” The answer matters because PEX, copper, CPVC, and galvanized all affect labor. If the contractor has not asked to see the line or photos, they may be guessing.

    Ask: “Will this need a permit or inspection in my area?” Some whole-house changes trigger local plumbing rules. That does not always add much labor, but it can add scheduling time. In some towns, the inspection window is the real delay.

    Ask: “What should be ready before you arrive?” A good installer may ask for clear cabinet access, a working shutoff, and the exact system model. If they do not ask for photos or measurements, I would expect a longer visit or a second trip. If the answer changes once they see the cabinet, that is a sign the original time estimate was too optimistic.

    A contractor who can explain the work in terms like bypass valve, drain saddle, compression fitting, and cartridge flush is usually thinking about the job the right way. One who says “it’s all the same” is not.

    When should I stop treating this as a simple install?

    Stop right there when the plumbing, the system, or the water conditions move outside the usual under-sink or straight main-line setup. In those cases, the problem is not speed. The problem is that the standard approach is the wrong tool.

    No working shutoff valve: If the water cannot be isolated cleanly, the job can flood the cabinet or wall — consult a licensed plumber and replace or repair the shutoff first, then install the filter.

    Galvanized pipe that is heavily corroded: Threads may crumble and fittings may not seal — consult a professional and plan on pipe repair or replacement before the filtration work.

    Need for a countertop cut into stone or tempered glass: A bad hole can crack the surface — use the proper drill bit and hole saw for the material, or hire someone who does countertop cutting routinely.

    No nearby drain for a reverse osmosis system: The reject water needs a safe discharge path — consult a plumbing professional and choose a different system type or have the drain route built correctly.

    Electrical components near water with no safe outlet: UV, booster pumps, and some control heads need power — add a proper outlet or choose a non-powered system, and consult a licensed electrician or plumber if the layout is unclear.

    Severe low pressure or pressure spikes: The system may not perform as designed, and fittings can fail sooner — fix the pressure issue first; a pressure-reducing valve or booster may be needed, and a plumber should evaluate the line if the pressure is unstable.

    Home on a well with sediment, iron, or manganese problems: The filter may clog fast if the pre-treatment is wrong — test the water and size the prefilter and treatment train to the actual water chemistry, ideally with a water-treatment professional.

    I would not treat those as minor delays. They change the job from installation to plumbing modification. That is the point where a clean one-visit estimate becomes unrealistic, and how long does it take to install a water filtration system becomes a site-specific question.

    The mistakes that waste the most time

    The most common mistakes are small at first and expensive later because they create leaks, rework, or a second trip.

    Buying the wrong system size. A unit that is too small for the household flow rate can cause weak pressure or short filter life. The fix is to match the system to actual demand, not just the cabinet dimensions.

    Ignoring the drain requirement on RO. Reverse osmosis systems produce reject water and often need a drain connection. If that was overlooked, the installer may have to return with extra parts. The consequence is a longer job and a second labor charge.

    Using the wrong tubing or fittings. A 1/4-inch line where 3/8-inch was intended can restrict flow; mixing incompatible compression parts can leak. The better alternative is to confirm tubing size and fitting type before anyone starts cutting.

    Drilling the wrong hole in the wrong material. A sink deck, quartz counter, and stainless sink do not get treated the same way. A bad hole can turn a one-hour task into a replacement project. The correct alternative is to verify the material and drilling method in advance.

    Skipping the flush. Carbon dust, factory residue, or membrane preservatives can leave the water cloudy or bad-tasting. The alternative is to flush for the manufacturer’s specified volume before declaring the system done.

    Tightening fittings until they deform. Overtightened compression nuts and cracked plastic housings create slow leaks that show up after the installer leaves. The better alternative is hand-tight plus the specified turn, then a 10- to 15-minute leak check under pressure.

    A good installation leaves the cabinet dry, the flow stable, and the filter easy to service later. If the cartridge cannot be removed without disconnecting tubing, the installer saved time today and handed you a headache next year. That is why the best answer to how long does it take to install a water filtration system is not just hours, but also whether the work was done cleanly.

    What does a fair installation quote usually cover?

  • How to Choose the Right Shutoff Valve for a Water Filter Install

    How to Choose the Right Shutoff Valve for a Water Filter Install

    Last updated: September 10, 2026

    Key Takeaways

    • A ball valve uses a drilled metal or polymer ball that rotates 90 degrees to stop flow.
    • For a standard home cold-water line, 125 psi or 150 psi service ratings are common.
    • Look for a valve rated for residential potable water service, commonly 125 psi or 150 psi.
    • Rotate the handle 90 degrees to verify that open and closed positions are distinct.

    A quarter-turn ball valve is usually the right shutoff valve for a water filter install, provided it matches the pipe material, pipe size, and pressure rating of the line being cut into. For how to choose right shutoff valve water filter install, the safer move is to match the plumbing first and the filter second; otherwise, the valve can stop water poorly and create a fresh leak point. Honestly, I’d pick the part that fits the pipe, not the brand on the box.

    Who this applies to — and what I assume you already have

    How to Choose the Right Shutoff Valve for a Water Filter Install

    This applies to an under-sink filter, a point-of-use carbon filter, a reverse osmosis system, or any small residential water treatment unit that needs an upstream shutoff. Unsure about line condition, hidden access, or the correct fitting standard? Consult a licensed plumber or the filter manufacturer’s installation guidance before you buy parts. I’m assuming you already know where the filter will sit, can identify the supply line size, and can turn off the water at the fixture or the main if needed. I’m also assuming a normal household setup — not a fire sprinkler line, boiler feed, or a commercial manifold.

    Three details drive the valve choice: pipe material, pipe size, and how the filter connects. A 3/8-inch compression supply tube under a sink is a different animal from a 1/2-inch copper branch or a 1/2-inch PEX line. “Water shutoff” on its own can be misleading. The valve has to match the connection method: compression, push-to-connect, sweat, threaded, or crimp. When those don’t line up, you end up stacking adapters, and that gets bulky fast.

    This isn’t the sort of job that needs a plumber just because it involves a water filter. It does turn into the wrong DIY project when the line is corroded, the shutoff is seized, or the supply runs behind a finished wall. In those cases, the real issue isn’t the valve. It’s the plumbing itself.

    Which shutoff valve type makes sense for a water filter?

    For most water filter installs, a quarter-turn ball valve is the practical default because it closes quickly and gives clear open/closed feedback. A ball valve uses a drilled metal or polymer ball that rotates 90 degrees to stop flow. That 90-degree movement matters: you can tell at a glance whether it is open or closed. Clean and simple.

    For under-sink filters, I usually start with compression ball stop valves in 3/8-inch or 1/2-inch sizes. Those are common where the branch line already uses compression fittings. With PEX, a push-to-connect or crimp-style ball valve may be the neatest fit. On copper, a sweat ball valve is often the most direct option if soldering is comfortable. Threaded valves work too, but only when the surrounding hardware already expects NPT, which is tapered pipe thread and not the same as a straight fitting.

    I’d pass on a gate valve for a filter shutoff unless there is a special reason. Gate valves can get stubborn after sitting in one position for a long time, and they don’t always give a crisp stop. Cheap plastic valves make me cautious on a pressurized feed line as well, especially if the filter sits under a sink and the valve will be used often. Plastic isn’t automatically wrong; it just forgives less when something gets overtightened or pushed sideways.

    The trade-off is serviceability versus simplicity. A ball valve costs a bit more than the flimsiest stop valve, but positive shutoff is worth it. If you are buying one valve only, a lead-free brass quarter-turn ball valve is the most broadly useful choice for typical residential filter work.

    How do I match the valve to the pipe and fitting?

    How to Choose the Right Shutoff Valve for a Water Filter Install

    Start with the line. Measure the pipe, identify the connection standard, then check the pressure and temperature rating stamped on the valve body. Sounds basic, doesn’t it? Still, this is where a lot of installs go sideways.

    Use a tape measure or caliper to confirm the nominal size: 3/8-inch, 1/2-inch, or 3/4-inch are the common residential sizes, but the outside diameter may not match the number printed on the valve. For example, 3/8-inch compression tubing is not the same as 3/8-inch NPT threading. If the valve says 1/2-inch FNPT, that means female National Pipe Thread; it will not seal correctly on a 1/2-inch compression tube without the proper adapter.

    A good valve should also list a pressure rating and a temperature range. For a standard home cold-water line, 125 psi or 150 psi service ratings are common. That is not a target; it is the design limit. I would not choose a valve with an unlabeled body or vague packaging when a clearly marked NSF/ANSI-compatible plumbing valve is available, especially if the filter is for drinking water.

    Check the water chemistry too. For drinking water, look for lead-free compliance in the valve material. In the U.S., that usually means the product is marked to NSF/ANSI 372 for low lead and often NSF/ANSI 61 for drinking-water contact materials. Those standards do not rescue a bad install, but they do show the valve is intended for potable water service. The U.S. Environmental Protection Agency also points homeowners to lead-reduction and drinking-water safety guidance on its drinking water pages, while NSF explains the lead-content and drinking-water contact standards in more detail. See the EPA’s drinking water information at https://www.epa.gov/ground-water-and-drinking-water and NSF’s standards overview at https://www.nsf.org/consumer-resources/water-quality/water-filters-testing-treatment.

    If the line is behind drywall or tucked inside a cabinet where future access will be poor, I’d prefer a valve with a very obvious handle position and a design that can be replaced without cutting the line apart. Service-friendly beats bargain-basement once access is tight.

    What shutoff valve should I choose for my exact install?

    Begin with the pipe, not the filter. The pipe decides the connection style; the filter only tells you how much flow you need. If the filter uses standard 1/4-inch tubing, the shutoff is still usually chosen on the feed side: 3/8-inch compression, 1/2-inch sweat, or 1/2-inch PEX, depending on what you are tapping.

    1. Identify the supply line material. Determine whether the pipe is copper, PEX, CPVC, stainless flex, or braided supply tube. Verify the material by sight and by the fitting style. If the line is corroded copper, brittle plastic, or has unknown repairs, stop and replace the damaged section before adding a valve.
    2. Measure the nominal size. Measure the line at the connection point and confirm whether it is 3/8-inch, 1/2-inch, or another standard. Verify the valve marking on the body or box. If the valve size and line size do not match exactly, do not force it; the result is a leak or an adapter stack that will not fit under a sink.
    3. Choose the connection type. Match compression to compression tube, sweat to copper, push-to-connect to prepared tube, and threaded to threaded ports. Verify the valve and the supply line share the same standard. A mixed connection without the proper ferrule, insert, or adapter is a common failure point.
    4. Check the pressure and water-use rating. Look for a valve rated for residential potable water service, commonly 125 psi or 150 psi. Verify the labeling is readable on the valve itself. If there is no rating, or the valve is clearly meant for irrigation or air only, do not use it on drinking water.
    5. Confirm the valve is quarter-turn. Rotate the handle 90 degrees to verify that open and closed positions are distinct. If the handle has no clear stop or the motion feels gritty, the valve is the wrong choice or damaged out of the box.
    6. Check clearance. Measure the space around the install point. Leave enough room for the handle to turn fully and for a tubing cutter or wrench to work. If the cabinet door, sink bowl, or wall leaves less than about 2 inches of practical working room, pick a compact stop valve or change the layout.
    7. Use the right seal method. For compression fittings, use the ferrule and nut that come with the valve. For threaded fittings, use PTFE tape or pipe dope approved for potable water, but not both unless the fitting maker says so. Verify the joint tightens without cross-threading. If the threads bind early or the nut bottoms out too soon, stop and recheck the standard.
    8. Test before restoring full service. Pressurize slowly, open and close the valve 2 or 3 times, then inspect for seepage with a dry paper towel. Verify the valve stops flow completely and the downstream filter pressurizes normally. If the handle feels loose, the valve drips, or the filter surges oddly, drain and correct the connection.

    If the install is an under-sink filter kit with 3/8-inch compression tubing, my first pick would often be a lead-free brass 3/8-inch compression ball stop valve. For PEX, with the proper crimp or push-to-connect tools, I’d choose the valve style that avoids extra adapters. On copper, where soldering is awkward, a quality push-to-connect ball valve can be the cleanest option, though it usually costs more than a basic compression fitting.

    What mistakes do people actually make?

    The biggest mistake is buying by brand description instead of by connection standard. A valve labeled “fits 1/2-inch” may be 1/2-inch NPT, 1/2-inch compression, or 1/2-inch PEX, and those are not interchangeable. The result is obvious: the part won’t fit, or it fits only after a chain of adapters that crowds the cabinet. The correct alternative is to identify the exact fitting standard before buying.

    Another trap is using a cheap multi-turn stop valve because it looks familiar. Months later, especially in hard-water areas where mineral buildup is common, the thing can get sticky. The correct alternative is a quarter-turn ball valve for a filter feed, especially when the valve may sit closed for long stretches.

    A third mistake is ignoring access. People install a valve that technically works but leaves the handle jammed against the back wall or the sink basin. Then nobody can shut the water off quickly when the filter needs service. The correct alternative is to mock up the clearance first and choose a compact body or elbow-style stop if space is tight.

    A fourth mistake is mixing potable-water and nonpotable parts because they are cheaper. That can leave you with a valve that is not marked for drinking-water contact, and that is a poor choice on a kitchen filter line. The correct alternative is to check for NSF/ANSI 61 and, where applicable, NSF/ANSI 372 markings.

    A fifth mistake is over-tightening compression nuts or threaded joints. The result is a crushed ferrule, distorted threads, or a slow leak that only shows up after the cabinet has dried out and been used a few times. The correct alternative is snug plus a small additional turn, not brute force. If the fitting maker gives specific torque or turns, follow that. If not, stop at the point where resistance rises sharply.

    When should I stop and pick a different approach?

    Stop and use a different approach when the valve choice will not solve the real problem. Forcing a standard valve onto a bad install usually costs more later.

    Corroded copper around the cut point: The pipe wall may be too thin to trust — replace the damaged section or have the line rebuilt before adding a shutoff.

    Hidden or inaccessible supply line: If you cannot see and reach the joint, you cannot inspect a leak — change the layout so the valve is accessible, or do not place a serviceable filter there.

    Unknown thread standard: If the fitting is old, painted over, or mixed with adapters, the wrong thread can crack a connection — identify the standard first or replace the section with a known matching fitting.

    Very limited cabinet space, under about 2 inches of room: A full-size valve may not turn freely — choose a compact stop valve, a 90-degree elbow stop, or relocate the filter.

    Recurring low pressure or water hammer already present: A shutoff valve will not fix poor supply conditions — address the pressure, check the supply line, then install the filter valve.

    Filter requires frequent service and the valve is hard to reach: If shutdown will be inconvenient, the filter will be neglected — move the shutoff to a more accessible spot or choose a valve with a better handle position.

    For a standard under-sink drinking-water filter, I would not stop the project just because the first part you found was wrong. I would stop when the plumbing is damaged, the fitting standard is uncertain, or the cabinet layout makes future service impractical. Those are design problems, not valve problems.

    What should the finished install look like?

    A good install closes completely, fits without strain, and leaves the filter easy to service. You should be able to turn the valve 90 degrees with one hand, see the open or closed position at a glance, and remove the filter later without disturbing the main line. The tubing should enter the valve straight, not at an angle. A valve forced sideways will fail sooner than one sitting naturally in line.

    For a basic kitchen filter, the end result usually looks straightforward: a lead-free brass quarter-turn valve on the feed line, a clean connection to the filter tubing, and no pile of adapters hanging under the sink. If you had to use more than one adapter, I’d treat that as a signal to reconsider the part choice and, if needed, consult a plumber or the manufacturer’s compatibility chart. Every extra joint is another place to leak.

    I also want the shutoff to be usable by a non-specialist in 6 months. That means obvious handle direction, visible markings, and enough room to turn the handle all the way. If someone has to guess whether the valve is open, the install is not finished.

    This is one place where the cheapest part can lead to the priciest outcome if it forces extra adapters or fails early. A $10 to $25 valve that matches the line correctly is usually better than a cheaper valve that needs adapters or sticks after a year. The exact price depends on material and connection type, but the point stays the same: buy the valve that simplifies the plumbing, not the one that merely resembles it.

    Can I use the valve that came with the filter kit?

    Usually, yes — if the kit valve matches the line size, connection style, and potable-water rating. The valve that comes with a filter kit is usually designed for the system’s tubing, but it may not be the best fit for the existing branch line. If the kit valve is plastic, under-rated, or only works after adding several adapters, compare it with a lead-free brass option before installing it.

    The valve included with the kit is most useful when the manufacturer has already matched the tubing, pressure rating, and service conditions. That is common in reverse osmosis packages and compact under-sink systems. If the kit includes a quick-connect stop valve, check the listed tube size, pressure rating, and drinking-water certifications before trusting it in a kitchen install.

    If the kit valve does not fit the actual pipe, don’t force the project to follow the box contents. Use the supply line as the reference point and select the valve that matches the plumbing. For how to choose right shutoff valve water filter install, the goal is a simple, visible, serviceable shutoff that matches the pipe first and the filter second.