Last updated: September 10, 2026
Key Takeaways
- A simple under-sink carbon filter can be done in under 2 hours.
- Leave the system pressurized for 10 to 15 minutes and check again.
- A simple install with accessible shutoffs and no drain work may take 90 minutes to 3 hours.
- A whole-house system can run 4 to 8 hours, and longer if the bypass loop has to be built from scratch.
A plumber at the sink. A drill on the counter. That is the scene. Most people asking how long does it take to install a water filtration system want a booking window, not a classroom lecture. Most water filtration systems take 2 to 6 hours to install if the plumbing is straightforward, and a full day or more if the job needs new lines, a drain connection, electrical work, or a bulky whole-house unit. If you need the short answer because you are calling someone this week, that is the range I would use first. The exact time depends on the system type, where it sits, and whether your plumbing is easy to reach.
Who this answer applies to
This answer applies to a homeowner or property manager deciding whether to hire a plumber or water-treatment contractor for a point-of-use system at one sink, a reverse osmosis unit under the counter, or a whole-house filtration system on the main line. Not sure whether the work is straightforward? Consult a professional and compare the job against local plumbing rules before you book. I am assuming you already know where the unit will go and that you want to understand the job length well enough to book it, compare quotes, and spot a contractor who is guessing.
I am not talking about a softener-only setup, a portable pitcher, or a simple faucet filter that screws on in minutes. Different jobs. When the system ties into a main water line, a drain, or electrical service, consult a licensed plumbing professional and check whether local code requires a permit or a pressure test.
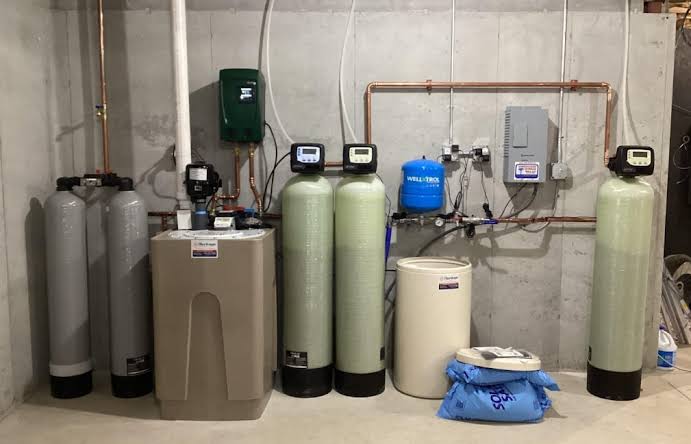
The biggest time variable is not the brand name on the box. It is the site conditions: copper vs. PEX, crawlspace vs. slab, how close the cold-water line is, whether there is a nearby drain for reject water, and whether the installer must cut drywall to reach a shutoff. A simple under-sink carbon filter can be done in under 2 hours. A reverse osmosis system with a storage tank and dedicated faucet usually takes longer because of the faucet hole, drain saddle, and flush cycle setup. A whole-house system can run 4 to 8 hours, and longer if the bypass loop has to be built from scratch. That part can snowball fast.
If you have galvanized pipe, severe corrosion, no working shutoff, or water pressure that already swings wildly, the clock changes fast. Those are not “surprises”; they are the job. If the housing, piping, or pressure condition looks uncertain, consult a licensed plumber before treating the project as routine.
How long does it take to install a water filtration system?
About half a day. That is the practical answer most people need before they book an appointment. I would expect a simple point-of-use carbon filter to be faster, and a reverse osmosis system or whole-house setup to be slower. On a typical service call, the most realistic range is 90 minutes to 3 hours for a simple install and 4 to 8 hours for a whole-house job.
Here is the job in the order a contractor usually handles it:
- Shut off the water and relieve pressure. Close the nearest stop valve or main shutoff, then open the cold tap for 5 to 10 seconds to drop pressure. Verify the line is no longer under load before cutting or disconnecting anything. If water still sprays when the line is cracked, the shutoff is failing or you are on the wrong valve.
- Confirm the installation point and clearances. Measure the cabinet or wall space in inches: height, width, and depth. A tank-style reverse osmosis system often needs more than the filter housing alone because the storage tank and tubing bends take space. Verify the unit can sit level and the tubing can turn without kinking. A problem shows up when doors will not close, tubing pinches, or the sediment filter cannot be removed later.
- Mount the bracket or housing. Mark the centerline, predrill if needed, and fasten to a solid surface with screws sized for the substrate. For drywall, the bracket should not hang from loose anchors if the unit is heavy when wet. Consult the manufacturer’s instructions if the housing weight, wall type, or mounting surface is uncertain. If it shifts when you tug it by hand, it is under-supported.
- Tap into the feed line. Install the supplied tee, saddle, or adapter on the cold-water line, using the correct tubing size such as 1/4-inch or 3/8-inch where specified. Verify the compression fittings seat cleanly and the line is not cross-threaded or over-crushed. A drip at this stage means the fitting was not seated or the tubing end is ovalized.
- Install the drain connection if the system needs one. Reverse osmosis units commonly discharge reject water to a drain via a saddle clamp or air-gap fitting. Keep the clamp above the trap and follow the manufacturer’s angle and height instructions. Verify the drain flows freely and does not back up. If water gurgles or backs into the line, the drain setup is wrong.
- Add the faucet, faucet hole, or dedicated outlet. If the system needs a separate dispenser, drill the countertop or sink deck only after confirming material type. A stainless sink, solid-surface top, and granite all have different cutting risks. Verify the faucet sits tight and the hole is deburred. Chipped laminate, cracked stone, or wobbling hardware means the cutout was rushed.
- Flush and test the cartridge or membrane. Run the system for the manufacturer’s specified flush time, which is often measured in gallons rather than minutes. Verify the water runs clear and pressure stabilizes. If flow is weak, cloudy, or full of black carbon dust after the flush period, the cartridge may be installed backward or not seated.
- Check for leaks under real pressure. Reopen the shutoff slowly, then inspect every joint with a dry paper towel. Leave the system pressurized for 10 to 15 minutes and check again. Verify there is no seepage at the fittings, housing cap, or faucet shank. A delayed drip usually points to a loose compression nut or a damaged O-ring.
A simple install with accessible shutoffs and no drain work may take 90 minutes to 3 hours. Add another 1 to 2 hours if the installer must cut in a bypass, drill a countertop, or route tubing through a basement ceiling. Whole-house filtration often lands in the 4 to 8 hour range because the unit is larger, the pipe is larger, and the mounting matters more. No magic there.
The honest limitation: if the job requires electrical power for a UV stage, pump, or control head, or if the piping is not standard copper/PEX, time estimates get less reliable. I would not trust anyone who promises a same-day number without seeing the site.
What changes the timeline most?
Extra connections. That is what usually stretches the schedule, not how “advanced” the filter sounds on the box. A basic sediment-and-carbon unit can be faster to install than a cheaper-looking reverse osmosis kit that needs a faucet, drain, and tank. That is why how long does it take to install a water filtration system often depends more on plumbing access than on the filter media.
The main time drivers are these:
Access. A sink cabinet with a clean shutoff and open floor space is one thing. A cramped cabinet with a garbage disposal, dishwasher hose, and disposal cord bundle is another. If a plumber has to crawl behind stored items or cut access holes, expect the clock to move by 30 to 90 minutes.
Pipe material. PEX is usually quicker to adapt than old galvanized steel. Copper is common and workable, but hard to modify if the pipe is cramped or oxidized. Galvanized can slow the job because fittings seize and pipe walls are often reduced by mineral buildup. That does not make the job impossible; it makes the estimate less generous.
Whole-house vs. point-of-use. A whole-house system installed on the main line may need a bypass valve, pressure gauge, shutoff valves, and enough straight pipe length to fit the housing. Point-of-use systems are smaller, but some still need a dedicated faucet or drain line. The filter size does not tell you the labor time by itself.
Countertop material. A drilled hole for a RO faucet can be quick on a pre-scored sink deck and slow on stone. Granite, quartz, stainless, and laminate all behave differently. A bad cut costs more time than a careful one because it can mean replacing the sink or patching the counter.
Water quality goals. If you are just reducing chlorine taste and odor, a carbon block or GAC filter may be enough. If you are trying to reduce dissolved solids, nitrates, or fluoride, the system may need RO or a specialty media tank. Those systems carry more tubing, more parts, and more time to assemble correctly.
I would be cautious about any quote that bundles “installation” without saying whether it includes a new faucet, bypass valve, drain tie-in, or old-system removal. The missing items often account for the extra hour or two, and they are the kind of details that decide whether how long does it take to install a water filtration system stays on schedule.
What should I ask a contractor before booking?
Ask five plain questions before you set a date; each one helps pin down whether the job is a 2-hour visit or an all-day installation.
Ask: “Is this a simple swap or a new install?” A swap means an existing unit is coming out and a similar one goes in. A new install means the contractor is adding the feed line, drain, faucet, or mounting point from scratch. Those are not priced or timed the same way.
Ask: “Does your estimate include the shutoff, drain tie-in, countertop drilling, and leak test?” If the answer is vague, expect add-ons. A clear estimate should say what is included in writing. If you are comparing quotes, this is where the hidden time lives.
Ask: “What pipe material will you be working with?” The answer matters because PEX, copper, CPVC, and galvanized all affect labor. If the contractor has not asked to see the line or photos, they may be guessing.
Ask: “Will this need a permit or inspection in my area?” Some whole-house changes trigger local plumbing rules. That does not always add much labor, but it can add scheduling time. In some towns, the inspection window is the real delay.
Ask: “What should be ready before you arrive?” A good installer may ask for clear cabinet access, a working shutoff, and the exact system model. If they do not ask for photos or measurements, I would expect a longer visit or a second trip. If the answer changes once they see the cabinet, that is a sign the original time estimate was too optimistic.
A contractor who can explain the work in terms like bypass valve, drain saddle, compression fitting, and cartridge flush is usually thinking about the job the right way. One who says “it’s all the same” is not.
When should I stop treating this as a simple install?
Stop right there when the plumbing, the system, or the water conditions move outside the usual under-sink or straight main-line setup. In those cases, the problem is not speed. The problem is that the standard approach is the wrong tool.
No working shutoff valve: If the water cannot be isolated cleanly, the job can flood the cabinet or wall — consult a licensed plumber and replace or repair the shutoff first, then install the filter.
Galvanized pipe that is heavily corroded: Threads may crumble and fittings may not seal — consult a professional and plan on pipe repair or replacement before the filtration work.
Need for a countertop cut into stone or tempered glass: A bad hole can crack the surface — use the proper drill bit and hole saw for the material, or hire someone who does countertop cutting routinely.
No nearby drain for a reverse osmosis system: The reject water needs a safe discharge path — consult a plumbing professional and choose a different system type or have the drain route built correctly.
Electrical components near water with no safe outlet: UV, booster pumps, and some control heads need power — add a proper outlet or choose a non-powered system, and consult a licensed electrician or plumber if the layout is unclear.
Severe low pressure or pressure spikes: The system may not perform as designed, and fittings can fail sooner — fix the pressure issue first; a pressure-reducing valve or booster may be needed, and a plumber should evaluate the line if the pressure is unstable.
Home on a well with sediment, iron, or manganese problems: The filter may clog fast if the pre-treatment is wrong — test the water and size the prefilter and treatment train to the actual water chemistry, ideally with a water-treatment professional.
I would not treat those as minor delays. They change the job from installation to plumbing modification. That is the point where a clean one-visit estimate becomes unrealistic, and how long does it take to install a water filtration system becomes a site-specific question.
The mistakes that waste the most time
The most common mistakes are small at first and expensive later because they create leaks, rework, or a second trip.
Buying the wrong system size. A unit that is too small for the household flow rate can cause weak pressure or short filter life. The fix is to match the system to actual demand, not just the cabinet dimensions.
Ignoring the drain requirement on RO. Reverse osmosis systems produce reject water and often need a drain connection. If that was overlooked, the installer may have to return with extra parts. The consequence is a longer job and a second labor charge.
Using the wrong tubing or fittings. A 1/4-inch line where 3/8-inch was intended can restrict flow; mixing incompatible compression parts can leak. The better alternative is to confirm tubing size and fitting type before anyone starts cutting.
Drilling the wrong hole in the wrong material. A sink deck, quartz counter, and stainless sink do not get treated the same way. A bad hole can turn a one-hour task into a replacement project. The correct alternative is to verify the material and drilling method in advance.
Skipping the flush. Carbon dust, factory residue, or membrane preservatives can leave the water cloudy or bad-tasting. The alternative is to flush for the manufacturer’s specified volume before declaring the system done.
Tightening fittings until they deform. Overtightened compression nuts and cracked plastic housings create slow leaks that show up after the installer leaves. The better alternative is hand-tight plus the specified turn, then a 10- to 15-minute leak check under pressure.
A good installation leaves the cabinet dry, the flow stable, and the filter easy to service later. If the cartridge cannot be removed without disconnecting tubing, the installer saved time today and handed you a headache next year. That is why the best answer to how long does it take to install a water filtration system is not just hours, but also whether the work was done cleanly.
Leave a Reply