Category: Home Water Quality Problems

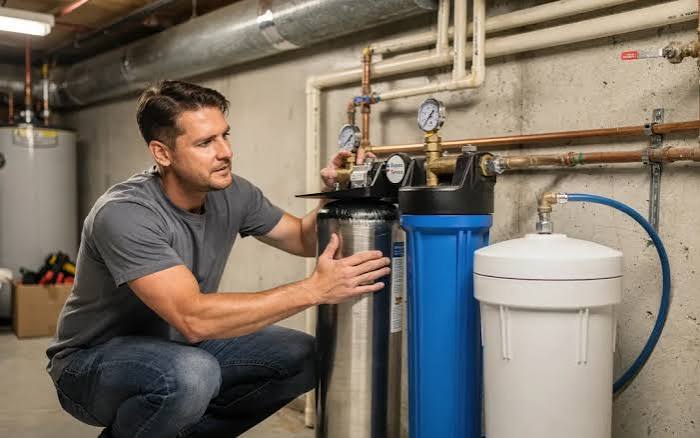
  • Do I Need a Sediment Filter, Carbon Filter, or Both?

    Do I Need a Sediment Filter, Carbon Filter, or Both?

    Last updated: September 10, 2026

    Key Takeaways

    • If it does both, use both.
    • Sediment filtration is the cleanup crew.
    • Clearer water can fool people.
    • A carbon filter wins when the problem is chlorine, odor, and taste .

    Cloudy water, rusty flecks, bad taste, or a faucet that keeps choking on grit — that is the real setup behind do I need a sediment filter, carbon filter, or both? The usual answer is simple: sediment first, carbon second, and both when you want water that is clean and actually pleasant to drink. I write and edit water-treatment copy with one goal: help people choose the right filter train without buying gear they do not need or skipping a stage that solves a real problem; for treatment decisions, consult a qualified water professional and verify claims against NSF’s Certified Drinking Water Treatment Units program and the Water Quality Association’s standards and certification .

    The short answer: which one do you actually need?
    Do I Need a Sediment Filter, Carbon Filter, or Both?

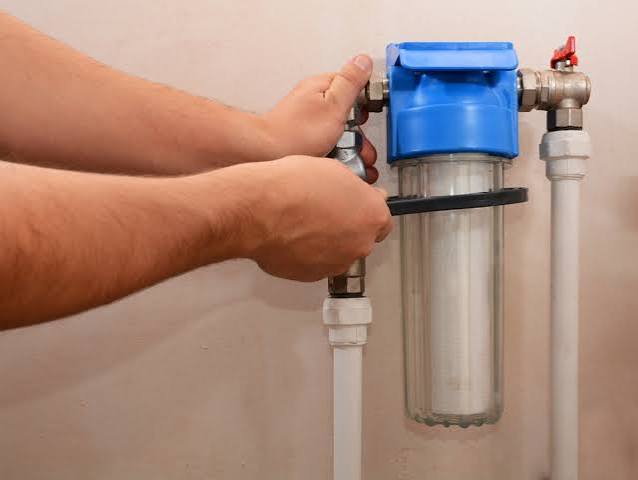
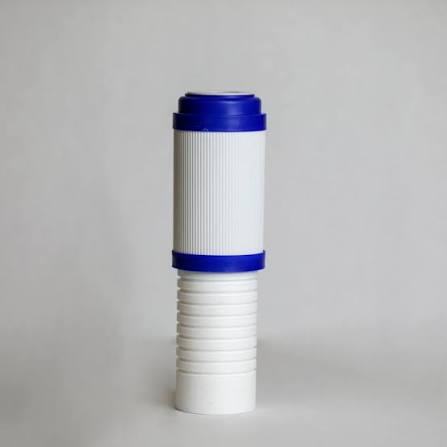
    A sediment filter handles grit, rust, sand, silt, and other visible particles. A carbon filter handles chlorine taste and smell, many organic compounds, and some chemical reduction jobs depending on the media and certification. Both make sense when your water has particles and taste/odor problems, or when you need to keep carbon from clogging too fast.

    Use this rule of thumb: orange marks, grit in a sink, or a toilet tank that looks dirty points to sediment. Clear water that smells like a pool or tastes “chemical” points to carbon. And if it does both, use both.

    That sounds almost too neat. It isn’t. Sequence matters, because carbon cartridges load up faster when sediment reaches them first, and a clogged carbon stage often quits by pressure loss before it quits by taste. That is why a 5-micron sediment stage ahead of carbon is such a common layout in whole-house systems and under-sink prefilters.

    Only chasing better taste at one kitchen tap? If the water is already clear, a carbon filter alone can be enough. Protecting a reverse osmosis system? The prefilter set often includes sediment plus carbon, because the membrane wants low particulate loading and low chlorine. For potable-water treatment, NSF/ANSI standards are the language to look for; NSF International and the Water Quality Association both explain certification categories clearly, and you should consult a qualified professional if you are matching a filter to a specific contaminant or health concern.

    What a sediment filter actually does

    A sediment filter wins when the problem is physical debris. It catches sand, rust flakes from iron pipes, scale, dirt, and silt floating in the water. Micron rating is the number to watch. A 20-micron cartridge catches larger particles and usually loads slower; a 5-micron cartridge catches finer particles and usually loads faster. That trade-off matters more than most product pages admit.

    Sediment filtration is the gatekeeper. Clean faucet screens, fewer clogged aerators, less grit in washing machines, and carbon cartridges that last longer because they are not acting like a dirt net — that is the payoff. If your water comes from a private well, a galvanized line, a water main repair zone, or an older building with pipe scale, sediment is often the first stage I would consider.

    But sediment filters do not fix taste, odor, chlorine, pesticides, VOCs, or dissolved metals in any meaningful general sense. A crystal-clear glass can still smell like a swimming pool. Sneaky little trap. People install a sediment cartridge, see clearer water, and assume the job is done. It is not if the water still tastes wrong.

    Sediment-only fits a reader whose water test or visual check points to particles and nothing else. It is also the right “protective” stage before a carbon block, UV system, water softener, or RO unit. If the water is already particle-free and your complaint is taste, a sediment filter alone is money spent on the wrong problem.

    What a carbon filter actually does
    Do I Need a Sediment Filter, Carbon Filter, or Both?

    A carbon filter wins when the problem is chlorine, odor, and taste. Activated carbon has a huge surface area that adsorbs many compounds from water. Put plainly: it grabs the stuff that makes water smell and taste off. In municipal water, chlorine is the classic target. In some setups, catalytic carbon is used for chloramine reduction, which is a different job and usually requires a different media claim or certification.

    The upside shows up fast. Chlorine taste drops. Smell improves. Coffee and tea often taste less harsh because the disinfectant bite is gone. On an under-sink system, carbon is often the stage that makes filtered water feel worth using every day.

    But carbon is not a dirt filter. It can clog if the water carries sediment, and once it is loaded, flow falls. It also does not solve every contaminant problem. A generic carbon cartridge is not the same as a certified reduction claim for lead, cysts, PFAS, or chloramine. Those claims depend on the exact cartridge and the NSF/ANSI standard it meets. If the listing does not name the certification, I would treat the claim as marketing, not evidence, and I would consult a qualified professional before relying on it for health-related treatment.

    Carbon-only makes sense for city water that is clear but tastes like chlorine. It is also the right choice when your main goal is better drinking water at a single tap and your incoming water is already low in particles. I would not choose carbon-only for a well with visible sediment, nor for any line that regularly spits rust or sand. The cartridge would be doing the wrong job first.

    Sediment filter vs carbon filter: the practical difference

    A sediment filter is a sieve; a carbon filter is a media bed with adsorption chemistry. That is the cleanest distinction, and it decides which one should come first.

    Criteria Sediment filter Carbon filter Winner for [condition]
    Main target Sand, rust, silt, scale Chlorine, odor, many organics Choose by symptom
    Typical rating language Microns, often 1–20 micron Media type and NSF/ANSI claim Sediment if particle size matters
    What it changes first Clarity and grit Taste and smell Choose sediment for cloudy water
    Effect on chlorine taste Usually none Usually the main benefit Carbon for municipal water taste
    Clogging risk Higher in dirty water Higher if sediment is not removed first Sediment as prefilter
    Best first stage Yes, when particles are present No, unless water is already clean Sediment first in most systems
    Best for well water Often yes Sometimes, depending on taste/odor Sediment for grit; carbon if odor exists
    Best for city water Only if line scale or debris is present Very often Carbon for taste and odor
    Needs certification scrutiny Lower, though materials still matter High, because claims vary a lot Carbon claims deserve more checking

    Carbon does not replace sediment, and sediment does not replace carbon. That is the line people skip. If you have both kinds of problems, the filters do different jobs in series. The order is usually sediment first, carbon second. Not cosmetic. It protects flow and stretches cartridge life.

    I would push back on any setup that claims one cartridge can “do everything” without a clear standards reference. That is especially true in whole-house systems where flow rate matters. If a system promises too much in one stage, it often pays for it in short life, low pressure, or weak contaminant reduction.

    Do I need both filters in one system?

    You need both when your water has particles and also needs taste/odor reduction, or when a downstream filter needs protection from sediment. That is the most common real-world answer, and it is the one people most often underbuy.

    A two-stage setup is usually the sensible middle ground. Sediment ahead of carbon keeps the carbon from becoming a dirt trap. In whole-house systems, this is especially useful if the water source is a private well, a shallow municipal line, or an older building with plumbing debris. In under-sink systems, the same logic applies if the cartridge arrangement starts with a sediment prefilter and then a carbon block or catalytic carbon stage.

    A good example of why both matter is a house with clear-looking water that still stains tea and leaves fine rust in toilet tanks. The water may not look bad in a glass, but sediment in plumbing can still be present, and chlorine or chloramine can still be the reason drinking water tastes flat or sharp. In that case, carbon alone improves taste but may clog early; sediment alone improves clarity but leaves the flavor problem untouched. The 2024 EPA update on corrosion control and treatment choices still depended on the specific water chemistry, which is why symptom-based selection beats guessing.

    The trade-off is real: cost, space, and maintenance all go up. Two stages mean more housings, more cartridges, and more changeouts. There is also more pressure drop than with no filter at all, which matters in low-pressure homes. If your incoming water is already clean and you only hate the taste, a full sediment-plus-carbon stack is overkill.

    My view is plain: both is the default for uncertain water, but not for every tap. If you are guessing, the safer guess is a sediment prefilter plus carbon. If you know the water is particle-free and your only complaint is chlorine taste, carbon alone is enough.

    When to reconsider the whole choice

    Sometimes neither filter is the right answer. That happens when the water issue is not particles or taste/odor, but hardness, iron, bacteria, or a specific contaminant that needs a different technology.

    A sediment filter does not soften water. It will not stop scale from forming in a kettle or on shower glass. For hardness, you are looking at ion exchange softening or a different treatment train, and the U.S. Geological Survey notes that hardness is commonly expressed in grains per gallon or milligrams per liter as calcium carbonate. A carbon filter does not disinfect water; it is not a substitute for UV, chlorination, boiling, or a properly engineered bacteriological treatment plan. If a private well has microbial concerns, I would not pretend a carbon cartridge solves that, and the EPA’s private well guidance recommends testing and targeted treatment instead of assuming one filter fixes everything.

    Sometimes a more specific filter beats a generic one. If your water has iron in dissolved form, manganese, hydrogen sulfide, chloramine, or PFAS concerns, the exact media and certification matter more than the broad label “carbon” or “sediment.” NSF/ANSI standards are the right reference point, and the product listing should say exactly which contaminants it reduces. If it does not, assume less.

    Flow matters too. A whole-house system on a 3/4-inch line with a weak pressure reserve can feel worse after installation if the cartridge is too fine or too small. A 1-micron filter can be excellent on paper and annoying in real life if it starves fixtures. The right filter is the one your plumbing can actually support.

    My verdict: which one to choose and why

    Choose a sediment filter if your water is visibly dirty, gritty, rusty, or debris-filled, or if you need to protect equipment downstream from particles. Choose a carbon filter if your water is already clear but tastes or smells like chlorine or chemicals. Neither if your main problem is hardness, bacteria, or a contaminant that needs a different treatment standard.

    That is the decision tree I would stand behind.

    If I had to pick a default for a house with uncertain water quality, I would choose both, in that order: sediment first, carbon second. That setup handles the broadest set of common complaints and shields the more delicate stage. I would not make that choice for a single-tap taste complaint on clean municipal water, because it adds cost and maintenance without enough benefit.

    For readers comparing actual products, I would look for:
    – a clear micron rating on the sediment stage,
    – an explicit carbon type, such as activated carbon or catalytic carbon,
    – an NSF/ANSI claim that matches the contaminant you actually care about,
    – and retailers beyond one storefront, such as the brand site plus Amazon, Home Depot, Lowe’s, or Walmart, so you can compare current availability and support.

    Quick answers to the questions people ask next

    Can I put carbon before sediment? Usually no. Sediment first protects the carbon and helps preserve flow.

    Will a sediment filter improve taste? Not much unless the taste problem is caused by visible debris or iron rust particles.

    Will a carbon filter remove rust? No. It is not the right tool for particulate dirt or rust flakes.

    If I have well water, do I need both? Often yes, but only if you have both particles and taste or odor issues. A lab test or at least a clear symptom check should guide the choice.

    How often do I replace them? It depends on water quality and cartridge size, so follow the maker’s guidance and watch for pressure drop, smell returning, or visible loading rather than guessing.
  • Home Water Quality Problems — The Complete Guide

    Home Water Quality Problems — The Complete Guide

    Last updated: September 10, 2026

    Key Takeaways

    • Test both after running each for 1 minute.
    • Any nearby construction, hydrant flushing, flooding, plumbing repair, or water-heater service in the last 7 days?
    • For lead, take a first-draw sample after water has sat unused for at least 6 hours.
    • Let a glass sit for 1 to 2 minutes.

    Table of Contents

    Home Water Quality Problems — The Complete Guide

    Odd smells. Rust stains. Grit in the sink. Cloudy water in a glass. Those are the clues most people notice first, and they usually point to something specific rather than a vague “bad water” problem. So the real question is not “Is my water bad?” It is: what kind of home water quality problem is this, what can wait, and what needs testing or treatment right now? Home water quality problems — complete guide readers usually need that answer, because the issue is typically one of three things: a health concern, a nuisance, or a plumbing fault that only looks like a water issue. For municipal water, the EPA’s Consumer Confidence Reports are a solid starting point; the CDC and your state health department can help with health-related questions.

    Who this guide is for — and what I’m assuming you already have

    Homeowners, renters, and property managers are the audience here — anyone trying to make sense of drinking water, shower water, or household water from a municipal supply, a private well, or a building storage system. I’m assuming you can shut off a faucet, pull an aerator, and read a basic water report if one lands in your hands. And I’m also assuming you know the difference between “this looks strange” and “someone may be getting sick,” because those are not the same problem.

    No need to panic over every symptom. A white crust on a kettle is usually hardness, not poison. A sulfur smell after water sits for a long time can come from plumbing or the water heater. On the other hand, if a baby, pregnant person, or anyone with a weakened immune system is drinking the water, I’d be a lot less relaxed about “probably fine.” Honestly, that’s where caution beats optimism. For health-related questions, I’d call in local public health, a certified lab, or your water utility instead of guessing. The CDC and EPA both recommend testing and professional guidance when there is a possible health risk.

    This guide is not a “best filter” shopping list either. One cartridge will not fix chlorine, lead, PFAS, hardness, iron, bacteria, and sediment all at once — that math stops working fast. A $30 carbon pitcher and a $3,000 reverse osmosis system solve different problems, and either one can be the wrong pick if you do not know what is actually in the water.

    Here’s the practical line: if the issue is taste, odor, staining, scale, or cloudiness, start by spotting the pattern yourself. If it’s a boil-water advisory, a known well problem, a lead service line, or a sudden color change after plumbing work, treat it as a testing problem first and a treatment issue second. Unsure? Check with your water utility, local public health department, or a certified water professional. The EPA’s “Consumer Confidence Reports” for municipal water and your state health department’s well guidance are useful places to begin.

    What home water quality problems usually are

    Home Water Quality Problems — The Complete Guide

    Most complaints fit into a few buckets: physical, chemical, biological, or plumbing-related. That framework matters, because the fix changes completely depending on which bucket you’re dealing with. Cloudy water after the tap runs for 30 seconds is not the same as water that smells like rotten eggs after the water heater cycles. A blue-green stain in a sink points somewhere else than reddish-brown sediment in a toilet tank.

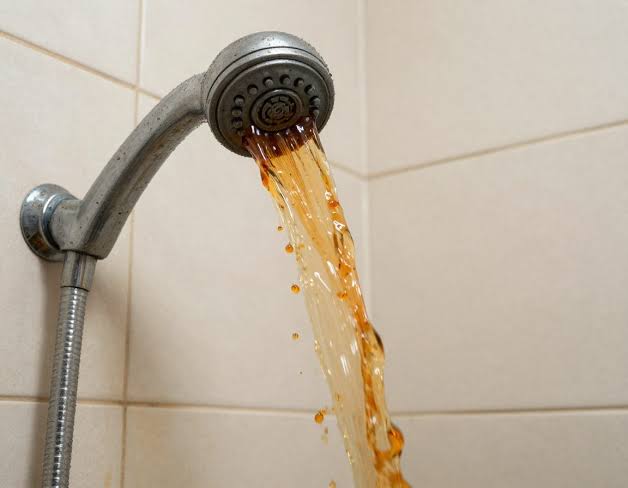
    Physical problems are the easiest ones to see. Sediment, rust flakes, cloudy water, and particles all fall in this group. They often come from aging pipes, disturbed mains, a failing water heater, or a well drawing in silt after rain. When the cloudiness clears from the bottom up in a glass after a minute or two, it may just be trapped air. Bubbles look milky and vanish. Sediment sinks. Simple, but not always.

    Chemical issues are usually invisible. Hardness, iron, manganese, chlorine, chloramine, nitrate, fluoride, lead, copper, arsenic, and PFAS may not change the look of the water at all. Hard water is not a poison problem, yet it makes soap act badly, leaves scale, and shortens appliance life. Lead is different. There is no safe level of lead exposure for children, and the source is often plumbing rather than the water coming into town. The EPA Lead and Copper Rule and local utility materials matter here, because the route into the home matters as much as the city supply itself.

    Biological problems cover bacteria, viruses, and protozoa such as Giardia and Cryptosporidium. They show up more often in private wells, after flooding, after a boil-water advisory, or when a backflow event has happened. A well can look perfect and still be unsafe. If you rely on a well, the question is not “does it taste okay?” but “what do the certified lab results say this month?” For well-water basics, see the CDC’s private well guidance and NSF’s water testing resources.

    Plumbing-related problems are the sneaky ones. A bad-anode water heater can create sulfur odor. Copper pipes can leave blue-green staining and a metallic taste if the chemistry is aggressive. Galvanized pipes can shed rust and lower pressure. Old solder, brass fittings, and flexible supply lines can add lead or metals. In those cases, the source water may be fine, and the house itself is the culprit. Classic, really.

    The mistake I see most often is treating all bad water as one issue. The EPA and CDC both stress matching the test to the likely contaminant, because that prevents buying the wrong filter, over-treating water that was fine, or brushing off a real hazard because the stain looked like “just rust.” The smart move is simple: identify the symptom pattern, then match it to the likely source.

    How do I tell what’s wrong with my water?

    Start with symptom, timing, source, and a few plain checks before spending money on treatment. That is the quickest way to narrow things down without making up a diagnosis.

    1. Check whether the problem is at one fixture or the whole house. Run cold water at the kitchen sink, bathroom sink, shower, and an outdoor spigot for 30–60 seconds. Verify whether the odor, color, or cloudiness appears everywhere or only at one tap. When it is isolated, the culprit is often a fixture, aerator, cartridge, or local branch line. When it shows up in multiple places, the issue is upstream or in the main plumbing run.
    2. Separate hot water from cold water. Test both after running each for 1 minute. Verify whether only hot water smells like sulfur or looks rusty. If only hot water is affected, suspect the water heater, anode rod, or heater sediment, not the incoming supply. If both are affected, look at source water, distribution pipes, or a whole-house issue.
    3. Use a clear glass and a white background. Fill a 12-ounce glass and hold it against white paper or a white sink. Wait 2 minutes. Verify whether the cloudiness disappears, settles, or remains. Cloudiness that clears is often air. Cloudiness that settles can be sediment. Cloudiness that persists may need testing, especially if it coincides with a boil advisory or a change in utility work.
    4. Inspect the aerator and showerhead. Unscrew the aerator and look for grit, rust, or white scale. Rinse it into a paper towel. Verify whether debris is inside the fixture. If yes, the issue may be local buildup or pipe corrosion. If the debris returns quickly after cleaning, upstream corrosion or sediment is likely.
    5. Check for staining patterns. Blue-green stains suggest copper and acidic water. Red-brown stains suggest iron or rust. Black staining can point to manganese or biofilm. Verify whether the stain appears in sinks, toilets, the tub, or only around a specific faucet. A repeatable stain pattern is more useful than a vague complaint about “dirty water.”
    6. Review your water source and recent events. Ask: municipal or well? Any nearby construction, hydrant flushing, flooding, plumbing repair, or water-heater service in the last 7 days? Verify whether the problem began suddenly after one of those events. Sudden onset after work on the system often points to stirred-up sediment or a pressure disturbance.
    7. Collect a sample the right way if you plan to test. Use a clean, lab-provided bottle if possible. For lead, take a first-draw sample after water has sat unused for at least 6 hours. For some other contaminants, you may need a flushed sample. Verify the lab instructions exactly; if you mix up first-draw and flushed samples, the result can mislead you badly.
    8. Match the symptom to the likely test. If you have odor, stain, or scale, ask for the relevant panel rather than a vague “water test.” Verify that the lab is certified for your state. If the issue is health-related, the right panel may include total coliform, E. coli, lead, nitrate, arsenic, or hardness depending on the source. A broad home strip kit can be useful for quick screening, but it is not the same as a certified lab result.

    The point of these steps is not to diagnose everything yourself. It is to avoid the classic waste: buying hardness treatment for a chlorine smell, or blaming the city for a water-heater problem. Fifteen to thirty minutes is usually enough for a first pass, and that often tells you whether the next move is a fixture cleaning, a plumber, a utility call, or a certified test.

    What the common symptoms usually mean

    Taste and smell clues help, but only if you read them carefully. A chlorine smell usually means disinfectant is present, which can be normal in municipal water. Chloramine, a combined disinfectant used by some utilities, can smell weaker than chlorine but still bother taste-sensitive people. An activated carbon filter can reduce both, though carbon has limits and needs replacement on schedule, often based on gallons or months from the manufacturer’s specification.

    Rotten egg? Sulfur. Usually hydrogen sulfide gas. In a well, it can come from groundwater chemistry or sulfur bacteria. In a home, the water heater is a frequent source, especially if the odor shows up only in hot water. That distinction matters, because a whole-house treatment system is overkill if the water heater is the problem. I would not start by buying a salt-based softener unless hardness is also present and verified.

    Metallic taste can point to copper, iron, zinc, or low pH. Acidic water can dissolve metals from pipes. If you taste metal and see blue-green staining, copper corrosion deserves attention. If the taste comes with reddish water after the tap sits unused, galvanized piping or iron sediment may be involved. That is a plumbing issue as much as a water chemistry issue.

    White spots on dishes, scale on faucets, and soap that won’t lather are classic hardness signs. Hardness is measured in grains per gallon or milligrams per liter as calcium carbonate. It is a nuisance, not a universal health threat, but it pushes people to drink less water because the taste and film are annoying. A softener or a template-assisted crystallization system can help with scale, and each has trade-offs. A softener needs salt and maintenance; a non-salt conditioner may reduce scale but does not actually remove hardness minerals.

    Cloudiness is not always contamination. Fine bubbles from dissolved air often show up after pressure changes or seasonal temperature shifts. Let a glass sit for 1 to 2 minutes. If it clears, it is likely air. If it leaves grit, that is different. If it stays hazy and coincides with illness, a boil-water advisory, or a well concern, do not shrug it off. When cloudiness is new and unexplained, call a certified lab or your water utility.

    Stains tell their own story. Rust-colored staining usually comes from iron. Black staining may be manganese or bacteria. Blue-green staining points to copper. Pink film on shower walls is usually a biofilm that grows in damp places; it is more of a cleaning issue than a water-supply diagnosis, though high humidity and low disinfectant residual can make it worse.

    The detail people miss is overlap. A sulfur odor can come from water, a drain, or a water heater. A metallic taste can come from source water, new plumbing, or stagnant water in a leaded fitting. That is why symptom-based diagnosis works only when you pair it with source and timing. Otherwise it gets slippery fast.

    When should I stop guessing and get the water tested?

    Stop guessing when the problem could affect health, when it is new and unexplained, or when the symptom does not fit a simple household cause. In those cases, testing is not optional if you want a trustworthy answer.

    Private well water with any new taste, smell, or color change: This can mean the well casing, aquifer, or nearby runoff has changed — get a certified lab test, including total coliform and E. coli at minimum, and add nitrate, arsenic, lead, or other local concerns based on your region. The CDC and state health departments recommend routine well testing and prompt follow-up for changes.

    Any household with a baby, pregnant person, or immunocompromised resident and suspected lead, nitrate, or bacterial contamination: These exposures can matter at low levels — use bottled water or an approved safe source until you have a proper result and a plan. For health-related concerns, consult your pediatrician, clinician, or local public health office.

    Blue-green staining, metallic taste, or greenish water: This can indicate copper corrosion or acidic water — test pH, copper, and lead, and have the plumbing inspected if the water sits in old pipes for hours.

    Brown water after municipal flushing, construction, or pipe work that does not clear within 24 hours: This may be sediment or corrosion in the system — call the utility and document the time, faucet, and sample appearance before assuming it is harmless.

    Rotten-egg odor only in hot water: This often points to the water heater or anode rod rather than the supply — have the heater checked before buying a whole-house treatment system. If you are not sure, consult a plumber or water treatment professional.

    Any boil-water advisory, flood event, sewer backup, or cross-connection/backflow incident: These can introduce pathogens — follow the advisory, disinfect or test as directed, and do not rely on appearance or smell to judge safety. The EPA and CDC both advise treating these as immediate safety events.

    Known lead service line, lead plumbing, or pre-1986 plumbing with a child in the home: Lead risk rises with stagnation and corrosion — use first-draw lead testing and consider immediate exposure reduction while you wait for results. If you cannot confirm the plumbing materials, consult your utility or a licensed plumber.

    Persistent odor from one faucet only after aerator cleaning and flushing: The issue may be in the faucet body, supply line, or local biofilm — if it persists, replace the fixture or have it inspected rather than treating the whole house.

    A good rule of thumb: if the problem is temporary, isolated, and clearly tied to a fixture, you can often troubleshoot it. If it is persistent, health-related, or tied to a source like a well or lead plumbing, testing comes first. A solid lab report beats a hundred guesses, and a certified professional can help interpret results when the pattern is not obvious.

    The mistakes people make with home water problems

    The biggest mistake is treating symptoms instead of causes. A filter can hide taste while leaving lead, nitrate, or bacteria untouched if it is the wrong type. That gives you false confidence. The better move is to identify the contaminant class first, then choose treatment matched to that class.

    Another common error is using a home test strip as if it were a diagnostic lab. Strips can be helpful for a quick read on hardness, chlorine, or sometimes pH, but they are crude. The downside is either overreacting to a bad color match or underreacting to a serious issue. Use a certified lab when the issue affects health or when the reading will drive a treatment decision.

    People also forget that hot water is not the same as cold water. If hot water smells bad, the water heater may be the source. Ignoring that can lead to unnecessary whole-house treatment. The better move is to isolate hot versus cold before doing anything else. A water heater flush, anode replacement, or temperature adjustment may solve the issue.

    A fourth mistake is skipping fixture cleaning. Aerators collect grit, scale, and flakes. The result is mistaking a dirty faucet for contaminated plumbing. Clean the aerator and retest after 5 to 10 minutes of flushing.

    Another error is assuming that “clear” means safe. Lead, nitrate, PFAS, and many pesticides do not change appearance. That can leave exposure untreated. Test based on source and risk, not just looks. If you are on a private well, a yearly bacteria test is a common baseline, but local geology and nearby land use may justify more. The EPA and CDC both provide testing guidance for these decisions.

    Finally, people buy a treatment system without maintenance discipline. Carbon filters saturate, softeners run out of salt, UV systems need clean sleeves and power, and reverse osmosis membranes need periodic replacement. The result is a system that quietly stops doing its job. Choose the simplest system that handles the

  • Water Filter Maintenance Schedule for Homeowners

    Water Filter Maintenance Schedule for Homeowners

    Last updated: September 10, 2026

    Key Takeaways

    • Usually every 2 to 12 months, depending on the filter type, water quality, and household use.
    • RO systems: prefilters commonly every 6 to 12 months; membrane every 2 to 5 years depending on feed water and use.
    • If your household uses a lot of filtered water, consider shortening replacement intervals based on the manufacturer’s guidance and the filter’s actual condition.
    • I check pressure, taste, leak points, and cartridge condition, and I do it in under 10 minutes.

    A home filter can look fine for months, then quietly bog down. So the basic rule is this: check it monthly, swap cartridges every 3 to 12 months depending on the filter, sanitize the housing whenever you change one, and do not treat the setup like a “set and forget” appliance. The right timing depends on the filter type, your water quality, and how much water your household uses. NSF/ANSI certification, manufacturer manuals, and EPA guidance all point the same way: follow the product instructions and watch performance, not just the calendar. Miss that, and clean water turns into a sluggish, underperforming system.

    I’m writing for homeowners who already have a point-of-use filter under the sink, a pitcher filter, a refrigerator filter, a whole-house sediment filter, or a reverse osmosis (RO) system. I’m assuming you know where the filter is, can shut off a valve, and can read the model number or cartridge label. I am not assuming you know the right interval, because that is where most people go wrong. Water suddenly tastes odd? Pressure drops sharply? Or maybe flooding, a boil-water advisory, or a well issue has you worried? At that point, maintenance is not the main question anymore; testing and troubleshooting are. For additional background, see the EPA drinking water guidance and the CDC advice on water safety after flooding.

    What maintenance schedule should I follow for my water filter?

    Water Filter Maintenance Schedule for Homeowners

    The schedule depends on filter type, water use, and water quality, not some generic “change it once a year” rule. A carbon block cartridge in a kitchen faucet system, a sediment prefilter on a well line, and an RO membrane do not age at the same pace. As a baseline, I would use this:

    • Pitcher or refrigerator filters: check monthly; replace every 2 to 6 months or when the manufacturer’s indicator says so.
    • Under-sink carbon filters: inspect monthly; replace every 6 to 12 months in many homes, sooner with heavy use or high chlorine.
    • Sediment prefilters: inspect monthly; replace when pressure drops or the cartridge visibly loads up, often every 1 to 6 months.
    • RO systems: prefilters commonly every 6 to 12 months; membrane every 2 to 5 years depending on feed water and use.
    • Whole-house filters: inspect monthly; change cartridges when pressure loss becomes noticeable or at the interval the housing maker specifies, often around 3 to 12 months.

    Broad? Yes. Necessary? Also yes. A house on city water with little sediment can stretch the timing. A house on a private well, especially with visible rust or silt, can chew through cartridges fast. Calendar dates alone are a bad compass for any system that sees changing load; in practice, that math stops working fast. Check the manufacturer’s instructions, and if you are pushing the interval longer, talk with a water treatment professional first.

    The second part of the schedule is maintenance, not replacement. Wipe housings, check O-rings, verify seals, and flush the system after cartridge changes. A new cartridge that leaks around a bad O-ring is not “new”; it is a plumbing problem waiting to happen. For replacement parts and setup details, check your system’s manufacturer manual or a comparable product guide from the brand that made your unit.

    For a simple paper trail, I keep one line in a notebook or phone note: installation date, cartridge type, and next due date. It takes 2 minutes and stops the most common failure, which is forgetting whether the filter has been in place for 4 months or 14.

    How do I set up a maintenance calendar for my home water filter?

    I build it around three checkpoints: monthly, every changeout, and one annual review. That structure catches almost every problem without turning filter care into a chore. The goal is not perfection; it is staying ahead of pressure loss, taste changes, and cartridge overrun.

    1. Record the filter model and cartridge type. Write down the exact housing or system model, plus the cartridge part number from the label or manual. Verify the micron rating if it is listed, such as 5 micron or 1 micron. A problem is a mismatched replacement cartridge, which can fit physically but perform differently.
    2. Set a monthly reminder. Choose the first day of each month and inspect the system for leaks, slow flow, staining, or odor. Verify that the housing is dry and the water still runs normally. A problem is a drop in flow or a damp ring near the housing seam.
    3. Track water use, not just the date. If your household uses a lot of filtered water, consider shortening the interval based on the manufacturer’s guidance and the cartridge’s actual condition. Verify whether the filter serves drinking water only or also refrigerator ice, cooking, or coffee. A problem is using one small cartridge for a large family and letting it run beyond capacity.
    4. Replace cartridges on schedule or on pressure loss, whichever comes first. For many point-of-use systems, that means 6 to 12 months; for sediment cartridges, it can be 1 to 6 months. Verify inlet and outlet flow before and after replacement. A problem is reduced pressure after a change, which points to a clogged cartridge, a wrongly seated element, or upstream sediment.
    5. Inspect and lubricate O-rings at every cartridge change. Clean the groove, check for cracks, and use only food-grade silicone lubricant if the manufacturer allows it. Verify the O-ring is flat, continuous, and not twisted. A problem is a leak at startup or a housing that will not tighten evenly.
    6. Flush the new cartridge. Run the system for the volume specified by the maker; for many carbon filters that may be several gallons, and for RO systems it is often a tank flush plus a few full tanks before use. Verify the water clears and the initial carbon fines are gone. A problem is black flecks, cloudiness, or a strong carbon smell after flushing.
    7. Sanitize the housing when the system opens. If the manual calls for it, use a dilute bleach solution or the sanitizer specified by the maker, then rinse thoroughly. Verify there is no chlorine smell left unless the system is designed to remove it downstream. A problem is biofilm, slime, or musty odor in the sump.
    8. Do one annual review. Compare the actual change interval with the label interval and adjust the schedule by season, water source, and usage. Verify whether the filter is meeting the job it was bought for. A problem is repeatedly changing cartridges too late or too early, both of which waste money and water quality.

    A schedule only works if it fits real life, so the best one is the one you can keep up with. If you are away for long stretches, add a reminder tied to another fixed event, such as changing HVAC filters or paying a quarterly bill. If you live in a rental and the landlord owns the unit, still keep your own date record; “I thought someone else handled it” is how filters get ignored for a year. The NSF consumer guide is also a useful reference for understanding filter ratings and replacement expectations.

    What should I check each month?

    Water Filter Maintenance Schedule for Homeowners

    Pressure, taste, leak points, and cartridge condition — that is my quick monthly sweep, and it takes under 10 minutes. That short look is where you catch a filter that is still “working” on paper but has already started to fail in practice.

    Start with flow rate. A faucet filter that used to fill a 1-quart pitcher in a reasonable time and now crawls is telling you the cartridge is loading up. For a whole-house sediment filter, a pressure drop across the housing is a stronger clue than taste. If the system has pressure gauges before and after the housing, note both readings. Even without gauges, a shower or kitchen tap that feels starved after the filter is a sign to inspect.

    Next, check water appearance and odor. Cloudiness right after opening a new cartridge may be normal for the first flush. Cloudiness that appears later is not normal. A chlorine smell returning after it had been removed suggests exhausted carbon. A musty or swampy odor can mean the cartridge or housing needs cleaning, not just replacement. The EPA’s consumer resources on home water treatment are a good reference for matching symptoms to likely maintenance issues.

    Then check the housing and seals. Look for a damp lower rim, drips, salt-like residue from hard water, or tiny cracks in clear housings. A clear sump that has turned brown or green deserves a deeper clean, not another cartridge dropped into the same mess.

    For RO systems, look at the storage tank behavior. If the tank seems to fill slowly, the faucet sputters, or the membrane seems to recover poorly after several hours, the prefilters, tank air charge, or membrane may need attention. That is not a single-part problem every time.

    If the system has a date sticker or electronic indicator, do not trust it blindly. I would use it as a reminder, not a judge, and I would confirm any unusual reading with the manual or a qualified technician. Indicators can fail, get reset incorrectly, or be based on flow volume assumptions that do not match your house.

    The mistakes homeowners make with water filter maintenance

    The biggest mistake is waiting for taste to change, and by then the filter is already overdue. Taste is a late signal. Chlorine breakthrough, sediment loading, and membrane fouling often start before anyone notices anything. The fix is a calendar and a log, not your tongue.

    Another common error is replacing only the cartridge and ignoring the housing. That leaves dirt, slime, and worn O-rings in place. The consequence is leaks, bad seals, or contaminated surfaces. The correct move is to clean the sump, inspect the cap, and check the seal every time the housing is opened.

    A third mistake is buying the wrong replacement because “it fit.” Fit is not enough. Micron rating, carbon type, flow direction, and certification matter. A 5-micron sediment cartridge and a carbon block cartridge may both thread in, but they do different jobs. The correct alternative is to match the exact part number or a clearly compatible equivalent listed by the manufacturer.

    People also skip flushing. New cartridges can shed carbon fines or trapped air, and RO tanks can need several cycles before taste stabilizes. The consequence is black specks, cloudy first draws, or odd flavor. The correct alternative is to flush for the volume the manual specifies; if there is no manual, flush until the water runs clear and odor-free.

    Another error is using a single annual replacement date for a system with heavy sediment or high use. That sounds organized, but it fails fast in homes on wells or in older plumbing. The consequence is a clogged filter that stresses the housing and cuts flow. The correct alternative is a shorter interval, often 1 to 6 months for sediment prefilters under load.

    Finally, people forget to shut off pressure before opening the housing. On a pressurized whole-house canister, that can mean a messy release and a cross-threaded sump. The correct alternative is to close the inlet and outlet valves, bleed pressure, and open the housing only after the line is depressurized.

    When does the standard schedule not apply?

    The standard schedule needs to change when the water source, usage, or filter design changes, and that happens more often than many homeowners think. A private well, a basement flood, a seasonal cabin, or a house full of guests can shorten intervals dramatically. A city water system with a sudden utility notice can do the same.

    Private well water with visible sediment: the filter may load in weeks, not months — use a pressure-based changeout rule and inspect every 2 weeks at first.

    Post-flood or post-repair water: the filter may catch debris, rust, and microbial load the cartridge was not designed to handle — replace the cartridge immediately and sanitize the housing before normal use.

    Long vacancies, 30 days or more: stagnant water can leave taste and odor problems — flush the system thoroughly before drinking, and replace cartridges if they sat wet beyond the maker’s recommended standby period.

    High-use households: more people means more gallons through the cartridge — shorten the interval based on the manufacturer’s guidance and watch for flow loss.

    RO systems with poor feed water: hard water, high chlorine, or heavy sediment shortens membrane life — stay strict with prefilter changes, because a membrane is expensive and easy to foul early.

    Any system that shows biofilm, slime, or recurring odor: the schedule is no longer the main issue — clean and sanitize the housing, verify the cartridge type, and consider whether the source water needs testing or pretreatment.

    This is where generic advice falls apart. “Change it every year” is fine only for a light-duty system on stable municipal water. It is wrong for a well pump pushing sediment after spring rain, and it is wrong for a kitchen filter serving a family that cooks at home every day.

    How do I know the filter is actually doing its job?

    A filter is doing its job when water flow stays usable, taste and odor stay consistent, and the cartridge is changed before it is visibly overloaded. That sounds simple, but it needs three checks: the calendar, the performance, and the condition of the parts.

    For performance, I look for stable pressure and no sudden flavor return. A carbon filter that no longer removes chlorine effectively is spent even if water still runs. For condition, I look at the cartridge itself. A sediment cartridge that has turned dark brown from top to bottom is telling you it has been doing real work. A cartridge that looks clean after a year may mean your water is clean, or it may mean the cartridge is oversized and not the right match.

    For whole-house systems, a good result also includes protecting downstream fixtures. If aerators, valves, or ice makers are less clogged than before, the prefilter is probably doing its job. If not, the maintenance schedule may be too lax or the filter type may be wrong for the sediment load.

    The trade-off is simple: shorter intervals cost more cartridges and a little more time, but they reduce nuisance problems and the risk of running an exhausted filter. Longer intervals save money only if the filter is still within spec. Once flow drops or the media is spent, the savings disappear.

    A practical standard I respect is this: if a filter’s use is uncertain, change it earlier rather than later. For a homeowner, the cost of a cartridge is usually smaller than the cost of a leak, a clogged faucet, or a week of doubting the water. The CDC’s household water guidance is useful here because it emphasizes using the right device, maintaining it, and replacing parts as directed.

    Quick answers homeowners ask me all the time

    How often should I replace a home water filter cartridge?
    Usually every 2 to 12 months, depending on the filter type, water quality, and household use. Sediment prefilters often need the shortest interval.

    Can I just change my water filter once a year?
    Only if the manufacturer says that is appropriate for your system and your water conditions. For many households, a shorter interval is safer.

    How do I know it’s time to change the filter early?
    Slow flow, bad taste, odor return, pressure drop, visible sediment loading, or repeated leaks are all signs to inspect sooner.

    Do RO filters need special attention?
    Yes. RO systems usually have prefilters, a membrane, and a storage tank, so the maintenance schedule is layered and should follow the manual closely.

    What if my water comes from a well?
    Test the water regularly and watch the filter more closely, because sediment, iron, and seasonal changes can shorten the schedule.

  • Why Is My Water Pressure Lower After Installing a Filter?

    Why Is My Water Pressure Lower After Installing a Filter?

    Last updated: September 10, 2026

    Key Takeaways

    • You can usually pin down the cause in about 20 to 40 minutes with a few checks and one simple comparison.
    • Bigger housings often make sense. Especially when you want filtration and usable pressure.
    • Sometimes the filter is not the whole story; call a licensed plumber or water-treatment professional, especially if low pressure affects more than one fixture.
    • A filter lowers pressure because every cartridge, screen, membrane, and valve adds resistance to flow.

    Right after a filter goes in, a weak tap can be maddening. Why is my water pressure lower after installing filter? Usually, the answer is plain: the unit is too restrictive, it was installed backward, or it is catching debris already sitting in the line. I mean actual pressure loss at the faucet, not the normal difference between a main line and a bathroom sink. This article applies if you installed a point-of-use filter, under-sink filter, shower filter, whole-house cartridge, or reverse osmosis prefilter, and you already know the filter is the new variable in the system.

    Whole-house weak pressure is a different animal. So is sudden pipe banging, rusty water after a shutoff, or a pressure issue that started before the filter went in. In those cases, the filter may be only part of the problem. Call a licensed plumber or water-treatment professional instead of assuming the cartridge is to blame.

    Why the filter changed your pressure

    Why Is My Water Pressure Lower After Installing a Filter?

    A filter lowers pressure because every cartridge, screen, membrane, and valve adds resistance to flow. Normal. What is not normal is a drop big enough to make a faucet feel weak, a shower spray turn thin, or an appliance take forever to fill.

    The term to watch is pressure drop: the loss of pressure between the inlet side and the outlet side of the filter. Every filter has some of it. The question is whether yours is small and expected, or large enough to signal trouble. A 5-micron sediment cartridge will usually restrict flow more than a 20-micron cartridge. A carbon block filter is often more restrictive than loose granular carbon. And an RO membrane system is supposed to be restrictive; the storage tank is there to compensate.

    A generic article often stops at “filters reduce pressure.” That misses the useful part. If the filter is installed correctly, a noticeable drop usually means one of four things: the filter is too fine for the job, it is clogged early, it is installed backward or with a valve partly closed, or the home already had marginal supply pressure and the filter pushed it over the edge. That math stops working fast.

    I’d split the issue into two questions. Did the pressure fall only at the filtered outlet, or across the house? And did it happen immediately after installation, or after a few days or weeks? Those two answers point you in different directions.

    Is my filter too restrictive for my plumbing?

    Yes — if the filter’s rated flow is below the fixture demand, the pressure will feel low even when the supply is fine. A kitchen faucet can live with modest flow loss; a shower or whole-house setup cannot.

    Start with the specs, not the marketing copy. Look for:
    – micron rating
    – flow rate in gallons per minute
    – maximum operating pressure
    – whether the cartridge is pleated, spun, carbon block, or membrane-based

    A 10-micron sediment filter removes finer particles than a 20-micron filter, but it usually creates more resistance. A carbon block cartridge often gives better taste reduction than loose carbon, yet it can choke flow faster. If you installed a shower filter with a tiny cartridge and then a low-flow showerhead, the combined restriction can make the spray feel weak even though nothing is “broken.”

    Also check whether the filter matches the pipe size and fixture type. A 3/8-inch under-sink line feeding a high-demand faucet through a small inline filter is a common bottleneck. So is a whole-house cartridge rated for 5 gpm on a home that needs much more when two showers and a washing machine run at once. In one NSF/ANSI 42 test context, cartridge pressure drop is reported at a defined flow rate, which is why the rated gallons per minute matter as much as the micron number.

    The practical rule is simple: if the filter’s flow rating is close to or below the fixture’s demand, expect pressure loss. If you do not know the demand, treat a sudden drop at one fixture as a sign that the filter may be undersized for that job, and verify the setup with a plumber or water-treatment pro if needed. Thin straw, big gulp. Bad pairing.

    How do I tell whether the filter, the install, or the supply is the problem?

    Why Is My Water Pressure Lower After Installing a Filter?

    You can usually isolate the cause in about 20 to 40 minutes with a few checks and one simple comparison. Do the checks in order so you do not replace a part that is fine.

    1. Bypass the filter if the system allows it. Set the bypass valve to open or remove the filter cartridge according to the manufacturer’s design. Verify that water flow returns to normal at the same faucet or hose bib. If pressure does not improve, the filter is probably not the only restriction; a plumber can check the PRV, shutoff valves, and piping.
    2. Check the inlet and outlet orientation. Look for arrows on the housing or head and confirm water enters the inlet and exits the outlet. Verify the labels against the piping, not just the way the housing sits on the wall. A backward cartridge housing can starve flow or prevent sealing.
    3. Confirm every shutoff valve is fully open. Turn the supply valve counterclockwise until it stops, then back it off slightly if the handle design requires it. Verify the handle is parallel to the pipe on quarter-turn valves. A valve left half-open can mimic a clogged cartridge.
    4. Inspect the cartridge seating and O-rings. Remove the housing, seat the cartridge squarely, and check that the O-ring is clean, lubricated if the manufacturer calls for it, and not pinched. Verify there is no twisting or cocking. A pinched seal can restrict flow and leak at the same time.
    5. Flush the filter for the manufacturer’s recommended volume. Many carbon filters need several gallons of flush water before they stop shedding fines. Verify the water clears and the flow improves after flushing. If it stays cloudy or weak, the cartridge may be packed too tightly or defective.
    6. Check for sediment at the inlet screen or prefilter. Shut off water, remove the screen, and look for sand, scale, or rust flakes. Verify the screen is clean and seated properly. Debris often appears right after a shutoff because disturbed pipe scale breaks loose.
    7. Measure pressure before and after the filter. Use a simple hose-thread pressure gauge or a gauge tee, then compare the inlet and outlet under the same condition. Verify the difference is small at rest and larger only when water is flowing. A large gap under flow points to excess restriction in the filter or piping.
    8. Test another fixture on the same branch. Open a nearby faucet or spigot. Verify whether the drop is isolated to one filtered tap or affects the whole branch. If only the filtered outlet is weak, the issue is local. If multiple fixtures drop, the supply or main valve may be involved.

    A good result is easy to spot: the filtered faucet runs close to its pre-filter flow, the water clears after flushing, and the outlet pressure no longer sags sharply when you open the tap. If the cartridge is already dirty after a short time, the line likely carries more sediment than the filter can handle alone.

    What should I check before I blame the filter?

    Check the home’s incoming pressure, the age of the plumbing, and where the filter sits in the line. A filter often gets blamed for a problem that was already there but had not shown up yet.

    A pressure-reducing valve, often called a PRV, is a common source of confusion. It sits on the main line and keeps house pressure in a safe range. If the PRV is set low, a filter added downstream can make the whole system feel weak. A partially closed main shutoff can do the same thing. Seeing low pressure at multiple taps, not just the filtered one, means the filter may have exposed a marginal supply.

    Pipe material matters too. Older galvanized pipe, especially where internal corrosion has narrowed the bore, reacts badly to any added restriction. A filter that seems fine on newer PEX or copper can reveal weakness in old steel lines. That is why a whole-house cartridge on an older home often needs a larger housing and a coarser prefilter than a small apartment setup.

    Component order matters as well. A softener, sediment filter, carbon block, and UV unit can each add resistance. Put them in the wrong sequence and you can create a bottleneck. In many treatment trains, sediment removal comes first, then carbon, then the finer device if one is needed, but the right order depends on the water and equipment, so confirm it with the manufacturer or a professional. If a carbon block is placed before the sediment stage in a dirty-water application, it can clog quickly.

    I would not assume “new means better” here. A 1-micron cartridge is not automatically an upgrade over a 5-micron cartridge. It may improve particle removal but worsen flow enough that the faucet becomes annoying to use.

    When should I stop troubleshooting and change the setup instead?

    Stop chasing small fixes when the filter is simply the wrong tool for the flow you need. These are the cases where I’d change the setup, not keep trying the same cartridge.

    The pressure drop is only at one filtered faucet and the filter has a low flow rating: The cartridge is undersized for that fixture — replace it with a higher-flow model or a larger housing.

    The filter clogs again within days or a few weeks: The incoming water has more sediment than the cartridge can handle — add a proper sediment prefilter or a larger first-stage filter.

    The filter is a fine carbon block on a whole-house line: That setup can be too restrictive for multiple fixtures — move the carbon stage downstream or use a larger housing rated for higher flow.

    The home already has weak pressure at multiple taps: The filter is not the root cause — check the PRV, main shutoff, or old piping before changing more filter parts.

    The system is an RO unit and the faucet feels slow: That is often normal for reverse osmosis because the tank and membrane are part of the design — verify the storage tank charge and the prefilters before assuming a fault.

    The filter housing is small, opaque, or hard to service: A compact design can be a maintenance trap — a larger clear housing or easier cartridge format may save time even if it costs more upfront.

    Common mistakes people make after a filter install

    The first mistake is using a cartridge that is too fine for the job. A 1-micron filter can be excellent on dirty water, but it can also make a kitchen faucet feel starved. The fix is to step up to a coarser stage, such as 5 or 10 microns, or increase housing size.

    The second mistake is forgetting to flush carbon fines. Carbon block filters often shed black dust at first. If the cartridge is not flushed per the manufacturer’s instructions, the outlet can feel sluggish and the water may look dirty for longer than it should. The fix is to flush until the water clears and flow stabilizes.

    The third mistake is leaving a valve partly closed. Basic, yes. Common, too. The result is a false diagnosis: people replace a cartridge that was never the problem. The fix is to verify every valve position and not trust handle position alone.

    The fourth mistake is installing the cartridge backward. Some housings make this hard to see, especially under a sink. The result can be a severe pressure drop or no flow at all. The fix is to read the arrows on the housing head and match inlet to outlet before closing the canister.

    The fifth mistake is ignoring sediment upstream. If the new filter quickly loads with rust, sand, or scale, it is doing its job and showing you the real problem. The fix is to add a sediment stage, clean the inlet screen, or address the piping source.

    The sixth mistake is assuming every low-flow symptom is pressure. Sometimes the faucet aerator, showerhead, or hose bib screen is partly clogged, and the filter just happens to be the last thing installed. The fix is to test flow with the aerator removed or by checking an unfiltered outlet on the same branch. That simple test is often enough to separate a clogged screen from a filter issue.

    What does a good fix look like, and how long should it last?

    A good fix restores useful flow without sacrificing the filtration you actually need. Plain and simple. The tap should feel normal again, the cartridge should not clog immediately, and the pressure difference across the filter should stay reasonable during ordinary use.

    For a point-of-use filter, I would want the faucet to run steadily without sputtering, and I would expect a pressure gauge to show only a modest loss across the housing at rest. For a whole-house setup, I would want showers, sinks, and appliances to work together without one fixture collapsing when another opens. If the filter is part of an RO system, some slow delivery is expected, but the tank should refill in a sensible amount of time and the stream should not fall off a cliff after a few seconds.

    Durability depends on water quality, cartridge size, and usage. A filter in a sediment-heavy house may need service far sooner than the package suggestion. A larger housing, such as a standard 10-inch or 20-inch canister, usually gives more surface area and less restriction than a tiny inline unit. That is why bigger housings often make sense when the goal is both filtration and usable pressure.

    I would choose the least restrictive filter that still solves the water problem you actually have. If you want taste improvement, you may not need ultra-fine filtration. If you want sediment protection, a staged approach often works better than one tight cartridge. The wrong setup can be technically “better” on paper and worse in daily life.

    Quick answers to the questions people ask most

    Can a new water filter lower pressure? Yes. Any filter adds resistance, and a fine or clogged cartridge can make the drop noticeable.

    Is low pressure after a filter always the filter’s fault? No. A partly closed valve, a bad PRV, old galvanized pipe, or debris in the line can cause the same symptom.

    How do I know if the cartridge is clogged? The flow gets weaker over time, the pressure drop increases when water is running, and the filter may look dirty or load up faster than expected.

    Should I remove the filter if pressure is low? Only as a test or if the filter is the wrong size for the job. If you need filtration, the better fix is usually a larger or less restrictive setup.

    Do reverse osmosis systems always have low flow? They are designed to be slower than a normal faucet, but they should still work within the limits of the tank, membrane, and prefilters. NSF notes that filter and system performance depends on the tested configuration, so verify the model rather than assuming all RO units behave the same.

    For more on pressure loss and flow, see NSF/ANSI drinking-water filtration standards, the EPA’s guidance on home water treatment, and your filter manufacturer’s published flow ratings.

  • How to Tell What Contaminants Are in Your Tap Water

    How to Tell What Contaminants Are in Your Tap Water

    Last updated: September 10, 2026

    Key Takeaways

    • Reports often show systemwide results, not what comes out of your kitchen faucet after 8 hours of stagnation.
    • If you suspect plumbing contaminants, collect a first-draw sample after water has sat unused for 6–18 hours.
    • Verify the faucet was not used for showers, dishwashing, or flushing during that window.
    • It does not assume you know chemistry terms like “MCL” or “ppb”; I’ll define them as I go.

    Start with the utility report, sure. But if your house has old pipes, that report alone can miss the real culprit. That is the blunt answer to how to tell what contaminants are in your tap water. The utility data reflects water at the plant or out in the distribution system; a tap test shows what reaches your glass after pipes, solder, fixtures, and time in the plumbing have done their work.

    Who this applies to — and what you need before you start

    How to Tell What Contaminants Are in Your Tap Water

    Anyone on municipal water or a private well fits here, especially if you want a likely answer without guessing wildly. You should be able to read a basic water quality report, label a sample bottle, and wait a few days for lab results. No chemistry degree required. “MCL” and “ppb” get explained along the way.

    For a public water system, your first stop is the annual Consumer Confidence Report (CCR), also called a water quality report. U.S. utilities have to provide it once a year under EPA rules. Handy? Absolutely. Complete? Not quite. It usually does not capture lead released from your own plumbing, and it may miss a problem that shows up only at one faucet after water sits overnight.

    On a private well, there is no utility report to lean on. You build the picture yourself with lab testing. For well owners, a broad panel is usually the sensible place to begin because groundwater shifts by region, depth, and season. Muddy, inconsistent, a little annoying. That is normal.

    This topic carries real weight because a bad read can overlook lead, nitrate, arsenic, or microbial contamination. When water is discolored, smells like sewage, came from a flooded well, or a child or pregnant person is involved, the DIY route stops being the smart first move. Use a certified lab, and for urgent safety concerns, follow local public health guidance before drinking any more of it.

    What your water report can tell you — and what it cannot

    Your water report can tell you which contaminants the utility found, at what levels, and whether those levels were below the EPA’s Maximum Contaminant Level (MCL), meaning the legal limit for many regulated contaminants in public drinking water. It can also show whether treatment is doing its job for things like chlorine, fluoride, nitrate, disinfection byproducts, copper, and some metals. Still, if the result affects health decisions, talk to a professional and use EPA or state guidance with the report.

    But it has blind spots.

    • Lead from your own home plumbing. Lead often shows up after water leaves the utility, especially in homes built before 1986, homes with lead service lines, or homes with brass fixtures that leach lead.
    • Contaminants not required in the report. Some chemicals are unregulated or only monitored under specific programs.
    • Averages instead of your tap. Reports often show systemwide results, not what comes out of your kitchen faucet after 8 hours of stagnation.

    The practical move is to read the report for the big categories, then decide whether you need a tap sample. A first-draw sample is the first water out of the faucet after water has sat in the pipes for at least 6 hours and no more than 18 hours. That sample is the one most likely to reveal lead or copper from plumbing.

    Two useful public references are the EPA’s page on the Consumer Confidence Report and the EPA’s lead-in-drinking-water guidance. I’d begin there:
    – EPA: Consumer Confidence Reports
    – EPA: Lead in Drinking Water

    If your report lists contaminants at low levels but your concern is a specific symptom, odor, stain, or plumbing issue, the report by itself is not enough. A neat little “everything is below the limit” line can still hide a problem that appears only at one faucet, after water stagnates, or in a certain season; if the result matters for health decisions, consult a professional and check the EPA or your state health department guidance.

    How do I tell what contaminants are in my tap water?

    How to Tell What Contaminants Are in Your Tap Water

    You figure it out by combining three things: the utility report, targeted tap testing, and a few clues from the water itself. I’d use that order because it keeps you from paying for random tests before you know what makes sense.

    1. Get the water utility’s latest Consumer Confidence Report. Find the most recent PDF or mailed copy and look for the contaminant table, source water, and “definitions.” Check whether the system uses surface water or groundwater, because that changes the likely risks. A warning sign is a report that only says “compliance” and skips the results table; that usually means you have the wrong document.
    2. Check the sample type and timing. If plumbing contaminants are your concern, collect a first-draw sample after water has sat unused for 6–18 hours. Make sure the faucet was not used for showers, dishwashing, or flushing during that window. A sample taken after the tap runs for several minutes can wash away lead or copper and give you a falsely calm result. That math stops working fast.
    3. Decide which contaminant classes fit your situation. Homes with older plumbing should prioritize lead and copper. Wells call for nitrate, arsenic, bacteria, and often iron, manganese, and hardness. Check that the lab panel lists units such as mg/L for nitrate and ppb or µg/L for lead. A problem sign is buying a “basic water test” that only checks pH and hardness; that tells you almost nothing about toxic contamination.
    4. Use a certified laboratory for anything health-related. Pick a lab accredited under the EPA’s drinking water lab recognition program or your state’s equivalent. Make sure the test method and detection limit appear on the report. A strip test with a color block that cannot separate 3 ppb from 15 ppb for lead is just too blunt to guide a decision.
    5. Collect the sample exactly as instructed. Use the bottle the lab sends, do not rinse it unless instructed, keep cold samples refrigerated at about 4°C if the kit says to, and ship within the stated time window, often 24–48 hours. Check that the chain-of-custody form is complete if the lab requires it. An unlabeled bottle, a missing collection time, or a sample left in a hot car can wreck the result.
    6. Read the result against the right benchmark. Compare regulated contaminants to the EPA MCL or your local standard, not to a random internet number. For lead, remember there is no truly safe level; EPA action levels are not the same thing as a health threshold. “Below the limit” is not identical to “no concern.” If the result matters for a child, pregnancy, or an ongoing health issue, consult a professional.
    7. Repeat if the first result is borderline or inconsistent. If a result sits near the action level or clashes with what you smell, see, or taste, retest from the same faucet and from a second faucet. Check whether the issue is limited to one fixture, one floor, or the whole house. One sample does not settle it forever; contaminants can change by day and by draw point.
    8. Map the source. If the utility report looks clean but your tap result does not, the likely source is the home system: lead service line, brass fixture, corrosion, or a treatment device that is failing. Compare a kitchen sample, a bathroom sample, and if possible a sample from a point before any softener or filter to see where it starts. Blaming the city for a lead result that appears only after water passes through your own plumbing is the wrong target; if you are unsure, consult a certified plumber or water professional.

    The best outcome is not a giant chemical list. It is a short, credible set of contaminants that are actually present, with enough detail to tell whether they come from the source water or from your house.

    What contaminants should I test for first?

    Begin with the contaminants that match your water source and your home, not a giant panel with 50 analytes you do not need. For public water, I’d prioritize lead, copper, and disinfection byproducts if you are worried about plumbing or taste. For wells, start with coliform bacteria, nitrate, arsenic, and the geology-driven metals that matter in your region.

    Here is the practical way to choose:

    • Lead: test if your home was built before 1986, has a lead service line, or has brass fixtures of unknown age.
    • Copper: test if water tastes metallic, leaves blue-green staining, or your plumbing is new and has recently been soldered.
    • Nitrate: test if you are on a well, especially in agricultural areas, because nitrate is a particular risk for infants.
    • Arsenic: test well water in areas where arsenic is known to occur naturally in groundwater.
    • Coliform bacteria / E. coli: test wells, especially after flooding, pump repair, or a new well start-up.
    • PFAS: consider it if your area has known industrial, military, airport, or landfill impacts. PFAS are a class of persistent synthetic chemicals; not every lab panel includes them, and they are not always the first test I would order unless the local risk is credible.

    A generic article will tell you to “test for everything.” Sounds careful. It is not. It burns money and slows the answer you actually need. A $25 strip panel that checks pH, hardness, chlorine, and iron may help with taste or staining, but it will not tell you whether your child’s bottle water has 8 ppb of lead or whether a well has bacteria.

    If you are unsure, a state drinking water program, county health department, or an accredited lab can often tell you which analytes are standard for your ZIP code. That advice is worth more than buying a broad consumer kit with no clear detection limits.

    What do the numbers on the lab report actually mean?

    The numbers matter only when you know the unit, the benchmark, and the sample type. A result of 0.010 mg/L for lead is the same as 10 µg/L, or 10 ppb. If the report does not make that conversion obvious, write it down before you compare anything. Simple? Not always.

    For regulated contaminants in public water, compare the result to the EPA MCL or action level listed in the report. For private wells, there may be no legal limit, so you compare to health-based guidance from the EPA, your state, or the lab’s interpretation sheet. Even then, that is not the same as “safe.”

    A few interpretation rules help:

    • Non-detect does not mean zero. It means below the lab’s detection limit.
    • Below the limit does not always mean no issue. Lead is the classic example because the action level is a systemwide regulatory trigger, not a personal safety threshold.
    • Turbidity is cloudiness, usually measured in NTU. A spike in turbidity after rain can point to sediment intrusion or well problems, and it can make disinfection less effective.
    • Hardness is not a contaminant in the health sense. It matters for scale and taste, but it is not the same kind of concern as lead or nitrate.

    If a result feels confusing, I’d read the lab’s method sheet before I trust a color-coded consumer summary. The method name, detection limit, and collection instructions tell you more than a slick “safe/unsafe” badge ever will.

    When should you stop trusting the usual approach?

    Stop using the usual report-plus-home-test approach when the situation points to an urgent health or contamination problem, because delays can matter.

    Water has a sewage smell, a rotten-egg odor plus illness in the household, or visible contamination after flooding: This may mean microbial contamination or intrusion — Stop drinking it, use bottled water or a verified safe source, and contact local health or water authorities the same day.

  • Your home has a lead service line, and a first-draw tap sample shows elevated lead: This means the plumbing is part of the source — Do not assume flushing solves it; arrange repeat testing and plan for corrosion control or service-line replacement.

    A baby, pregnant person, or anyone immunocompromised will drink the water and the well has not been recently tested: This raises the stakes for nitrate and bacteria — Get a certified well test now rather than relying on taste, smell, or an old report.

    The water is brown, orange, or black after utility work or a nearby main break: This can be sediment, iron, or disturbed scale — Run only enough water to see whether the issue clears quickly; if it persists, contact the utility and do not assume a filter will fix it.

    The report says “compliant,” but your tap water has a strong metallic taste, blue-green stains, or repeated sample failures: The source may be inside the house — Test another faucet and sample before any softener or filter, because the problem may be your plumbing rather than the supply.

    You need a result for a legal, real estate, or medical decision: Consumer kits are the wrong tool — Use an accredited lab and keep the chain of custody intact.

    If you are seeing acute symptoms and suspect contamination, get medical advice promptly. Water testing is useful, but it is not a substitute for diagnosis.

    The mistakes people make when they try to identify tap-water contaminants

    The biggest mistake is assuming taste, smell, or clarity tells the whole story. Lead, nitrate, and arsenic can be invisible and tasteless. That error costs time and can leave a serious exposure in place.

    1. Testing only once. Water quality can vary day to day, especially in wells and after plumbing changes. The result is a false sense of certainty. The better move is to retest from the same faucet and, if needed, from a second fixture.

    2. Using the wrong sample type. A flushed sample can miss lead from stagnant plumbing; a first-draw sample can overstate source-water contamination if you really want the utility supply. The result is a misleading diagnosis. Match the sample to the question.

    3. Buying a broad consumer strip kit and treating it like a health report. Those kits may help with quick screening for chlorine or hardness, but they are not enough for a health decision about contaminants such as lead or bacteria. A certified lab is the better choice when the question is safety, not convenience.

    4. Ignoring the report’s units. A number without units is easy to misread. Parts per billion, milligrams per liter, and micrograms per liter can describe the same concentration in different ways, so always convert before deciding what matters.

    5. Assuming compliance equals safety. A utility can meet its legal obligations and still leave you with a home-specific issue, especially if plumbing or fixtures are contributing contaminants. That is why a tap sample matters when the concern is your faucet, not just the system.

    A simple comparison table for choosing a test

    Situation Best first test Typical cost Turnaround Notes
    Public water, want systemwide contaminants Consumer Confidence Report Free Annual Good for utility-level data, not home plumbing
    Public water, suspect lead from plumbing First-draw tap sample at an accredited lab $25–$75 3–10 days Sample after 6–18 hours of stagnation
    Private well, no recent testing Broad well panel $100–$300 3–10 days Include bacteria, nitrate, arsenic, and local metals
    Flooded well or sewage smell Certified microbiological test $30–$100 1–5 days Do not rely on strips or taste
    Legal, real estate, or medical use Accredited lab with chain of custody $50–$200+ 3–10 days Keep paperwork intact

    What to do after you get the results

    Use the result to decide the next step, not to collect more paper. If the contaminant is in the utility report, look for the utility’s treatment updates, annual trends, and public notices. If the contaminant is at your tap but not in the report, focus on plumbing, fixtures, filters, and any point-of-use treatment device.

    If the number is clearly above the benchmark, do not wait for a second opinion before reducing exposure. Use bottled water, an NSF-certified filter if appropriate, or alternate water until you have a fix. If the result is borderline, retest with a careful sample and, if needed, ask a certified plumber, local health department, or water professional to help interpret the pattern.

    If the result is low but your concern remains, keep notes on the faucet, time of day, stagnation time, and any recent plumbing work. Patterns are often more useful than a single number. That little notebook can save a headache later.

    Bottom line

    You figure out how to tell what contaminants are in your tap water by pairing the utility report with the right tap sample, then reading the numbers in context. That gives you a realistic answer to how to tell what contaminants are in your tap water without wasting money on random tests. If you need help, use the EPA, your state drinking water program, an accredited lab, or a certified professional rather than guessing from taste, smell, or a single result.