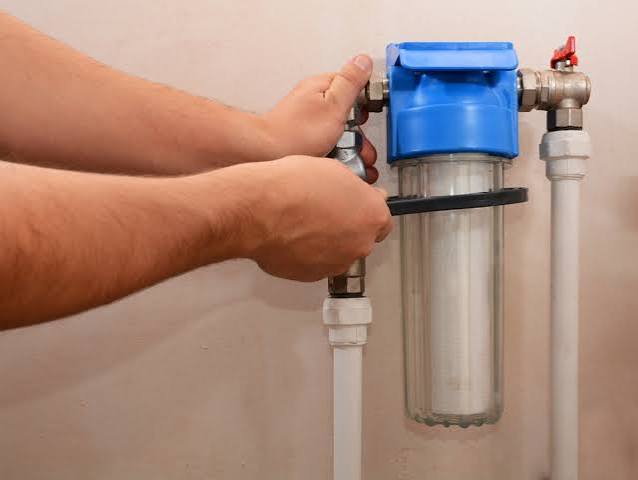
Last updated: September 10, 2026
Key Takeaways
- Usually every 2 to 12 months, depending on the filter type, water quality, and household use.
- RO systems: prefilters commonly every 6 to 12 months; membrane every 2 to 5 years depending on feed water and use.
- If your household uses a lot of filtered water, consider shortening replacement intervals based on the manufacturer’s guidance and the filter’s actual condition.
- I check pressure, taste, leak points, and cartridge condition, and I do it in under 10 minutes.
A home filter can look fine for months, then quietly bog down. So the basic rule is this: check it monthly, swap cartridges every 3 to 12 months depending on the filter, sanitize the housing whenever you change one, and do not treat the setup like a “set and forget” appliance. The right timing depends on the filter type, your water quality, and how much water your household uses. NSF/ANSI certification, manufacturer manuals, and EPA guidance all point the same way: follow the product instructions and watch performance, not just the calendar. Miss that, and clean water turns into a sluggish, underperforming system.
I’m writing for homeowners who already have a point-of-use filter under the sink, a pitcher filter, a refrigerator filter, a whole-house sediment filter, or a reverse osmosis (RO) system. I’m assuming you know where the filter is, can shut off a valve, and can read the model number or cartridge label. I am not assuming you know the right interval, because that is where most people go wrong. Water suddenly tastes odd? Pressure drops sharply? Or maybe flooding, a boil-water advisory, or a well issue has you worried? At that point, maintenance is not the main question anymore; testing and troubleshooting are. For additional background, see the EPA drinking water guidance and the CDC advice on water safety after flooding.
What maintenance schedule should I follow for my water filter?
The schedule depends on filter type, water use, and water quality, not some generic “change it once a year” rule. A carbon block cartridge in a kitchen faucet system, a sediment prefilter on a well line, and an RO membrane do not age at the same pace. As a baseline, I would use this:
- Pitcher or refrigerator filters: check monthly; replace every 2 to 6 months or when the manufacturer’s indicator says so.
- Under-sink carbon filters: inspect monthly; replace every 6 to 12 months in many homes, sooner with heavy use or high chlorine.
- Sediment prefilters: inspect monthly; replace when pressure drops or the cartridge visibly loads up, often every 1 to 6 months.
- RO systems: prefilters commonly every 6 to 12 months; membrane every 2 to 5 years depending on feed water and use.
- Whole-house filters: inspect monthly; change cartridges when pressure loss becomes noticeable or at the interval the housing maker specifies, often around 3 to 12 months.
Broad? Yes. Necessary? Also yes. A house on city water with little sediment can stretch the timing. A house on a private well, especially with visible rust or silt, can chew through cartridges fast. Calendar dates alone are a bad compass for any system that sees changing load; in practice, that math stops working fast. Check the manufacturer’s instructions, and if you are pushing the interval longer, talk with a water treatment professional first.
The second part of the schedule is maintenance, not replacement. Wipe housings, check O-rings, verify seals, and flush the system after cartridge changes. A new cartridge that leaks around a bad O-ring is not “new”; it is a plumbing problem waiting to happen. For replacement parts and setup details, check your system’s manufacturer manual or a comparable product guide from the brand that made your unit.
For a simple paper trail, I keep one line in a notebook or phone note: installation date, cartridge type, and next due date. It takes 2 minutes and stops the most common failure, which is forgetting whether the filter has been in place for 4 months or 14.
How do I set up a maintenance calendar for my home water filter?
I build it around three checkpoints: monthly, every changeout, and one annual review. That structure catches almost every problem without turning filter care into a chore. The goal is not perfection; it is staying ahead of pressure loss, taste changes, and cartridge overrun.
- Record the filter model and cartridge type. Write down the exact housing or system model, plus the cartridge part number from the label or manual. Verify the micron rating if it is listed, such as 5 micron or 1 micron. A problem is a mismatched replacement cartridge, which can fit physically but perform differently.
- Set a monthly reminder. Choose the first day of each month and inspect the system for leaks, slow flow, staining, or odor. Verify that the housing is dry and the water still runs normally. A problem is a drop in flow or a damp ring near the housing seam.
- Track water use, not just the date. If your household uses a lot of filtered water, consider shortening the interval based on the manufacturer’s guidance and the cartridge’s actual condition. Verify whether the filter serves drinking water only or also refrigerator ice, cooking, or coffee. A problem is using one small cartridge for a large family and letting it run beyond capacity.
- Replace cartridges on schedule or on pressure loss, whichever comes first. For many point-of-use systems, that means 6 to 12 months; for sediment cartridges, it can be 1 to 6 months. Verify inlet and outlet flow before and after replacement. A problem is reduced pressure after a change, which points to a clogged cartridge, a wrongly seated element, or upstream sediment.
- Inspect and lubricate O-rings at every cartridge change. Clean the groove, check for cracks, and use only food-grade silicone lubricant if the manufacturer allows it. Verify the O-ring is flat, continuous, and not twisted. A problem is a leak at startup or a housing that will not tighten evenly.
- Flush the new cartridge. Run the system for the volume specified by the maker; for many carbon filters that may be several gallons, and for RO systems it is often a tank flush plus a few full tanks before use. Verify the water clears and the initial carbon fines are gone. A problem is black flecks, cloudiness, or a strong carbon smell after flushing.
- Sanitize the housing when the system opens. If the manual calls for it, use a dilute bleach solution or the sanitizer specified by the maker, then rinse thoroughly. Verify there is no chlorine smell left unless the system is designed to remove it downstream. A problem is biofilm, slime, or musty odor in the sump.
- Do one annual review. Compare the actual change interval with the label interval and adjust the schedule by season, water source, and usage. Verify whether the filter is meeting the job it was bought for. A problem is repeatedly changing cartridges too late or too early, both of which waste money and water quality.
A schedule only works if it fits real life, so the best one is the one you can keep up with. If you are away for long stretches, add a reminder tied to another fixed event, such as changing HVAC filters or paying a quarterly bill. If you live in a rental and the landlord owns the unit, still keep your own date record; “I thought someone else handled it” is how filters get ignored for a year. The NSF consumer guide is also a useful reference for understanding filter ratings and replacement expectations.
What should I check each month?
Pressure, taste, leak points, and cartridge condition — that is my quick monthly sweep, and it takes under 10 minutes. That short look is where you catch a filter that is still “working” on paper but has already started to fail in practice.
Start with flow rate. A faucet filter that used to fill a 1-quart pitcher in a reasonable time and now crawls is telling you the cartridge is loading up. For a whole-house sediment filter, a pressure drop across the housing is a stronger clue than taste. If the system has pressure gauges before and after the housing, note both readings. Even without gauges, a shower or kitchen tap that feels starved after the filter is a sign to inspect.
Next, check water appearance and odor. Cloudiness right after opening a new cartridge may be normal for the first flush. Cloudiness that appears later is not normal. A chlorine smell returning after it had been removed suggests exhausted carbon. A musty or swampy odor can mean the cartridge or housing needs cleaning, not just replacement. The EPA’s consumer resources on home water treatment are a good reference for matching symptoms to likely maintenance issues.
Then check the housing and seals. Look for a damp lower rim, drips, salt-like residue from hard water, or tiny cracks in clear housings. A clear sump that has turned brown or green deserves a deeper clean, not another cartridge dropped into the same mess.
For RO systems, look at the storage tank behavior. If the tank seems to fill slowly, the faucet sputters, or the membrane seems to recover poorly after several hours, the prefilters, tank air charge, or membrane may need attention. That is not a single-part problem every time.
If the system has a date sticker or electronic indicator, do not trust it blindly. I would use it as a reminder, not a judge, and I would confirm any unusual reading with the manual or a qualified technician. Indicators can fail, get reset incorrectly, or be based on flow volume assumptions that do not match your house.
The mistakes homeowners make with water filter maintenance
The biggest mistake is waiting for taste to change, and by then the filter is already overdue. Taste is a late signal. Chlorine breakthrough, sediment loading, and membrane fouling often start before anyone notices anything. The fix is a calendar and a log, not your tongue.
Another common error is replacing only the cartridge and ignoring the housing. That leaves dirt, slime, and worn O-rings in place. The consequence is leaks, bad seals, or contaminated surfaces. The correct move is to clean the sump, inspect the cap, and check the seal every time the housing is opened.
A third mistake is buying the wrong replacement because “it fit.” Fit is not enough. Micron rating, carbon type, flow direction, and certification matter. A 5-micron sediment cartridge and a carbon block cartridge may both thread in, but they do different jobs. The correct alternative is to match the exact part number or a clearly compatible equivalent listed by the manufacturer.
People also skip flushing. New cartridges can shed carbon fines or trapped air, and RO tanks can need several cycles before taste stabilizes. The consequence is black specks, cloudy first draws, or odd flavor. The correct alternative is to flush for the volume the manual specifies; if there is no manual, flush until the water runs clear and odor-free.
Another error is using a single annual replacement date for a system with heavy sediment or high use. That sounds organized, but it fails fast in homes on wells or in older plumbing. The consequence is a clogged filter that stresses the housing and cuts flow. The correct alternative is a shorter interval, often 1 to 6 months for sediment prefilters under load.
Finally, people forget to shut off pressure before opening the housing. On a pressurized whole-house canister, that can mean a messy release and a cross-threaded sump. The correct alternative is to close the inlet and outlet valves, bleed pressure, and open the housing only after the line is depressurized.
When does the standard schedule not apply?
The standard schedule needs to change when the water source, usage, or filter design changes, and that happens more often than many homeowners think. A private well, a basement flood, a seasonal cabin, or a house full of guests can shorten intervals dramatically. A city water system with a sudden utility notice can do the same.
Private well water with visible sediment: the filter may load in weeks, not months — use a pressure-based changeout rule and inspect every 2 weeks at first.
Post-flood or post-repair water: the filter may catch debris, rust, and microbial load the cartridge was not designed to handle — replace the cartridge immediately and sanitize the housing before normal use.
Long vacancies, 30 days or more: stagnant water can leave taste and odor problems — flush the system thoroughly before drinking, and replace cartridges if they sat wet beyond the maker’s recommended standby period.
High-use households: more people means more gallons through the cartridge — shorten the interval based on the manufacturer’s guidance and watch for flow loss.
RO systems with poor feed water: hard water, high chlorine, or heavy sediment shortens membrane life — stay strict with prefilter changes, because a membrane is expensive and easy to foul early.
Any system that shows biofilm, slime, or recurring odor: the schedule is no longer the main issue — clean and sanitize the housing, verify the cartridge type, and consider whether the source water needs testing or pretreatment.
This is where generic advice falls apart. “Change it every year” is fine only for a light-duty system on stable municipal water. It is wrong for a well pump pushing sediment after spring rain, and it is wrong for a kitchen filter serving a family that cooks at home every day.
How do I know the filter is actually doing its job?
A filter is doing its job when water flow stays usable, taste and odor stay consistent, and the cartridge is changed before it is visibly overloaded. That sounds simple, but it needs three checks: the calendar, the performance, and the condition of the parts.
For performance, I look for stable pressure and no sudden flavor return. A carbon filter that no longer removes chlorine effectively is spent even if water still runs. For condition, I look at the cartridge itself. A sediment cartridge that has turned dark brown from top to bottom is telling you it has been doing real work. A cartridge that looks clean after a year may mean your water is clean, or it may mean the cartridge is oversized and not the right match.
For whole-house systems, a good result also includes protecting downstream fixtures. If aerators, valves, or ice makers are less clogged than before, the prefilter is probably doing its job. If not, the maintenance schedule may be too lax or the filter type may be wrong for the sediment load.
The trade-off is simple: shorter intervals cost more cartridges and a little more time, but they reduce nuisance problems and the risk of running an exhausted filter. Longer intervals save money only if the filter is still within spec. Once flow drops or the media is spent, the savings disappear.
A practical standard I respect is this: if a filter’s use is uncertain, change it earlier rather than later. For a homeowner, the cost of a cartridge is usually smaller than the cost of a leak, a clogged faucet, or a week of doubting the water. The CDC’s household water guidance is useful here because it emphasizes using the right device, maintaining it, and replacing parts as directed.
Quick answers homeowners ask me all the time
How often should I replace a home water filter cartridge?
Usually every 2 to 12 months, depending on the filter type, water quality, and household use. Sediment prefilters often need the shortest interval.
Can I just change my water filter once a year?
Only if the manufacturer says that is appropriate for your system and your water conditions. For many households, a shorter interval is safer.
How do I know it’s time to change the filter early?
Slow flow, bad taste, odor return, pressure drop, visible sediment loading, or repeated leaks are all signs to inspect sooner.
Do RO filters need special attention?
Yes. RO systems usually have prefilters, a membrane, and a storage tank, so the maintenance schedule is layered and should follow the manual closely.
What if my water comes from a well?
Test the water regularly and watch the filter more closely, because sediment, iron, and seasonal changes can shorten the schedule.
Leave a Reply