Last updated: September 10, 2026
Key Takeaways
- A cartridge that is nominally rated for 6 months can foul much faster in dirty water.
- If replacing a cartridge takes 20 minutes, a towel, and a basin, that is reasonable
- Within the first 24 hours, I would check every joint with a dry paper towel and look for seepage, not just dripping.
- Match the flow demand: Compare the filter’s GPM rating with the fixture it will serve.
Table of Contents
- What to know before you say yes
- Will a water filter work with my existing plumbing?
- What to check before you buy
- Adapters, fittings, and changes
- When a filter is not the right answer
- Common mistakes
- What a good result looks like
Yes — in most homes, a water filter will work with existing plumbing, but only when the filter type matches the pipe size, pressure, and fixture setup already in place. Ask it another way: will a water filter work with my existing plumbing? Usually, yes. But the real test is whether it fits the line, keeps pressure steady, and still leaves enough flow for the sink, shower, or whole house. I’m being blunt because the bad outcomes are predictable — leaks, weak pressure, and a system that needs extra parts just to sit there.
What I need to know before I say “yes”
Three things decide it: pipe or hose size, water pressure, and the spot where the filter will sit in the line. Most residential plumbing uses nominal sizes such as 1/2 inch, 3/4 inch, or 1 inch for pipe, while faucet and appliance hookups often rely on threaded fittings like 3/8 inch compression, 1/2 inch NPT (National Pipe Thread), or 3/4 inch garden hose thread. A 3/8-inch compression unit under a sink is one thing; a whole-house cartridge filter on a 1-inch main is a different animal entirely.
Copper, PEX, CPVC, and galvanized pipe can all be part of the picture. So can renters and homeowners who can reach the shutoff valves under a sink or at a laundry supply line. Also, you may already know whether you want point-of-use filtration at one tap or point-of-entry filtration for the whole house. Don’t start by shopping on appearance alone. That road goes nowhere.
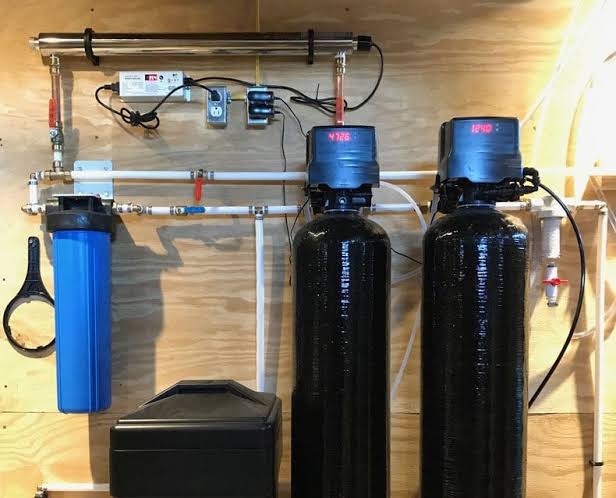
I would not call “existing plumbing” a simple yes-or-no question until I checked a few basics: available space, shutoff valves, drain access if the unit needs one, and local water pressure. Most under-sink filters need a small cabinet and a shutoff valve; reverse osmosis systems often need a drain connection and a pressurized tank; whole-house systems need room, a bypass valve, and enough clearance to change cartridges, often every 3 to 12 months depending on the media and water quality. For that sort of check, the EPA’s homeowner guidance on filtration and the NSF consumer resources are useful starting points.
This is where the first hard stop appears. A corroded main, active leaks, old galvanized pipe that is narrowing from the inside, or even uncertainty about which line feeds which fixture means the plumbing issue comes first and the filter comes later. The filter does not heal bad pipework. Not even close.
Will a water filter work with my existing plumbing?
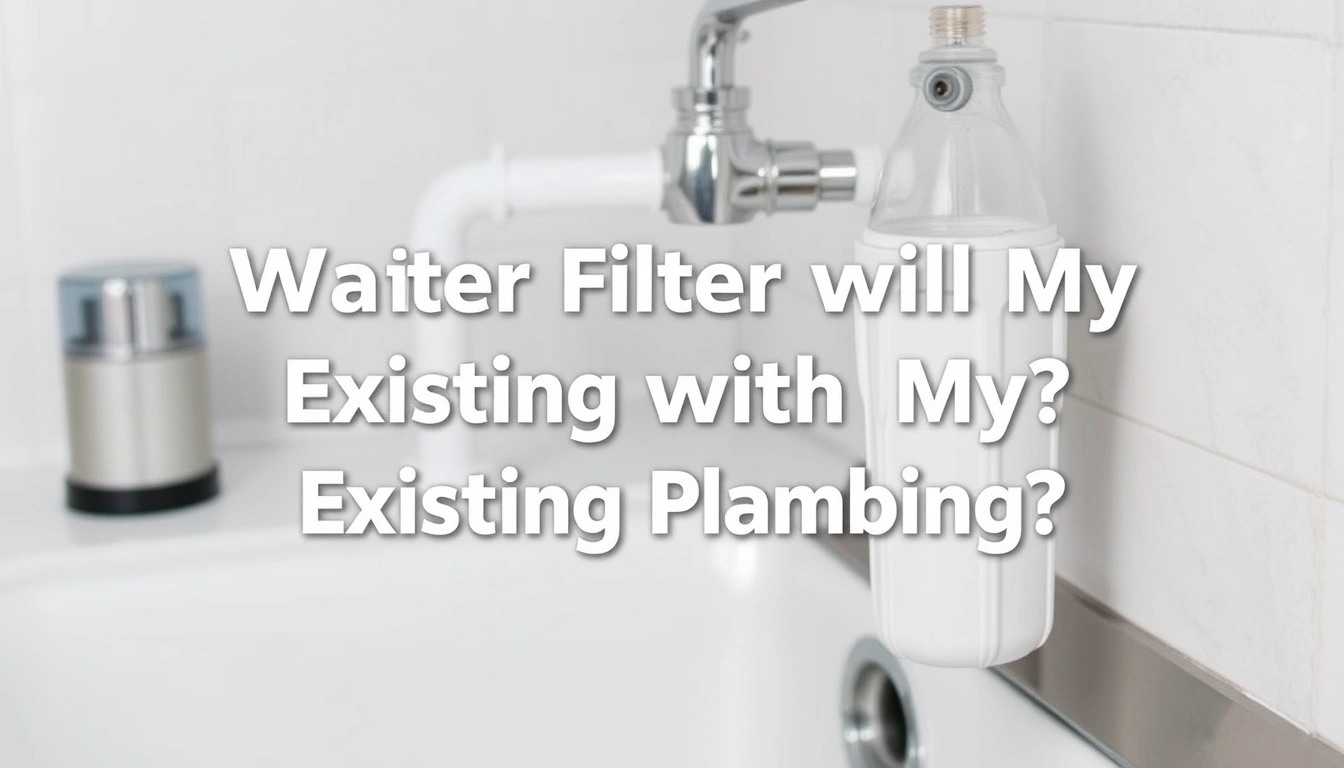
Yes, as long as the plumbing can supply the right connection, pressure, and flow without making the filter work outside its design. That sounds neat on paper; in practice, the trouble usually starts with picking the wrong category. A pitcher filter needs no plumbing at all. A faucet-mounted filter usually fits a standard aerator thread, though pull-down kitchen faucets can be a nuisance. An under-sink cartridge filter usually tees off the cold-water line with 3/8-inch or 1/2-inch fittings. A whole-house system sits on the main line, where flow rate matters far more than at one tap.
Flow rate is measured in gallons per minute, or GPM. A sink filter can usually live with lower GPM because it serves one outlet. A whole-house filter has to pass enough water for more than one fixture at once. When it can’t keep up, pressure drop shows up: the water slows, showers feel thin, and appliances refill sluggishly. That is not your house misbehaving. It is a mismatch.
Here is the plain version I would use. If your plumbing already has a shutoff valve and a standard branch line, most under-sink filters can be adapted with the right fittings. If your faucet has a nonstandard spray head or a built-in pull-out hose, faucet-mounted filters are often the wrong pick. If your house uses well water with sediment, whole-house filtration may still work, but the prefilter has to catch grit before it clogs the finer media. And if your water pressure is already low, a restrictive cartridge can push it below a usable range. That happens a lot with reverse osmosis and dense carbon blocks.
People often miss this: compatibility is not just about thread size. It also comes down to pressure loss, access, and the way the filter changes the water path. A filter can physically fit and still be a lousy match if it cuts flow by 30% or needs a drain you do not have. The NSF/ANSI standards and EPA consumer guidance both stress matching the system to the job, not merely the connection. Clean fit, bad performance? That’s a dead end.
What should I check before I buy anything?
Verify the connection type, space, pressure, and rated capacity before you spend a dollar. I’d check in that order because it usually avoids returns and surprise plumbing errands, and I would still consult a professional if the shutoff, pressure, or drain setup is unclear.
- Identify the connection point: Measure the cold-water branch under the sink, faucet aerator, or main line with a tape measure or thread gauge. Look for 3/8-inch compression, 1/2-inch NPT, or 3/4-inch garden hose thread. Match the filter or adapter to the actual fitting. A problem shows up when you need force, tape, or “close enough” threading just to get it started.
- Check available space: Measure cabinet height, width, and depth in inches, and leave at least 2 to 4 inches of clearance around cartridges or housing caps for service. Verify that you can remove the sump or cartridge without disconnecting the whole unit. A problem shows up when the tank, valve head, or tubing bend radius blocks the door or drawer.
- Confirm water pressure: Look at the home’s static pressure, usually measured in psi, at a hose bib or main line gauge. Many residential systems expect roughly 40 to 60 psi; the exact acceptable range depends on the product. Verify that the filter’s minimum pressure is below your actual reading. A problem shows up when the pressure is already low before anything is installed.
- Match the flow demand: Compare the filter’s GPM rating with the fixture it will serve. A kitchen sink can tolerate less flow than a shower or whole-house line. Verify that the system can supply your intended use without obvious restriction. A problem shows up when the spec sits far below the use case.
- Check for a drain requirement: Reverse osmosis and some backwashing systems need a drain connection or waste line. Verify that there is a nearby air gap or approved drain path. A problem shows up when the only practical drain is too far away or may not meet local code.
- Inspect the shutoff valves: Make sure the cold-water shutoff turns fully, does not leak, and actually stops water. Verify that you can isolate the branch you want to modify. A problem shows up when the valve spins, drips, or refuses to close all the way.
- Confirm the media rating: Look for the contaminant class, such as sediment, chlorine, lead, or cyst reduction, and any standard listed by NSF International or the Water Quality Association. Verify that the filter is meant for your water problem, not just your plumbing. A problem shows up when the filter is sold as “taste and odor” only but you need structural filtration.
For terminology, NSF International’s consumer guidance and the Water Quality Association’s certification pages are both useful. Want the formal standard language? NSF/ANSI 42 covers aesthetic effects like chlorine taste and odor, NSF/ANSI 53 covers health-related contaminants, and NSF/ANSI 58 covers reverse osmosis systems. The EPA’s Private Drinking Water Wells guidance also helps if you are on a well.
How do I tell if my plumbing will need adapters or changes?
Look at the fitting, the valve, and the route the tubing has to take. Most of the time, you need adapters instead of pipe replacement. Good news. An adapter is a short fitting that changes one thread or size to another; it is not proof the system is failing.
A standard under-sink install often uses a tee fitting on the cold-water line and then a 1/4-inch or 3/8-inch tube to the filter head. With a modern quarter-turn stop and a 3/8-inch outlet, you may be able to connect directly. A pull-out faucet with a braided hose is different; the filter may need a separate feed line instead of an inline faucet adapter. Whole-house systems usually call for unions, bypass valves, and a filter housing rated for the pipe size already in the home.
Force is not a fitting strategy. That’s the mistake. PTFE tape, also called plumber’s tape, belongs on the correct threaded joint, not as a cure for a mismatched part, and a plumbing pro can tell you whether a given joint should use tape, a gasket, or a compression seal. Compression fittings seal by the ferrule and nut, not by tape on the threads. Unsure? Stop and ask a plumber instead of muscling it together.
Copper and PEX usually make the filter easier to work into the system than old galvanized pipe. Galvanized lines can carry mineral scale and rust flakes, which clog cartridges quickly. In that case, I would want a sediment prefilter ahead of a finer carbon block, or I would expect frequent cartridge changes. A cartridge that is nominally rated for 6 months can foul much faster in dirty water.
Some installation styles barely depend on the house plumbing at all. Faucet filters, countertop filters, and refrigerator line filters are the least invasive. Their trade-off is obvious: they usually serve one outlet and may not suit pull-down faucets, sprayers, or nonstandard aerators. They fit a renter who wants no pipe cutting and no cabinet work. They do not fit a family that wants filtered water at the shower or laundry line.
When does a filter stop being the right answer?
A filter stops being the right answer when the plumbing problem is bigger than the filtration problem. That line matters. Miss it, and you spend money on the wrong setup while the water still acts up.
Active leaks at joints or valves: This means the plumbing needs repair before filtration — fix the leak first, then install the filter. A filter adds more fittings, which adds more leak points.
Old galvanized lines with visible rust flakes or severe pressure loss: This means the pipe may be restricted or deteriorating inside — plan for plumbing replacement or a coarse sediment strategy, not a fine filter alone.
Pressure below the filter’s minimum requirement: This means the unit may not function correctly — choose a lower-restriction system or address the pressure issue first.
No place to connect a drain for reverse osmosis or backwashing equipment: This means the chosen filter type does not fit the site — use a no-drain option, a faucet filter, or a different treatment method. If the drain or waste line is questionable, consult a plumber before buying.
Pull-down or specialty faucets with nonstandard hoses: This means faucet-mounted filters often will not attach cleanly — use an under-sink or countertop system instead.
You need to treat a verified safety issue in the water, but you have not identified the contaminant: This means guessing with a filter is risky — test the water through a lab or local water authority, then choose a certified system under NSF/ANSI 53, 58, or the relevant standard, ideally with guidance from a water professional.
These are not edge cases. They are where people burn the most time. A homeowner with a corroded 1950s branch line can spend $200 to $1,000 on a filter setup and still have weak flow because the real restriction is upstream. A renter with a pull-out faucet can buy a faucet mount that will not physically fit. In both situations, the right move is to change the approach, not force the hardware. Sometimes the pipe is the culprit, plain and simple.
What mistakes do people make with existing plumbing?
They usually make the same five mistakes, and each one carries a clear cost.
-
Buying by contamination label alone. The cost is a filter that removes the wrong thing or restricts flow too much. The fix is to match the standard and the plumbing, not just the marketing claim.
-
Ignoring pipe size and thread type. The cost is extra adapters, leaks, or a return. The fix is to identify the actual fitting before ordering.
-
Skipping pressure checks. The cost is weak flow, noisy operation, or a reverse osmosis system that produces water painfully slowly. The fix is to check psi first.
-
Using the wrong installation point. The cost is a faucet filter on a pull-out sprayer or a whole-house unit where only one tap needs treatment. The fix is to choose point-of-use or point-of-entry based on use.
-
Not planning cartridge changes. The cost is a system that works for a month and then clogs. The fix is to leave cabinet space and a service path, ideally with enough room for a 10-inch or 20-inch housing if that is the format.
-
Assuming the first adapter you find is acceptable. The cost is cross-threading or an insecure seal. The fix is to match compression to compression, NPT to NPT, and only adapt when the part is designed for it.
If I had to boil all of that down, it would be this: a water filter should fit the plumbing without turning the home into a plumbing project. Otherwise, you may be looking at pipe replacement, rerouting, or repeated workarounds — and that is the wrong system.
What counts as a good result after installation?
A good result is steady flow, dry fittings, and the right water at the right fixture. During the first 24 hours, I would check every joint with a dry paper towel and look for seepage, not just dripping. Then I would run the water long enough to flush air and loose carbon fines, which some new cartridges release at first. With an under-sink filter, the flow should feel normal enough that you do not avoid using it. With a whole-house filter, showers, laundry, and taps should still act like a house with ordinary plumbing.
A good result also means the filter is easy to service. If replacing a cartridge takes 20 minutes, a towel, and a basin, that is reasonable, especially if the manufacturer’s instructions say the first cartridge change is due after 6 months or 12 months, depending on the model and water quality.
Leave a Reply